Введение
The Random-Access Memory (RAM) is crucial to the speed and functionality of any laptop. If your laptop constantly freezes, reboots, or displays the Blue Screen of Death (BSOD), use this guide to help you replace or increase the RAM in your device.
Выберете то, что вам нужно
-
-
Flip the laptop so the back panel is facing up.
-
Remove the ten 10 mm Phillips #1 screws securing the back panel.
-
-
-
-
Carefully insert a plastic opening tool under one corner of the back panel.
-
Slide the tool along the seam to gently pry the panel up and away from the device.
-
-
-
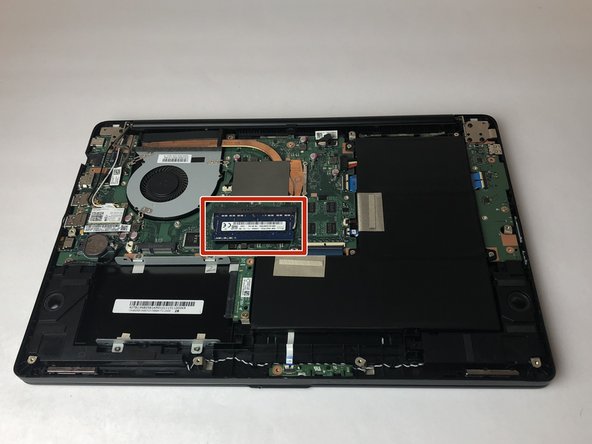
The RAM is the rectangular plate in the center.
-
Use a spudger to press the clips securing the RAM outward. The RAM will pop up enabling you to lift it out.
-
To reassemble your device, follow these instructions in reverse order.
To reassemble your device, follow these instructions in reverse order.
Отменить: Я не выполнил это руководство.
Еще один человек закончил это руководство.


