Введение
In this guide you will learn how to remove and replace the Asus Q505UA-BI5T7's speakers for this device. This is a simple process with a minimal amount of tools needed. The replacement of this part should take around only 10 minutes to complete. Please read the troubleshooting page before deciding to remove the speakers.
Выберете то, что вам нужно
-
-
Flip the device over so that the back cover is facing you.
-
Remove the two 10 mm Philips #1 screws from the top two corners of the back cover of the laptop.
-
Remove the remaining eight 8 mm Philips #1 screws remaining in the back cover of the laptop.
-
-
-
Use the plastic opening tool to gently pry the back cover of the laptop up. Slide the tool slowly along the edges of the back cover to pop it out of the clips holding the cover in place.
-
-
-
-
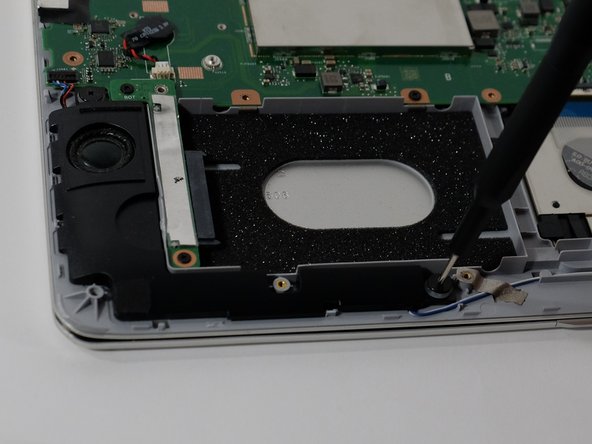
These are the two device speakers. Locate the right speaker by the battery, and continue to the next step.
-
-
-
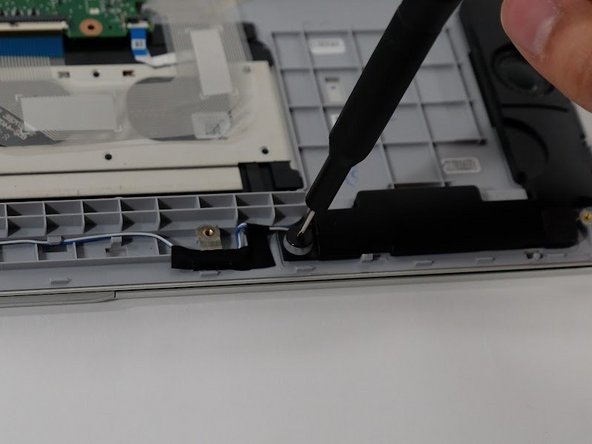
After locating the right speaker, use a Phillips #1 screwdriver to remove both 5 mm screws from either side of the speaker.
-
-
-
After locating the left speaker by the hard drive, use a Phillips #1 screwdriver to remove both 5 mm screws from either side of the speaker.
-
-
-
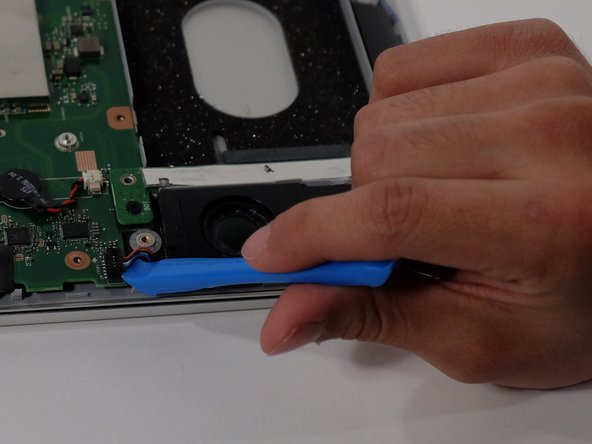
Using the blue ifixit Opening Tool, gently pry the connection panel from its place.
-
-
-
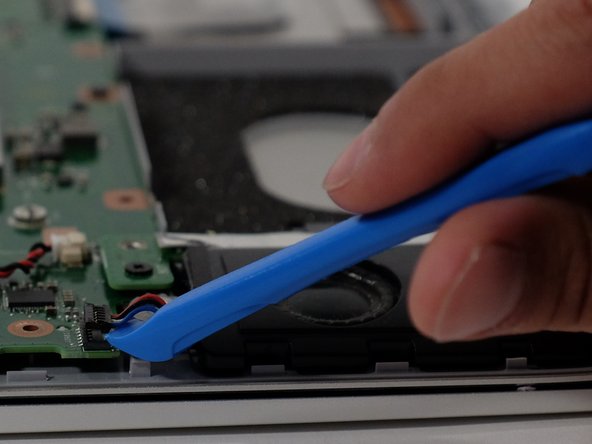
Gently remove the speakers, small attaching adhesive strips should pull out easily.
-


To reassemble your device, follow these instructions in reverse order.
To reassemble your device, follow these instructions in reverse order.

Команда

Linn Benton Community College, Team 1-2, Karnes Fall 2023 Участник Linn Benton Community College, Team 1-2, Karnes Fall 2023
LBCC-KARNES-F23S1G2
3 членов
Автор 3 руководств