Введение
This guide is for the replacement or upgrade of the RAM card.
Выберете то, что вам нужно
-
-
Flip the laptop over so that the back panel is facing up.
-
Carefully remove the eight 5.7mm screws on the back panel using a Phillips #1 screwdriver.
-
-
-
Turn the laptop upright and flip the screen open.
-
Using the plastic opening tool, gently pry the keyboard panel off of the base.
-
-
-
Gently raise the keyboard from the base enough to access the underside.
-
Gently pull up on the locking tab to release the ribbon cable. This should take no force to complete.
-
Remove the keyboard.
-
-
-
-
Remove the three 5.7 mm screws from the CD drive mounting points. Use a Phillips #1 screwdriver to remove the screws.
-
-
-
Locate the hard drive in the lower right hand corner in the computer. This device did not have a hard drive so a piece of cardboard was used as a substitute.
-
Remove the two 5.7 mm screws from the base. Use a Phillips #1 screwdriver to remove the screws. Lift up to remove the hard drive.
-
-
-
Remove all fourteen 4.3 mm screws from the motherboard. Use a Phillips #1 screwdriver to remove the screws.
-
-
-
Unplug the three connections from the top of the motherboard.
-
Lift up at an angle to remove the motherboard from the computer. Take caution when lifting the areas where the USB ports are located. They are in small slots that exit the computer's main body. They will need to be slid through these slots to remove the motherboard.
-
-
-
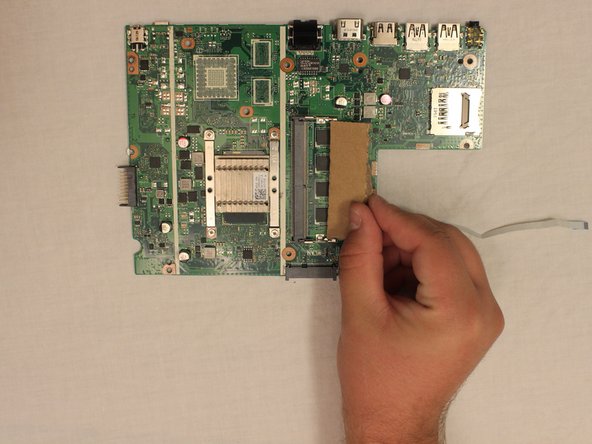
Locate the RAM slot on the underside of the motherboard. This device did not have a RAM card so a piece of cardboard was used as a substitute.
-
Replace the current card with the new RAM card.
-


To reassemble your device, follow these instructions in reverse order.
To reassemble your device, follow these instructions in reverse order.
Отменить: Я не выполнил это руководство.
2 участников успешно повторили данное руководство.
Команда

Western Carolina University, Team S1-G4, Virtue Fall 2018 Участник Western Carolina University, Team S1-G4, Virtue Fall 2018
WCU-VIRTUE-F18S1G4
4 членов
Автор 5 руководств