Введение
Experiencing audio troubles with your Asus ROG G55VW-DH71? Simply replace it by using this five step guide!
Great audio is a necessity for any computer user and your ROG G55VW-DH71 may be in need of an upgrade. Through this guide, your auditory needs and computer experience can be enhanced in only two minutes.
Выберете то, что вам нужно
-
-
Using the PH0 screw driver remove both 4.4 mm screws.
-
Using the PH0 screw driver remove the 6.4 mm screw.
-
-
-
-
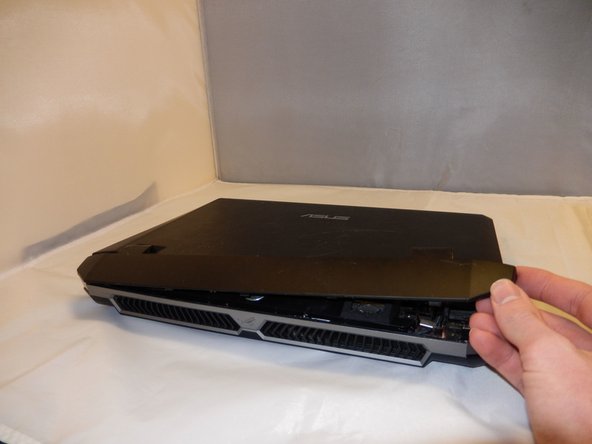
Using the iFixit opening tool, gently pry open the plate covering the spine of the device.
-
-
-
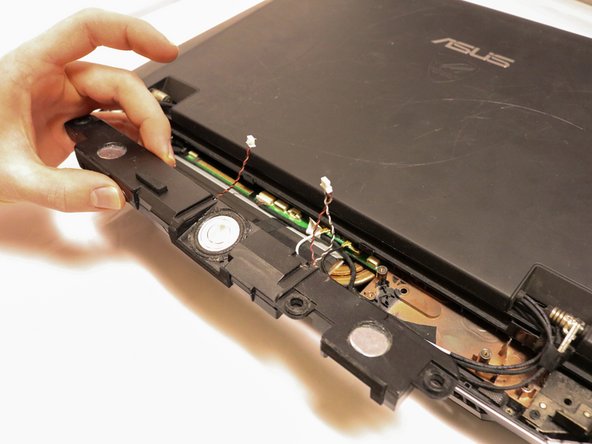
Using the PH 00 screwdriver, remove the three 10.6 mm screws holding the sound bar down.
-
-
-
Using the bent black tweezers, remove both wires connecting the sound bar to the motherboard.
-


To reassemble your device, follow these instructions in reverse order.
To reassemble your device, follow these instructions in reverse order.

Команда

Eastern Washington University, Team S1-G2, Crawford Winter 2019 Участник Eastern Washington University, Team S1-G2, Crawford Winter 2019
EWU-CRAWFORD-W19S1G2
4 членов
Автор 5 руководств
Один комментарий
Excellent tutorial. Thank you for your help.Excellent tutorial. Thank you for your help. I lost the back cover of my g55. I couldn't find a spare part here in Brazil.