Введение
It is important to power down the Asus ROG G751JL-BSI7T28 prior to starting the repair as well as unplug the A/C adapter. While this covers most of the concern with electrical components, there still may be connectors with power going through them. There is no risk for a personal shock however no metal should be near the laptop during the repair. Necklaces, bracelets, rings, etc could potentially short out components on the motherboard of the laptop making your problem bigger than when you started the repair!
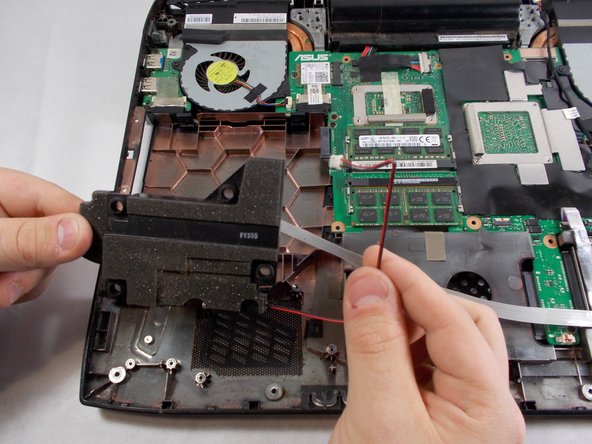
When replacing the speakers, it is important not to damage the drivers on the new speakers. This will severely distort the sound. It is also important to be careful with the pins that connect the speaker to the board. These long metal pins may bend and could be troublesome to straighten back out.
Выберете то, что вам нужно
-
-
With the laptop closed, turn it upside-down so the bottom is facing up toward you.
-
-
-
Place a spudger into the notch, and pry the small triangular piece away from the laptop.
-
Using a Phillips #00 screwdriver, remove the single 3 mm screw.
-
Place a spudger beneath the back panel and pry it away from the laptop.
-
-
-
Open the laptop and turn it so that the ASUS logo is facing you.
-
Gently lift up the display hinge housing shroud, but don’t pull it completely away yet.
-
Disconnect the RGB light power cable in the shroud, now the shroud can be put aside.
-
-
-
-
Remove the 5mm Phillips #00 screws.
-
Lift up the silver hinge brackets on each side of the laptop.
-
-
-
Remove the 5mm Phillips #00 screws from the hinges.
-
Detach the ribbon cable and remove the display assembly from the laptop.
-
-
-
Carefully lift the keyboard up, being careful to not damage the fragile ribbon connectors.
-
Use an opening tool to detach the ribbon cables connecting the keyboard to the rest of the laptop.
-
Remove the keyboard from the laptop.
-
-
-
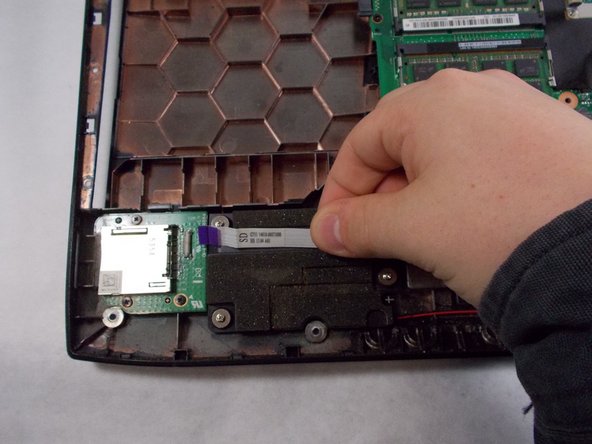
Flip the SD card reader's retaining arm up.
-
Remove the SD card reader's power/data ribbon cable.
-
-
-
Remove four 3mm Phillips #0 screws from the speaker.
-
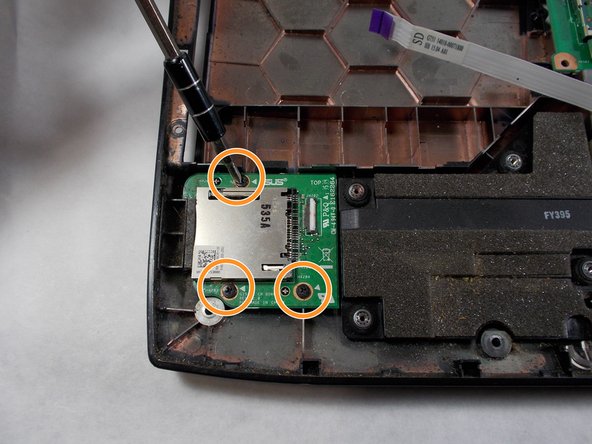
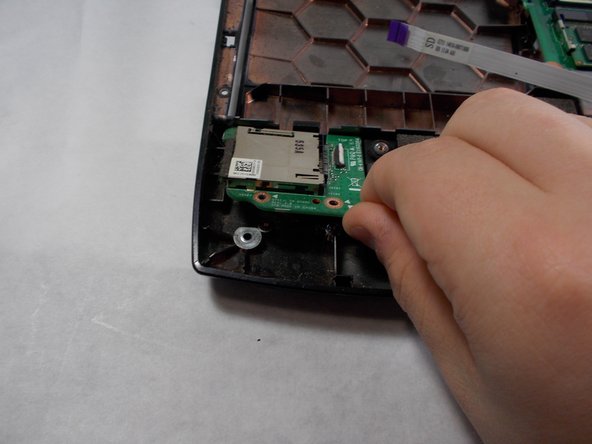
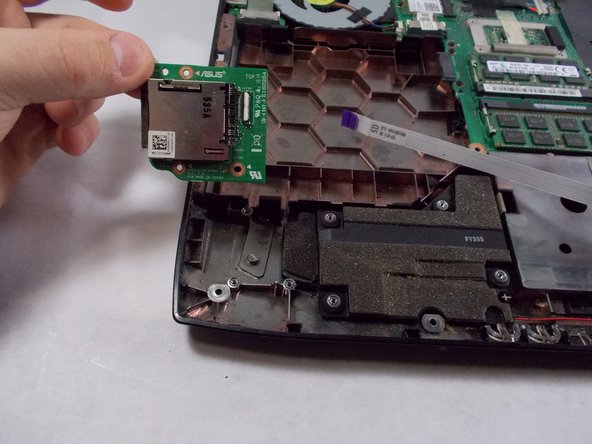
Remove three 3mm Phillips #0 screws from the SD card reader.
-


To reassemble your device, follow these instructions in reverse order.
To reassemble your device, follow these instructions in reverse order.

Команда

UMass Dartmouth, Team S1-G1, Barthe Fall 2019 Участник UMass Dartmouth, Team S1-G1, Barthe Fall 2019
UMASSD-BARTHE-F19S1G1
3 членов
Автор 4 руководств