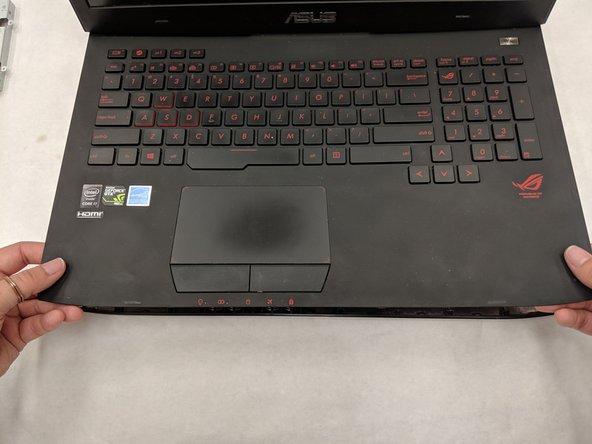
Перейти к основному содержанию

Asus ROG G751JL-DS71 Fan Replacement

Выберете то, что вам нужно

  1. Asus ROG G751JL-DS71 Fan Replacement, Fan: шаг 1, изображение 1 из 2 Asus ROG G751JL-DS71 Fan Replacement, Fan: шаг 1, изображение 2 из 2
    • Lift the rubber cover found on the bottom of the laptop.

    • Remove the 5.2 mm screw with a Phillips 1 Screwdriver.

  2. Asus ROG G751JL-DS71 Fan Replacement: шаг 2, изображение 1 из 3 Asus ROG G751JL-DS71 Fan Replacement: шаг 2, изображение 2 из 3 Asus ROG G751JL-DS71 Fan Replacement: шаг 2, изображение 3 из 3
    • Use the standard spudger to remove the back center panel.

  3. Asus ROG G751JL-DS71 Fan Replacement: шаг 3, изображение 1 из 3 Asus ROG G751JL-DS71 Fan Replacement: шаг 3, изображение 2 из 3 Asus ROG G751JL-DS71 Fan Replacement: шаг 3, изображение 3 из 3
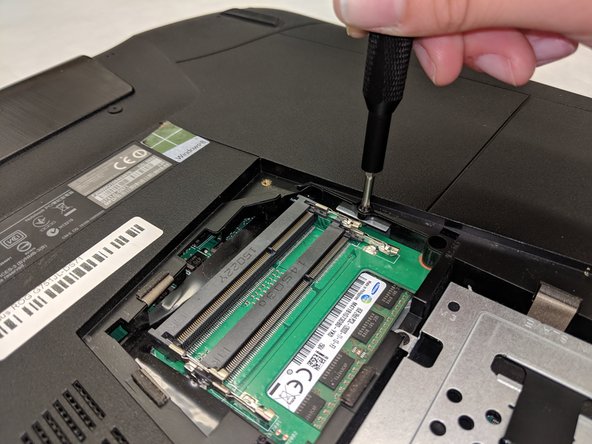
    • Use a Phillips 1 Screwdriver to remove the 5 mm screw that is located underneath the back panel.

  4. Asus ROG G751JL-DS71 Fan Replacement: шаг 4, изображение 1 из 2 Asus ROG G751JL-DS71 Fan Replacement: шаг 4, изображение 2 из 2
    • Pull out the optical drive found on the side of the laptop.

  5. Asus ROG G751JL-DS71 Fan Replacement: шаг 5, изображение 1 из 3 Asus ROG G751JL-DS71 Fan Replacement: шаг 5, изображение 2 из 3 Asus ROG G751JL-DS71 Fan Replacement: шаг 5, изображение 3 из 3
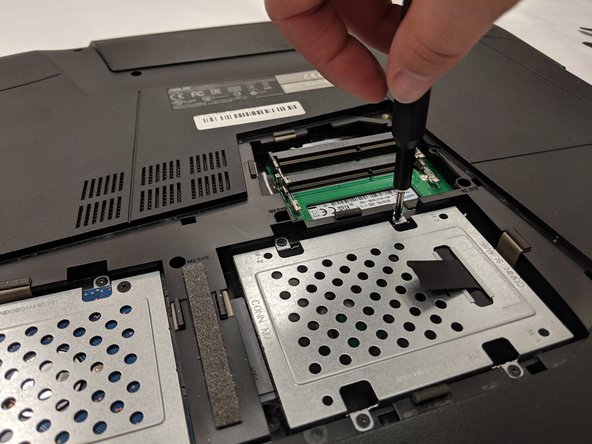
    • Remove the screws holding the hard drives in place using a phillips #1 screwdriver.

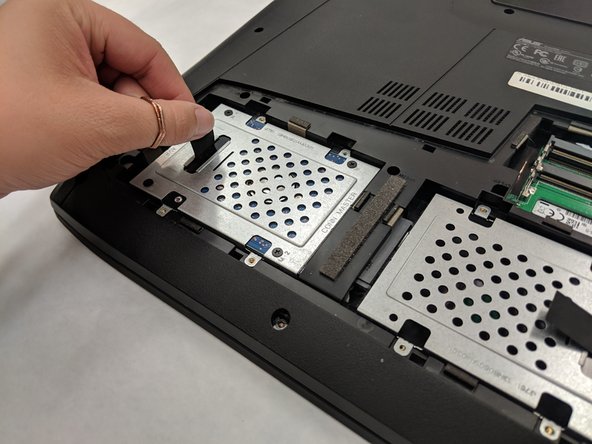
    • Using the small flaps, remove the hard drives by hand.

  6. Asus ROG G751JL-DS71 Fan Replacement: шаг 6, изображение 1 из 2 Asus ROG G751JL-DS71 Fan Replacement: шаг 6, изображение 2 из 2
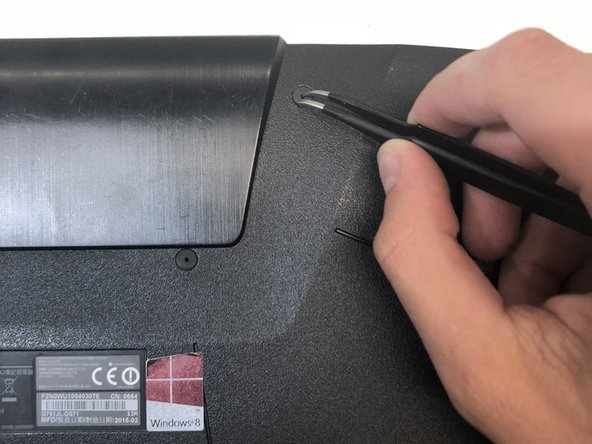
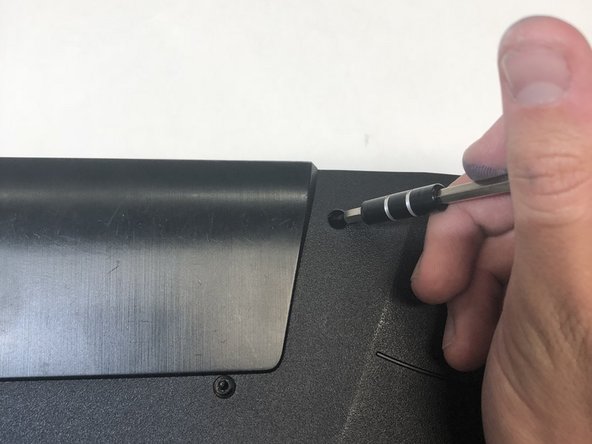
    • Use a pair of tweezers to remove the top four rubber stoppers found on the bottom of the laptop.

  7. Asus ROG G751JL-DS71 Fan Replacement: шаг 7, изображение 1 из 2 Asus ROG G751JL-DS71 Fan Replacement: шаг 7, изображение 2 из 2
    • Use a Phillips 1 Screwdriver to remove the top four 8.5 mm screws.

  8. Asus ROG G751JL-DS71 Fan Replacement: шаг 8, изображение 1 из 3 Asus ROG G751JL-DS71 Fan Replacement: шаг 8, изображение 2 из 3 Asus ROG G751JL-DS71 Fan Replacement: шаг 8, изображение 3 из 3
    • Use a metal spudger to carefully pry the top back panel off.

    • While removing the top back panel, be careful not to break the four pin connector located underneath.

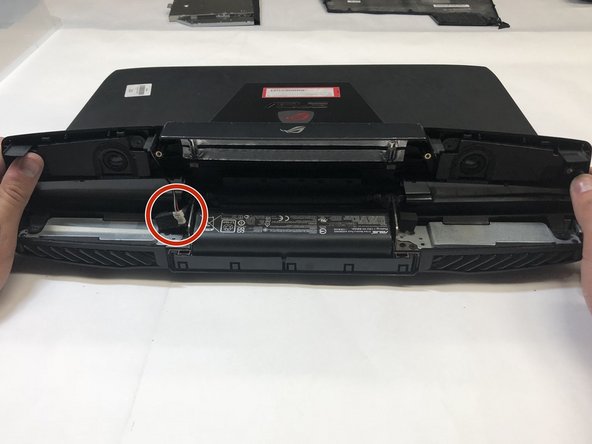
    • Disconnect the four-pin connector and remove the top back panel from the computer.

  9. Asus ROG G751JL-DS71 Fan Replacement: шаг 9, изображение 1 из 1
    • Use a Phillips 1 Screwdriver to remove the four 6.8 mm screws underneath the back panel.

  10. Asus ROG G751JL-DS71 Fan Replacement: шаг 10, изображение 1 из 1
    • Use a Phillips 1 Screwdriver to remove the ten 5.2 mm screws holding the main panel in place.

  11. Asus ROG G751JL-DS71 Fan Replacement: шаг 11, изображение 1 из 3 Asus ROG G751JL-DS71 Fan Replacement: шаг 11, изображение 2 из 3 Asus ROG G751JL-DS71 Fan Replacement: шаг 11, изображение 3 из 3
    • Use a metal opening tool to pry the keyboard from the base of the laptop.

    • Lift the keyboard carefully so as to not tear or break the four ribbon connectors underneath the keyboard.

  12. Asus ROG G751JL-DS71 Fan Replacement: шаг 12, изображение 1 из 2 Asus ROG G751JL-DS71 Fan Replacement: шаг 12, изображение 2 из 2
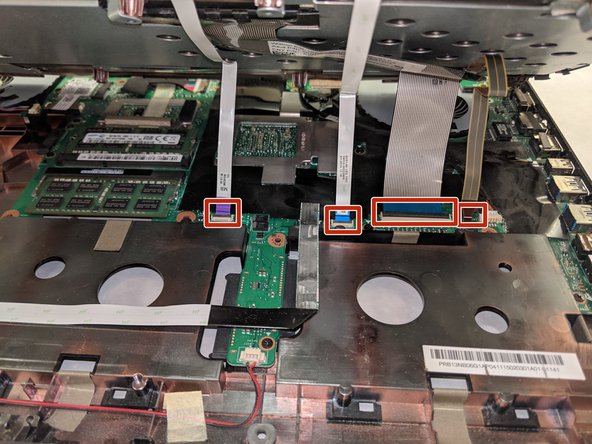
    • Use a pair of tweezers to undo each of the four ribbon connectors.

    • The keyboard is now completely disconnected from the laptop and you can remove it.

  13. Asus ROG G751JL-DS71 Fan Replacement: шаг 13, изображение 1 из 3 Asus ROG G751JL-DS71 Fan Replacement: шаг 13, изображение 2 из 3 Asus ROG G751JL-DS71 Fan Replacement: шаг 13, изображение 3 из 3
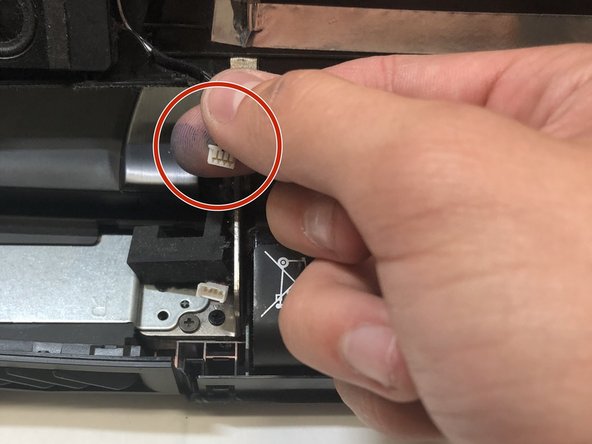
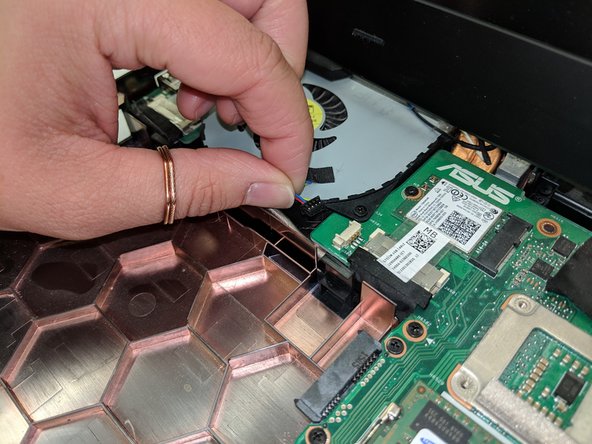
    • Disconnect the four-pin connectors from each fan and remove them

    • The fans are now completely disconnected from the laptop and you can remove them

Заключение

To reassemble your device, follow these instructions in reverse order.

Еще один человек закончил это руководство.

Ashley Twigg

Участник с: 04/01/19

237 Репутация

1 руководство автора

Команда

IUPUI, Team S8-G8, Wilson Spring 2019 Участник IUPUI, Team S8-G8, Wilson Spring 2019

IUPUI-WILSON-S19S8G8

4 членов

Автор 3 руководств

Один комментарий

i was wondering if i can swap the bottom case of g751jl with bottom case of g751jy? thanks a ton

Avkash - Ответить

Добавить комментарий

Просмотр статистики:

За последние 24часов: 0

За последние 7 дней: 0

За последние 30 дней: 4

За всё время: 969