Перейти к основному содержанию

Asus ROG ZX50VW-BH17N10 Motherboard Replacement

Выберете то, что вам нужно

  1. Asus ROG ZX50VW-BH17N10 Motherboard Replacement, Motherboard: шаг 1, изображение 1 из 1
    • Remove the 1.6 mm and 9 mm screws from the back panel using the Phillips #1 screwdriver.

  2. Asus ROG ZX50VW-BH17N10 Motherboard Replacement: шаг 2, изображение 1 из 3 Asus ROG ZX50VW-BH17N10 Motherboard Replacement: шаг 2, изображение 2 из 3 Asus ROG ZX50VW-BH17N10 Motherboard Replacement: шаг 2, изображение 3 из 3
    • Use the metal spudger to pry the back panel off.

  3. Asus ROG ZX50VW-BH17N10 Motherboard Replacement: шаг 3, изображение 1 из 1
    • The following screws will be removed using the Phillips #1 screwdriver.

    • Remove the four 9 mm screws from the hard drive and use the black pull tab to remove it.

    • Remove the five 1.6 mm screws and three 9 mm screws from perimeter of the laptop's base.

    • Remove the 9 mm screw next to the RAM.

    • Flip the computer right-side up .

    • Caution when flipping the computer. Components may shift around and the hard drive will fall out if not removed prior to flipping.

  4. Asus ROG ZX50VW-BH17N10 Motherboard Replacement: шаг 4, изображение 1 из 3 Asus ROG ZX50VW-BH17N10 Motherboard Replacement: шаг 4, изображение 2 из 3 Asus ROG ZX50VW-BH17N10 Motherboard Replacement: шаг 4, изображение 3 из 3
    • Gently pry the keyboard off being careful not to tug at any of the inner ribbons.

    • Using the metal spudger may severely damage the internal components of your device. The ribbons are very fragile and can be severed easily.

    • Detach the three ribbons connecting the motherboard and the keyboard. Do this by flipping up the white latch and pulling the ribbon out. There should be one latch per ribbon.

  5. Asus ROG ZX50VW-BH17N10 Motherboard Replacement: шаг 5, изображение 1 из 1
    • Gently remove the the keyboard.

    • There should be nothing attached to the keyboard at this point.

  6. Asus ROG ZX50VW-BH17N10 Motherboard Replacement: шаг 6, изображение 1 из 3 Asus ROG ZX50VW-BH17N10 Motherboard Replacement: шаг 6, изображение 2 из 3 Asus ROG ZX50VW-BH17N10 Motherboard Replacement: шаг 6, изображение 3 из 3
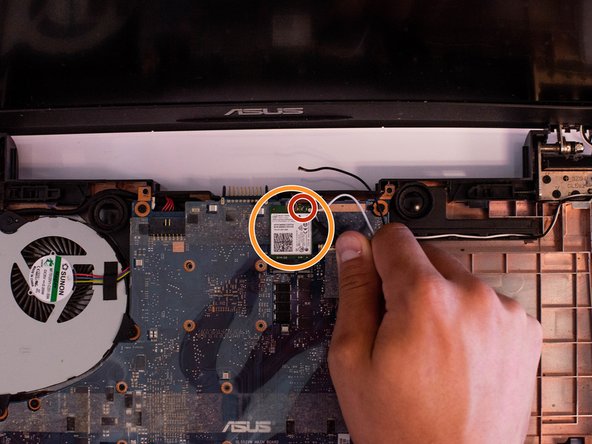
    • Unscrew the two 9 mm screws and the single 3 mm screw from the motherboard using the Phillips #1 screwdriver.

  7. Asus ROG ZX50VW-BH17N10 Motherboard Replacement: шаг 7, изображение 1 из 3 Asus ROG ZX50VW-BH17N10 Motherboard Replacement: шаг 7, изображение 2 из 3 Asus ROG ZX50VW-BH17N10 Motherboard Replacement: шаг 7, изображение 3 из 3
    Инструмент, используемый на этом этапе:
    Tweezers
    $4.99
    Купить
    • Detach the black and white plugs from the motherboard.

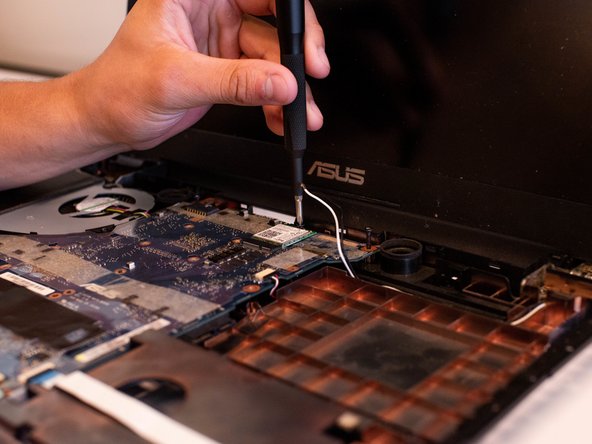
    • Remove the wireless AC chip from the motherboard using the tweezers.

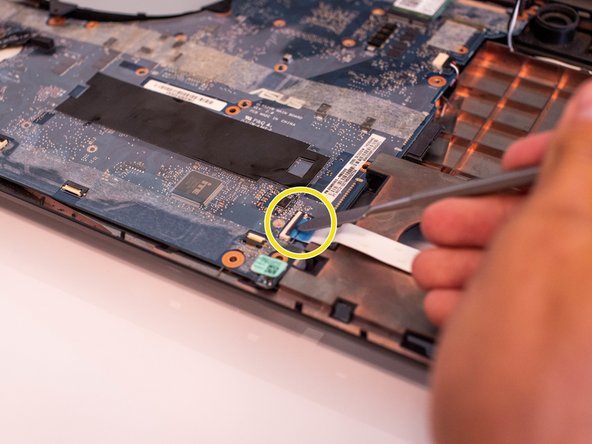
    • Detach the last ribbon from the motherboard.

  8. Asus ROG ZX50VW-BH17N10 Motherboard Replacement: шаг 8, изображение 1 из 1
    • Remove the three 7 mm screws attached to the fan using the Phillips #1 screwdriver.

  9. Asus ROG ZX50VW-BH17N10 Motherboard Replacement: шаг 9, изображение 1 из 1
    • Take hold of the right side of the mother board and lift upwards.

    • At the same time, hold the fan in place as the motherboard is lifted upward.

    • Be sure that no other ribbons or wires are attached to the motherboard at this point.

  10. Asus ROG ZX50VW-BH17N10 Motherboard Replacement: шаг 10, изображение 1 из 3 Asus ROG ZX50VW-BH17N10 Motherboard Replacement: шаг 10, изображение 2 из 3 Asus ROG ZX50VW-BH17N10 Motherboard Replacement: шаг 10, изображение 3 из 3
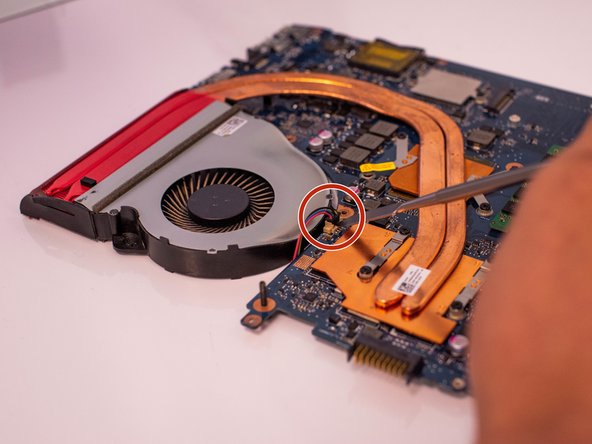
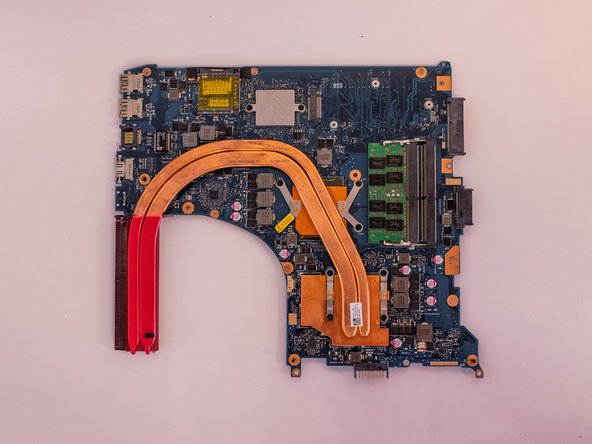
    • Carefully flip the motherboard over and place it down flat.

    • Detach the plug from the motherboard and remove the fan.

Заключение

To reassemble your device, follow these instructions in reverse order.

Naomi Rodriguez

Участник с: 09/17/19

747 Репутация

Автор 5 руководств

Команда

0 Комментариев

Добавить комментарий

Просмотр статистики:

За последние 24часов: 0

За последние 7 дней: 6

За последние 30 дней: 17

За всё время: 443