Введение
Use this guide to replace the Wi-Fi card in your Asus V6800V laptop.
A Wi-Fi card is a module that can receive or send data via Wi-Fi. It can be used to connect to the internet, a wireless router, or a smart device. It can be installed internally or externally on a PC, depending on the type and compatibility.
Before using the guide, try connecting to a network on a different frequency band. Many consumer Wi-Fi routers broadcast at two different network frequency bands: 2.4 GHz and 5 GHz. These will appear as separate networks in the list of available Wi-Fi networks. If your list of available Wi-Fi networks includes both a 2.4 GHz network and a 5 GHz network, try connecting to the other network. Also, try running network troubleshooting.
If the Wi-Fi in your laptop still isn’t able to connect to Wi-Fi networks, you need to replace it to let that happen. To do that you need to remove the charger and battery from the computer before beginning. For removing the battery, follow this guide.
Выберете то, что вам нужно
-
-
Place the computer upside down.
-
Using your thumbs, slide both latches away from each other (towards the outside).
-
Push the battery out with your fingers.
-
-
-
Remove the six screws highlighted on the picture.
-
Once the screws are removed, pry open the panel with the pry tool.
-
It should now look like this.
-
-
-
-
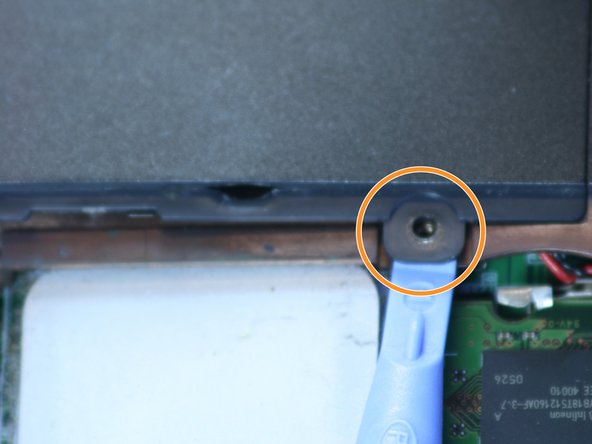
After removing that panel, locate the screw on the right as highlighted.
-
Remove that screw.
-
Pry open the side panel with the small prying tool as shown.
-
That panel should pop off and the wireless card will now be easily visible.
-
-
-
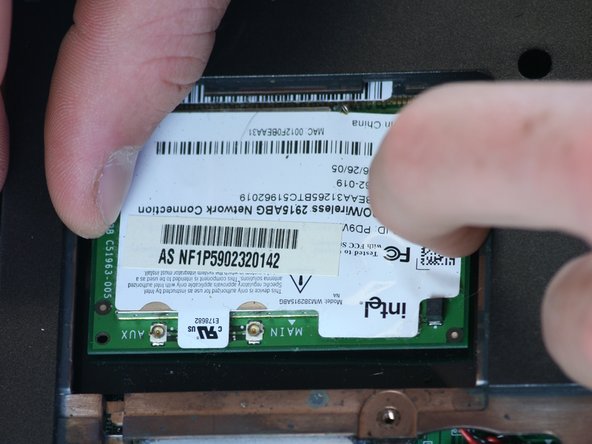
Place the small prying tool underneath the gold connector and gently apply pressure straight up until it pops off.
-
Repeat for the other one.
-
Place the gold connectors aside.
-
-
-
Locate the tabs that are holding the wireless card in place. These are highlighted in picture.
-
Place one finger on each tab and press each to the side away from the wireless card as shown.
-
The wireless card should pop up as shown. Pull up more with fingers to get more clearance.
-
-
-
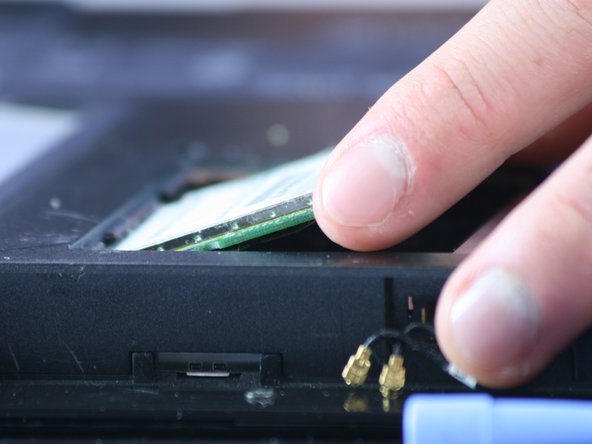
To remove the wireless card, pull the card directly out.
-
It should come out with just a little bit of pressure.
-
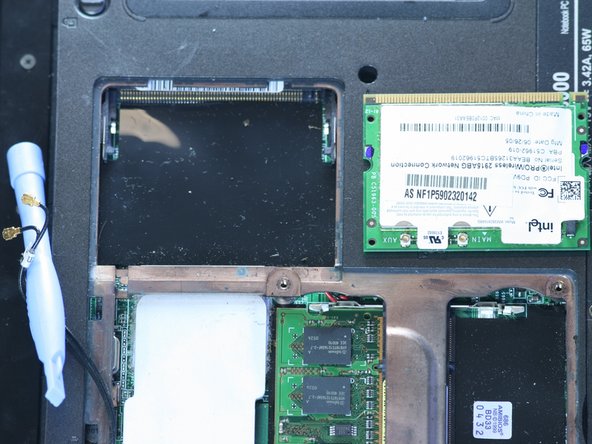
It should look as shown when removed.
-


To reassemble your device, follow these instructions in reverse order.
To reassemble your device, follow these instructions in reverse order.
Команда

Cal Poly, Team 2-9, Johann Summer 2010 Участник Cal Poly, Team 2-9, Johann Summer 2010
CPSU-JOHANN-R10S2G9
5 членов
Автор 10 руководств