Перейти к основному содержанию

Asus VivoBook 14" F412DA Battery Replacement

Выберете то, что вам нужно

  1. Asus VivoBook 14" F412DA Battery Replacement, Remove the screws: шаг 1, изображение 1 из 1
    Инструмент, используемый на этом этапе:
    Anti-Static Wrist Strap
    $7.95
    Купить
    • Start by removing the marked screws

    • Remove the four 6mm screws

    • Remove the two 8mm screws

    • Remove the four 9mm screws

    • These screws are different lengths, remember which order you removed them. Putting the wrong size screw in the wrong hole can cause damage.

    • The center screw is covered by a sticker that must be removed.

    • It is recommended to wear an anti-static wrist strap for this procedure.

    • Charged Lithium-ion batteries can explode if damaged or punctured, reduce the risk of an explosion by discharging your battery completely before removing.

  2. Asus VivoBook 14" F412DA Battery Replacement, Remove the bottom: шаг 2, изображение 1 из 3 Asus VivoBook 14" F412DA Battery Replacement, Remove the bottom: шаг 2, изображение 2 из 3 Asus VivoBook 14" F412DA Battery Replacement, Remove the bottom: шаг 2, изображение 3 из 3
    • Using a opening tool, pry and lift at the edge of the bottom until you feel it open.

  3. Asus VivoBook 14" F412DA Battery Replacement, Release battery connector: шаг 3, изображение 1 из 3 Asus VivoBook 14" F412DA Battery Replacement, Release battery connector: шаг 3, изображение 2 из 3 Asus VivoBook 14" F412DA Battery Replacement, Release battery connector: шаг 3, изображение 3 из 3
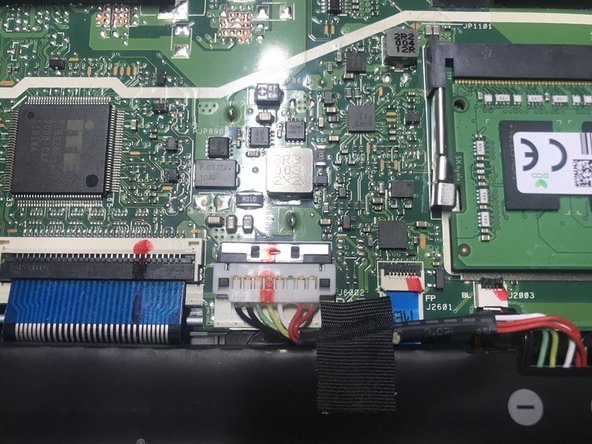
    • Using a fingernail or spudger move back the retaining clip holding the battery connector in place.

    • Be gentle releasing the connector, it's very fragile.

  4. Asus VivoBook 14" F412DA Battery Replacement, Disconnect the battery: шаг 4, изображение 1 из 3 Asus VivoBook 14" F412DA Battery Replacement, Disconnect the battery: шаг 4, изображение 2 из 3 Asus VivoBook 14" F412DA Battery Replacement, Disconnect the battery: шаг 4, изображение 3 из 3
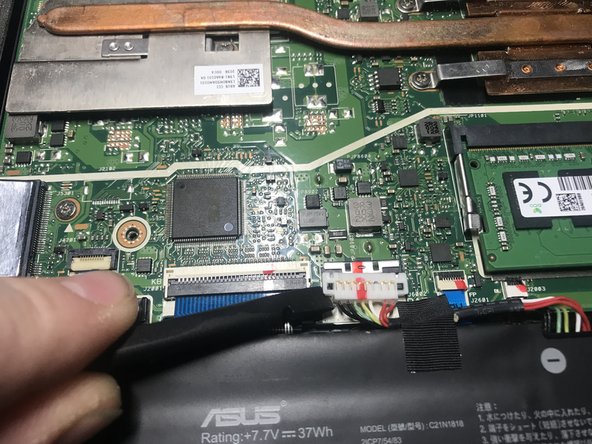
    • Put a spudger under the battery connector and twist, the connector should lift off.

    • Caution: Use a plastic tool, to avoid risk of puncturing the battery. A punctured battery may leak dangerous chemicals or catch fire.

  5. Asus VivoBook 14" F412DA Battery Replacement, Unscrew the battery: шаг 5, изображение 1 из 1
    • Remove the two 5mm screws.

    • Remove the 4mm screw.

    • These screws are different lengths so take extra care to track where each one come from.

  6. Asus VivoBook 14" F412DA Battery Replacement, Remove the battery: шаг 6, изображение 1 из 1
    • Carefully lift the old battery out of the computer.

    • The battery should be easy to remove. If the battery does not come out easily, double check that all screws are removed.

Заключение

To reassemble your device, insert the new battery and follow these instructions in reverse order.

3 участников успешно повторили данное руководство.

Jonathan D Banwart

Участник с: 04/19/21

592 Репутация

Автор 2 руководств

Один комментарий

Can I get a link of the RAM 🙏

Mrs burrito - Ответить

Добавить комментарий

Просмотр статистики:

За последние 24часов: 14

За последние 7 дней: 110

За последние 30 дней: 562

За всё время: 8,402