Перейти к основному содержанию

Asus VivoTab RT TF600T LCD Screen Replacement

Выберете то, что вам нужно

  1. Asus VivoTab RT TF600T LCD Screen  Replacement, LCD Screen: шаг 1, изображение 1 из 3 Asus VivoTab RT TF600T LCD Screen  Replacement, LCD Screen: шаг 1, изображение 2 из 3 Asus VivoTab RT TF600T LCD Screen  Replacement, LCD Screen: шаг 1, изображение 3 из 3
    • Make sure the tablet is turned off.

    • Remove the tablet from the attached keyboard.

    • To remove the keyboard, simply depress the switch on the left side of the screen and pull the tablet portion off.

  2. Asus VivoTab RT TF600T LCD Screen  Replacement: шаг 2, изображение 1 из 3 Asus VivoTab RT TF600T LCD Screen  Replacement: шаг 2, изображение 2 из 3 Asus VivoTab RT TF600T LCD Screen  Replacement: шаг 2, изображение 3 из 3
    • Rotate the device 180°, and remove the two 1.59 mm screws at the bottom of the device.

    • Use the Phillips screwdriver size #000 to remove the two 1.59 mm screws.

  3. Asus VivoTab RT TF600T LCD Screen  Replacement: шаг 3, изображение 1 из 2 Asus VivoTab RT TF600T LCD Screen  Replacement: шаг 3, изображение 2 из 2
    • Use the plastic opening tool to help detach the screen from the back panel.

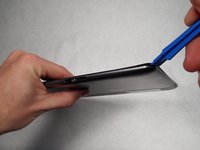
    • Insert the plastic opening tool into the bottom right corner and gently start to pry off the screen.

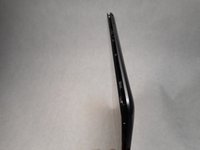
    • Once the screen begins to separate from the body of the device, start working the tool around the outer edges until the entire screen becomes detached.

  4. Asus VivoTab RT TF600T LCD Screen  Replacement: шаг 4, изображение 1 из 2 Asus VivoTab RT TF600T LCD Screen  Replacement: шаг 4, изображение 2 из 2
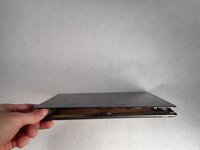
    • Now that the screen is completely detached, lay the back panel flat on a smooth surface.

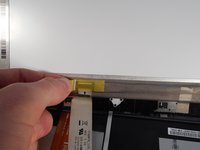
    • Lift the screen to view the inside of the tablet.

  5. Asus VivoTab RT TF600T LCD Screen  Replacement: шаг 5, изображение 1 из 2 Asus VivoTab RT TF600T LCD Screen  Replacement: шаг 5, изображение 2 из 2
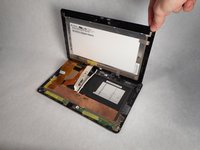
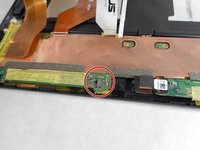
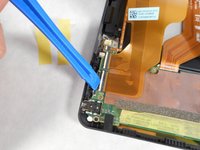
    • Before disconnecting the display cables, refer to the image to turn off the switch labeled DIP; this switch is used to de-energize the system.

    • The battery is connected to the motherboard. To avoid any short circuiting of the device, you must place the switch labeled DIP to OFF.

  6. Asus VivoTab RT TF600T LCD Screen  Replacement: шаг 6, изображение 1 из 3 Asus VivoTab RT TF600T LCD Screen  Replacement: шаг 6, изображение 2 из 3 Asus VivoTab RT TF600T LCD Screen  Replacement: шаг 6, изображение 3 из 3
    • Remove the yellow tape covering the end of the cables.

  7. Asus VivoTab RT TF600T LCD Screen  Replacement: шаг 7, изображение 1 из 2 Asus VivoTab RT TF600T LCD Screen  Replacement: шаг 7, изображение 2 из 2
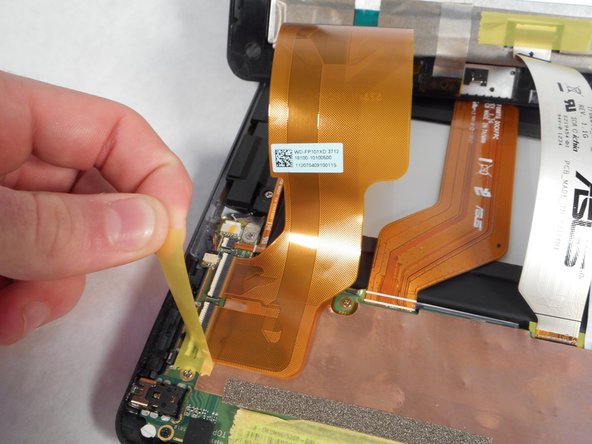
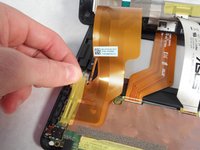
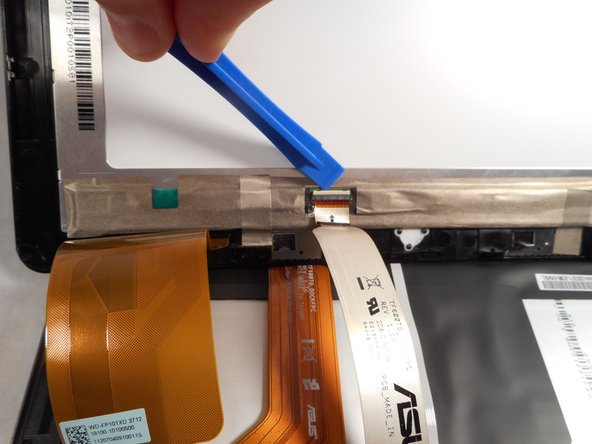
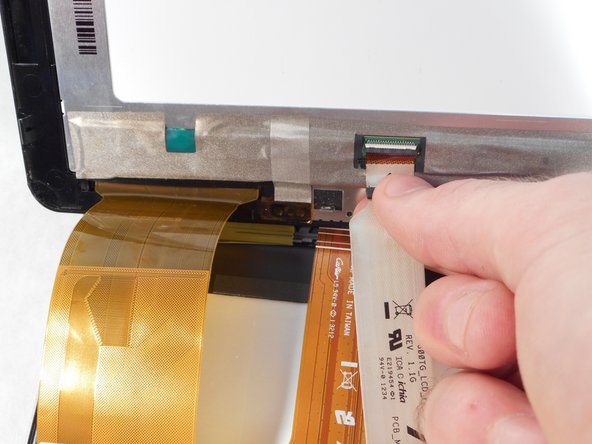
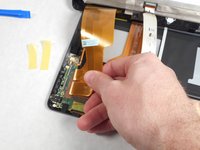
    • After lifting the yellow tape, you should be able to see a white strip. The white strip is actually a lever.

    • Use the plastic opening tool to push in the levers.

  8. Asus VivoTab RT TF600T LCD Screen  Replacement: шаг 8, изображение 1 из 3 Asus VivoTab RT TF600T LCD Screen  Replacement: шаг 8, изображение 2 из 3 Asus VivoTab RT TF600T LCD Screen  Replacement: шаг 8, изображение 3 из 3
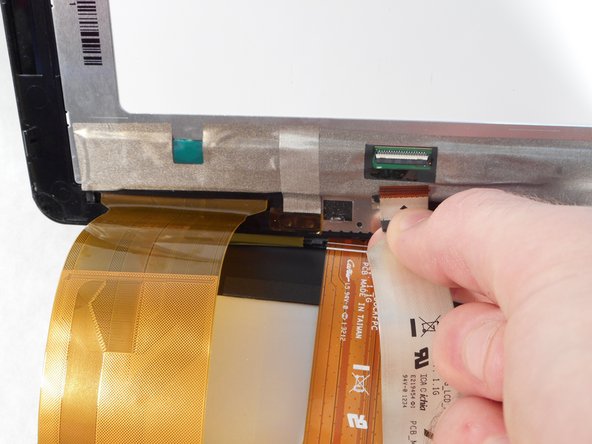
    • With all three white levers pushed in, gently pull on each display cable until the cable disconnects.

  9. Asus VivoTab RT TF600T LCD Screen  Replacement: шаг 9, изображение 1 из 1
    • Lift the screen upwards to remove.

Заключение

Congratulations! You have now successfully removed the screen from your device. To attach your new screen and reassemble your device follow these instructions in reverse order.

5 участников успешно повторили данное руководство.

Brittany

Участник с: 10/13/15

490 Репутация

Автор 2 руководств

Команда

Sam Houston State, Team 1-2, Blackburne Fall 2015 Участник Sam Houston State, Team 1-2, Blackburne Fall 2015

SHSU-BLACKBURNE-F15S1G2

3 членов

Автор 5 руководств

0 Комментариев

Добавить комментарий

Просмотр статистики:

За последние 24часов: 0

За последние 7 дней: 0

За последние 30 дней: 3

За всё время: 3,202