Перейти к основному содержанию

Asus Vivobook Q301LA-BHI5T02 Wifi card Replacement

Выберете то, что вам нужно

  1. Asus Vivobook Q301LA-BHI5T02 Wifi card Replacement, Back Cover: шаг 1, изображение 1 из 1
    • Make sure the computer is turned off.

    • Flip the device over so that the back cover is facing you.

  2. Asus Vivobook Q301LA-BHI5T02 Wifi card Replacement: шаг 2, изображение 1 из 2 Asus Vivobook Q301LA-BHI5T02 Wifi card Replacement: шаг 2, изображение 2 из 2
    • Remove the four 5mm Phillips #1 screws from the top of the laptop.

    • Remove the two 6mm Phillips #1 screws from the sides of the laptop.

    • Remove the four 2mm Phillips #1 screws from the bottom of the laptop.

  3. Asus Vivobook Q301LA-BHI5T02 Wifi card Replacement: шаг 3, изображение 1 из 3 Asus Vivobook Q301LA-BHI5T02 Wifi card Replacement: шаг 3, изображение 2 из 3 Asus Vivobook Q301LA-BHI5T02 Wifi card Replacement: шаг 3, изображение 3 из 3
    • Use a plastic opening tool to gently pry the bottom of the laptop up. Slowly slide it along the edges, twisting it every so often to pop the bottom of the laptop out of the clips holding it in place.

  4. Asus Vivobook Q301LA-BHI5T02 Wifi card Replacement: шаг 4, изображение 1 из 1
    • Lift off the cover and remove the back cover from the device.

  5. Asus Vivobook Q301LA-BHI5T02 Wifi card Replacement, Wifi card: шаг 5, изображение 1 из 3 Asus Vivobook Q301LA-BHI5T02 Wifi card Replacement, Wifi card: шаг 5, изображение 2 из 3 Asus Vivobook Q301LA-BHI5T02 Wifi card Replacement, Wifi card: шаг 5, изображение 3 из 3
    • Unplug the two small cords connected to the wifi card.

  6. Asus Vivobook Q301LA-BHI5T02 Wifi card Replacement: шаг 6, изображение 1 из 1
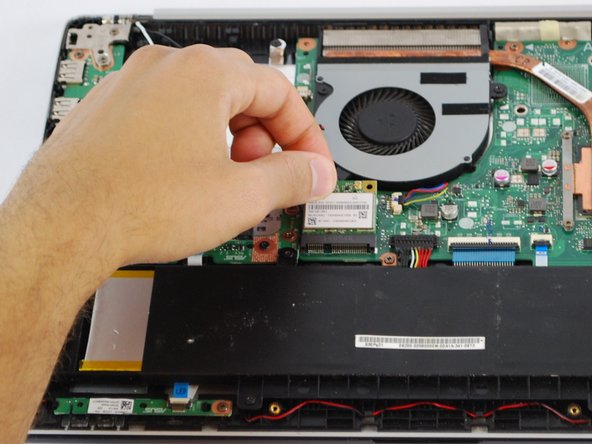
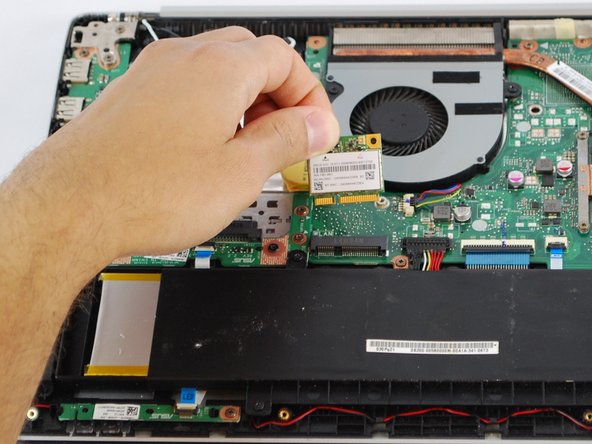
    • Using a Phillips #1 Screwdriver unscrew the 2 mm screw holding the wifi card in place.

  7. Asus Vivobook Q301LA-BHI5T02 Wifi card Replacement: шаг 7, изображение 1 из 3 Asus Vivobook Q301LA-BHI5T02 Wifi card Replacement: шаг 7, изображение 2 из 3 Asus Vivobook Q301LA-BHI5T02 Wifi card Replacement: шаг 7, изображение 3 из 3
    • Unplug the Wi-Fi card from the motherboard and remove it from the device.

Заключение

To reassemble your device, follow these instructions in reverse order.

Jorge Villarreal

Участник с: 10/02/17

397 Репутация

Автор 3 руководств

Команда

USF Tampa, Team S10-G3, Thompson Fall 2017 Участник USF Tampa, Team S10-G3, Thompson Fall 2017

USFT-THOMPSON-F17S10G3

4 членов

Автор 6 руководств

0 Комментариев

Добавить комментарий

Просмотр статистики:

За последние 24часов: 0

За последние 7 дней: 3

За последние 30 дней: 14

За всё время: 1,514