Введение
This guide will show you how to replace the front screen assembly of the Asus Zen AiO Pro Z240IC, which includes the camera and microphone. No technical knowledge is required. All you need is a #1 Phillips screwdriver and a plastic opening tool.
Выберете то, что вам нужно
-
-
Use the plastic opening tool to pry off the black plastic strip at the bottom of the screen by wiggling the tool between the strip and the screen.
-
Run the opening tool slowly along the base of the screen, peeling the black strip back, until the opposite end of the screen is reached.
-
-
-
Use a Phillips #1 screwdriver to remove the seven (7) 4.8 mm screws from the base of the screen.
-
-
-
-
Place the computer on its back, facing up.
-
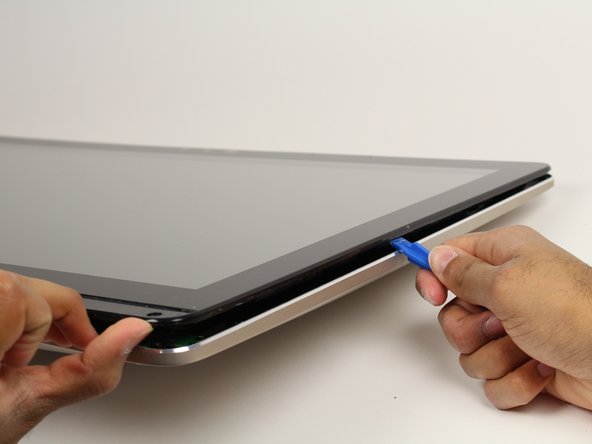
Wedge the plastic opening tool in between the screen and the bezel of the aluminum computer casing.
-
Move the tool along the entire edge of the screen with an up-and-down prying motion to loosen the screen from the casing. Do not lift the entire screen away from the computer yet.
-
-
-
Lift the screen from the bottom edge by about 6 inches. Prop it open with one hand.
-
Look inside the computer and locate five (5) cables that connect the embedded components of the screen (camera, microphone, etc.) to the rest of the computer.
-
-
-
Remove the two (2) cables that are connected to the computer by white, rectangular terminal blocks by pulling straight out on the plug.
-
-
-
Use a finger to lift the plastic locking flaps that hold the remaining three (3) ribbon cables in place.
-
Remove the cables from their terminals by slipping them away from their connectors.
-




To reassemble your device, follow these instructions in reverse order.
To reassemble your device, follow these instructions in reverse order.
Отменить: Я не выполнил это руководство.
Еще один человек закончил это руководство.



Команда

Cal Poly, Team S4-G1, Livingston Fall 2017 Участник Cal Poly, Team S4-G1, Livingston Fall 2017
CPSU-LIVINGSTON-F17S4G1
5 членов
Автор 25 руководств
2 Комментариев
In step 6 you are removing a ribbon cable with your fingernail. The same cable is damaged for me. Can you share the part number of this cable? I can see this a label is on this cable. I believe this is enabling the digitiser to work. I contacted Asus UK and they have no clue. Thanks
