Введение
This guide will show you how to replace the LCD and touch screen of your Asus Zenfone 3 Max (Model identification: ZC520TL). You may need this guide if your screen display is damaged or if your screen is cracked and you want to replace it with a new one. Before you begin, please note that the replacement of the back cover must be done with great care, as you can potentially damage other parts of the device.
Выберете то, что вам нужно
-
-
Locate the SIM card slot on the upper left side of your Asus Zenfone Max 3.
-
-
-
Use the iFixit 150mm Flex Extension with the Hex 0.7 bit or the SIM card eject tool.
-
Stick the tool into the hole on the SIM card slot and open the slot with it.
-
-
-
Using an iFixit opening tool, gently wedge the tool between the phone and the back casing.
-
Move the opening tool up and down to pry the back off of the device.
-
-
-
-
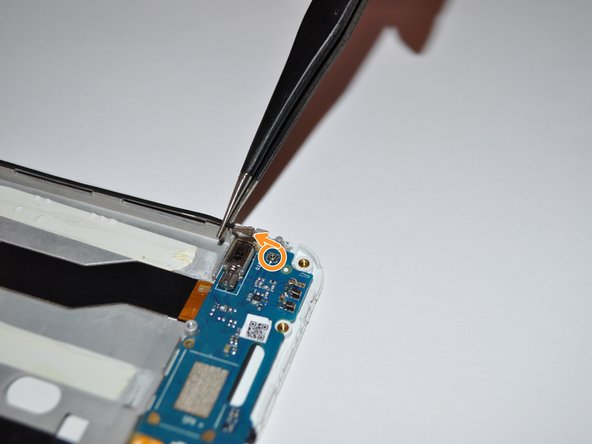
Gently disconnect the gold connection cable indicated by the red circle in the corresponding picture.
-
Pull back on the black adhesive tab that is adhered to the top of the battery. Tab removal is marked in the corresponding picture with a orange circle.
-
-
-
Next, remove the battery by gently pulling on the blue removal tab located at the bottom of the device battery.
-
Completely remove existing device battery.
-
-
-
Remove the four 2.5mm Phillips #0 screws at the bottom near the speaker and take the small black plastic cover off.
-
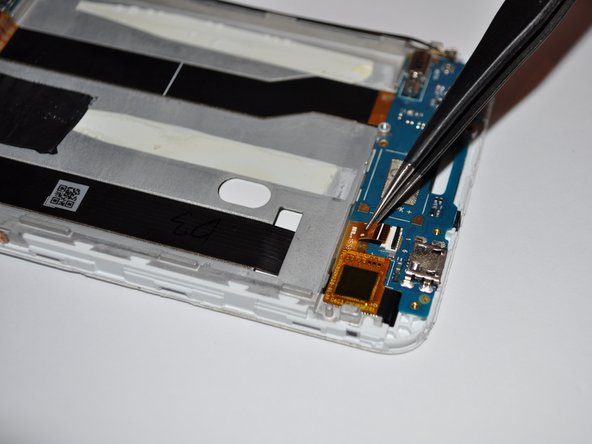
Starting at the bottom, disconnect the antenna (long black wire).
-
Disconnect the orange cable.
-
-
-
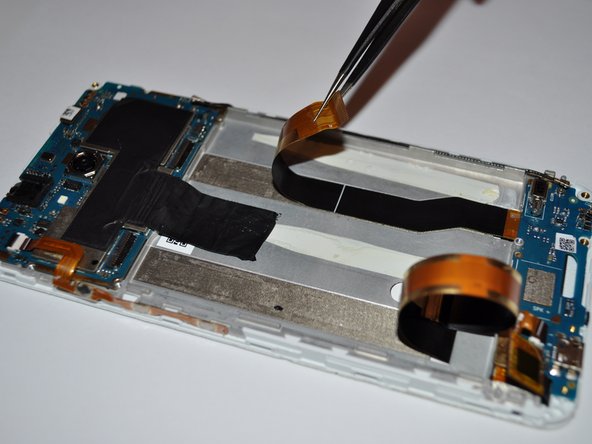
At the top of the phone, disconnect the black screen flex cable (the one that is rectangular) using a black nylon spudger. Peel it all the way back.
-
Using a black nylon spudger, disconnect the charging port flex cable (the other black cable) and microphone button. Peel it all the way back.
-
-
-
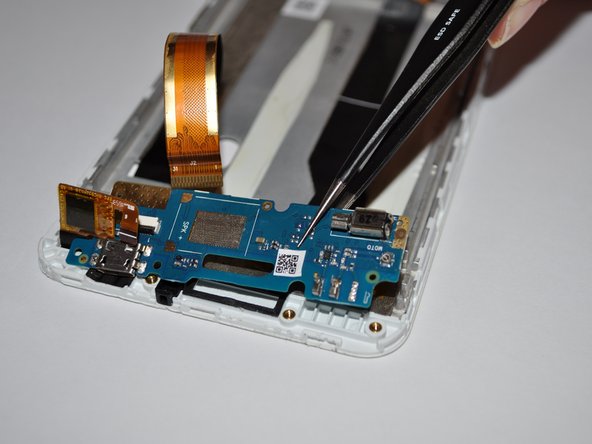
Remove the four 2.5mm Phillips #0 screws that hold the motherboard and remove the motherboard. Follow our motherboard replacement guide.
-
Remove the (blue) daughterboard. The charging port flex cable will come with it.
-
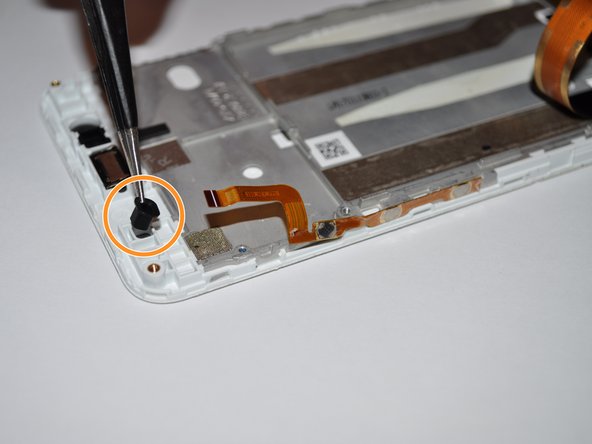
Move the rubber piece (denoted with orange circle) from the old port to your new LCD assembly.
-


To reassemble your device, follow these instructions in reverse order.
To reassemble your device, follow these instructions in reverse order.
Отменить: Я не выполнил это руководство.
Еще один человек закончил это руководство.
Команда

University of Alabama, Team S1-G3, Bedsole Fall 2019 Участник University of Alabama, Team S1-G3, Bedsole Fall 2019
UA-BEDSOLE-F19S1G3
4 членов
Автор 10 руководств
Один комментарий
The indicated part is the battery. I guess that’s an error copied from the Battery Replacement guide. Any recomendations for getting the screen replacement?