Введение
If your phone fails to charge, it could be due to a malfunctioning charging port. A charging port can be easily damaged by water, corrosion, and debris. This guide will help you replace your damaged charging port
Выберете то, что вам нужно
-
-
Using a removable head screwdriver and a T3 bit, begin by removing the two screws located on either side of the charging port.
-
-
-
Gently wedge the opening tool between the phone and the back casing.
-
Move the opening tool up and down to pry the back off of the device.
-
-
-
Once the back has been removed, you will need to unscrew the four screws on the bottom panel with an AT3 bit.
-
-
-
-
Wedge an opening tool between the battery and phone.
-
Gently pry the battery out of the device.
-
-
-
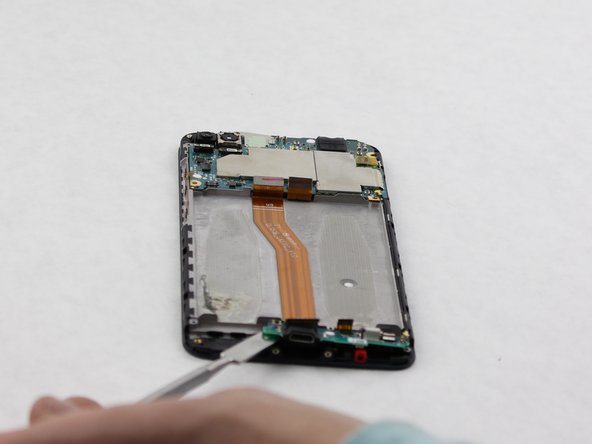
Once the battery has been removed, gently wedge the metal spudger beneath the green panel.
-
Lift the panel along with the charging port out the device and replace with the new charging port.
-


To reassemble your device, follow these instructions in reverse order.
To reassemble your device, follow these instructions in reverse order.
Отменить: Я не выполнил это руководство.
3 участников успешно повторили данное руководство.
Команда

Sam Houston State, Team S11-G6, Blackburne Fall 2018 Участник Sam Houston State, Team S11-G6, Blackburne Fall 2018
SHSU-BLACKBURNE-F18S11G6
4 членов
Автор 10 руководств
2 Комментариев
repair microfone asus zenfone 4 selfie pro please
I have managed to replace the charging port but now it shows Charging Port Temperatures Abnormalities Reminder which is loud and annoying to see every time. I also see that one of my sensors in the cpu-z program (thermal sensor pa_therm0) hitting a constant 75-84 degree centigrade and another sensor (chg_temp) hitting 65 constantly. Any help in regards to this manner?