Введение
If the speaker in your Audiovox CR8030iE5 is no longer functioning, it’s likely that you have a faulty speaker that needs to be changed. The speaker is a crucial component of your device. Its primary function is to emit sound to alert or wake up a user at a predetermined time.
This guide will walk you through the steps to replace a faulty speaker and install a new one. Please note that each speaker contains a powerful magnet; exercise caution by keeping it away from any nearby metal objects.
Выберете то, что вам нужно
-
-
Turn the device upside down.
-
Apply constant pressure to the base of your Audiovox, while holding the plastic casing until the casing is completely removed.
-
-
-
-
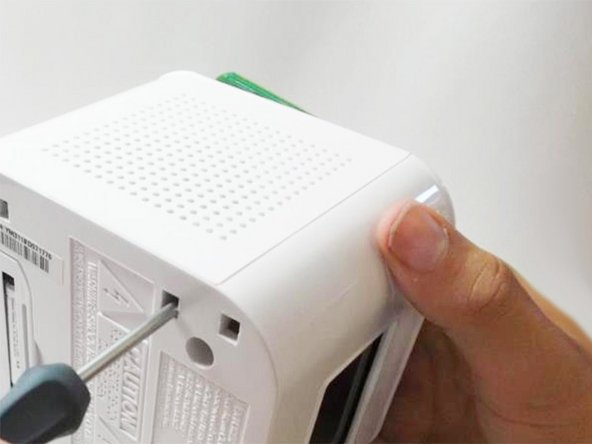
Using a Phillips #1 screwdriver, remove the screw found in the middle of the board.
-
-
-
Slide a plastic opening tool along the rim of the faulty speaker where it meets the plastic casing.
-
-
-
Using your thumb, applying constant pressure, pull back the plastic tab towards the speaker and away from the metal bracket.
-
Simultaneously insert a Phillips #00 screwdriver into the square hole on the underside of clock and push through to lift the metal bracket off of the plastic tab.
-
-
-
Pull up on the metal brackets, found on either side, until the speaker is completely removed. Removing the speaker is rather challenging. Don't get discouraged if it takes multiple attempts!
-


To reassemble your device, follow these instructions in reverse order.
To reassemble your device, follow these instructions in reverse order.
Отменить: Я не выполнил это руководство.
3 участников успешно повторили данное руководство.

Команда

Cal Poly, Team 10-39, Amido Spring 2013 Участник Cal Poly, Team 10-39, Amido Spring 2013
CPSU-AMIDO-S13S10G39
4 членов
Автор 6 руководств