Введение
You may be experiencing issues with your motherboard within the BLU Energy X Plus. Replacing the motherboard of a phone can be challenging, but this motherboard replacement guide is clear and concise and will direct you towards a successful replacement.
Выберете то, что вам нужно
-
-
Flip your device to the left side facing up and take out the SD card tray using the SIM card eject tool. You will insert the tool in at an angle and lift the tray up.
-
-
-
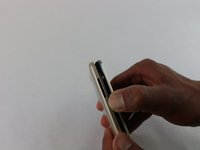
Flip your device to the right side facing up and use the SIM card eject tool to remove the SIM card by pushing the tool in the hole. You will feel a button click and the tray should slide out 2mm. You will then use your fingers to pull the tray out.
-
-
-
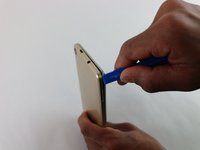
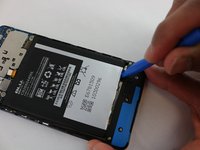
Take the blue plastic opening tool and insert it in-between the back of the phone and the chrome trim. Go all the way around the device slowly to take the back cover off.
-
-
-
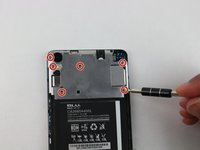
Remove the six silver screws from the cover plate, and one black screw from the top.
-
Use the screwdriver head J000 to remove all the screws.
-
Six silver screws, all 1.5mm in length.
-
One black screw, 1mm in length.
-
-
-
After all the screws are out, lift the protective metal cover off of the phone. Lift from the bottom of the cover.
-
-
-
Use the small blue plastic opening tool to lift the contact attached to the battery from the motherboard of the phone.
-
-
-
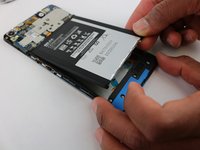
Use the small blue plastic opening tool to lift the battery from the bottom with little force because the battery will be glued in.
-
Then, use your hand to remove the battery completely.
-
-
-
-
After loosening the glue from the bottom of the camera, lift the camera out of the phone.
-
-
-
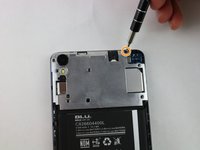
Remove the black screw using a screwdriver head J000.
-
One black screw, 1mm in length.
-
-
-
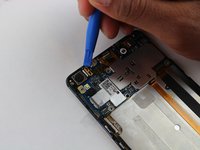
Lift the black tab on the zero insert force connector on the lower left side of the motherboard using a small blue plastic opening tool.
-
-
-
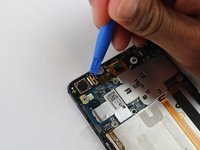
Lift the black tab on the zero insert force connector on the lower right side of the motherboard using a small blue plastic opening tool.
-
-
-
Lift the black tab on the zero insert force connector on the top left side of the motherboard using a small blue plastic opening tool.
-
-
Инструмент, используемый на этом этапе:Tweezers$4.99
-
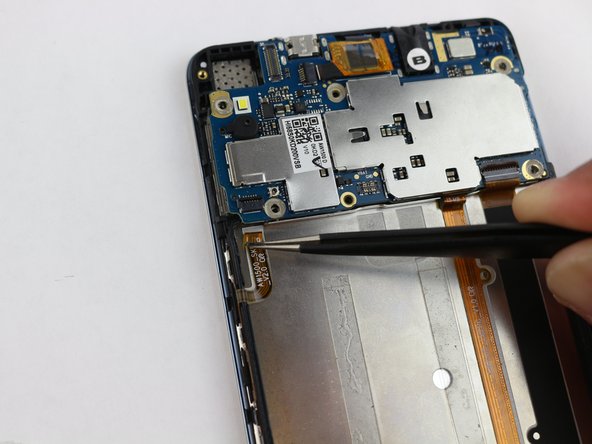
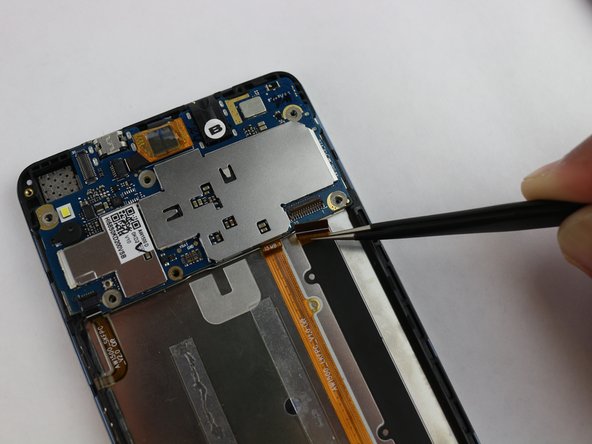
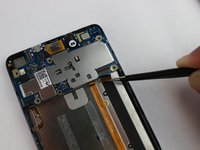
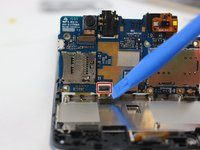
Use a fine nose pair of tweezers to pull the ribbon cable from the zero insert force connector with little force to remove the contact connecter from the motherboard.
-
-
-
Use a fine nose pair of tweezers to pull the ribbon cable from the zero insert force connector with little force to remove the contact connecter from the motherboard.
-
-
-
Use a fine nose pair of tweezers to pull the ribbon cable from the zero insert force connector with little force to remove the contact connecter from the motherboard.
-
-
-
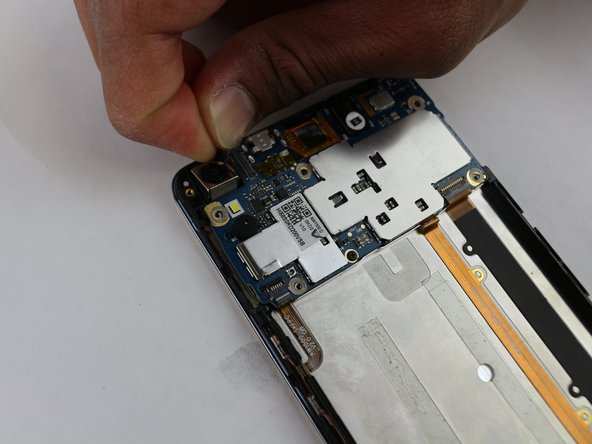
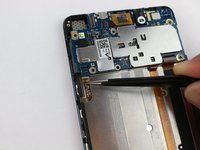
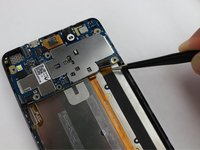
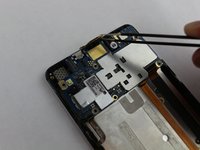
Lift the small processor using a pair of tweezers.
-
Then, lift up the motherboard using your hand, lifting from the top of the motherboard.
-
-
-
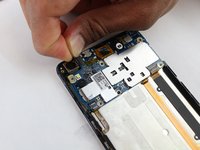
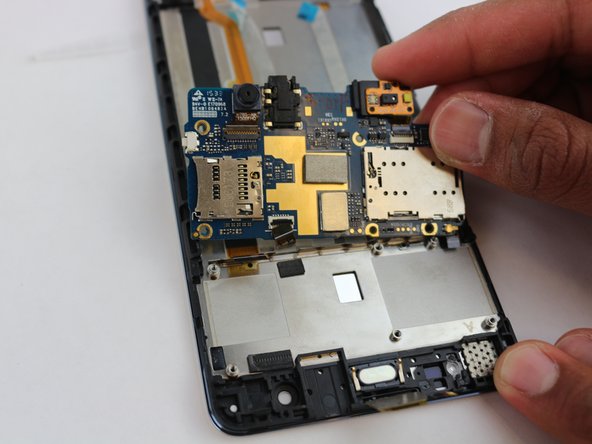
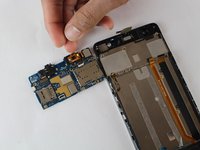
Remove the zero insert force connector that's on the back side of the motherboard using a small blue plastic opening tool to lift up the black tab. Then pull the motherboard out of the phone.
-
-
-
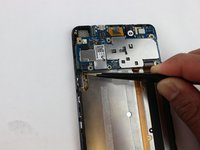
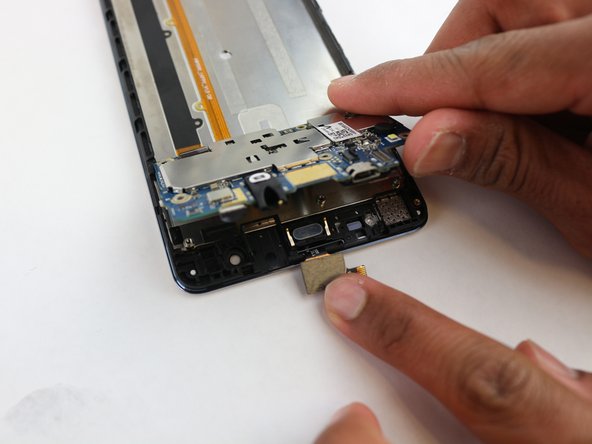
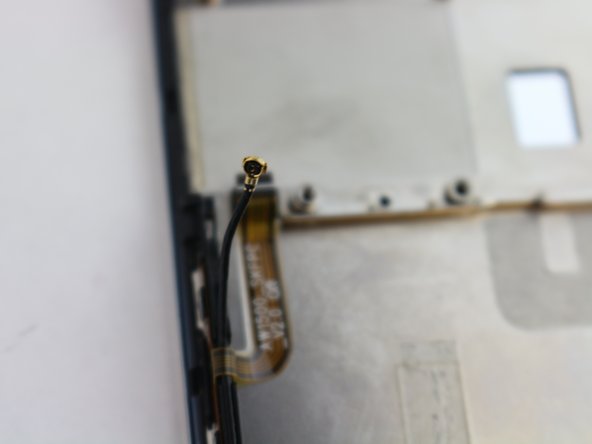
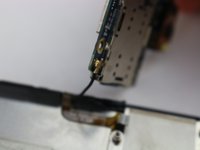
Remove the connector wire from the motherboard using your finger nails. You will need to pull from the gold colored connecter, which is attached to the motherboard.
-
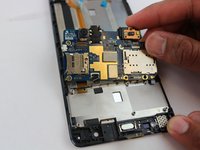
And, there's your motherboard.
-


To reassemble your device, follow these instructions in reverse order.
Команда

USF Tampa, Team 2-121, Cagle Spring 2016 Участник USF Tampa, Team 2-121, Cagle Spring 2016
USFT-CAGLE-S16S2G121
4 членов
Автор 5 руководств