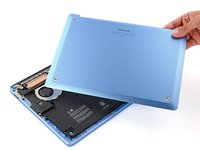
Перейти к основному содержанию

Battery Disconnection

Абсолютно необходимое руководство
Это руководство предназначено только для использования в качестве обязательного условия для других руководств. Оно не полностью само по себе.

Выберете то, что вам нужно

  1. Battery Disconnection, Prepare your laptop for disassembly: шаг 1, изображение 1 из 3 Battery Disconnection, Prepare your laptop for disassembly: шаг 1, изображение 2 из 3 Battery Disconnection, Prepare your laptop for disassembly: шаг 1, изображение 3 из 3
    • Before starting this repair, allow your laptop's battery to drain below 25%. A charged battery may catch fire if damaged.

    • Unplug all cables and fully shut down your laptop.

  2. Battery Disconnection, Flip your laptop over: шаг 2, изображение 1 из 3 Battery Disconnection, Flip your laptop over: шаг 2, изображение 2 из 3 Battery Disconnection, Flip your laptop over: шаг 2, изображение 3 из 3
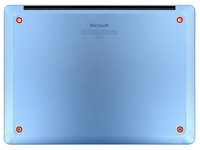
    • Close your laptop and lay it down so the rubber feet are facing up.

  3. Battery Disconnection, Remove the feet: шаг 3, изображение 1 из 3 Battery Disconnection, Remove the feet: шаг 3, изображение 2 из 3 Battery Disconnection, Remove the feet: шаг 3, изображение 3 из 3
    • Gently slide one arm of your angled tweezers into the recess near the upper right edge of one of the feet.

    • You can also use the point of a spudger. However, you're more likely to damage the foot, if you're reusing it.

    • Use your tweezers to pry up and remove the foot.

    • The feet may eject very quickly—be careful not to lose them.

    • Repeat the process to remove the remaining feet.

    • To install a foot, align the pegs on the bottom with their cutouts in the frame and press the foot into place.

  4. Battery Disconnection, Remove the lower case screws: шаг 4, изображение 1 из 2 Battery Disconnection, Remove the lower case screws: шаг 4, изображение 2 из 2
    Инструмент, используемый на этом этапе:
    FixMat
    $36.95
    • Throughout this repair, keep track of each screw and make sure it goes back exactly where it came from.

    • While the Surface Laptop 7 uses Torx Plus screws, standard Torx bits work. Make sure to apply constant, downward force to prevent stripping.

    • Use a Torx Plus 5IP screwdriver to remove the four 4.5 mm‑long screws (with washers) securing the lower case.

  5. Battery Disconnection, Detach the lower case: шаг 5, изображение 1 из 3 Battery Disconnection, Detach the lower case: шаг 5, изображение 2 из 3 Battery Disconnection, Detach the lower case: шаг 5, изображение 3 из 3
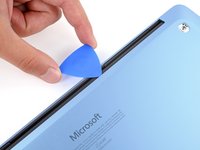
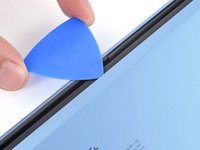
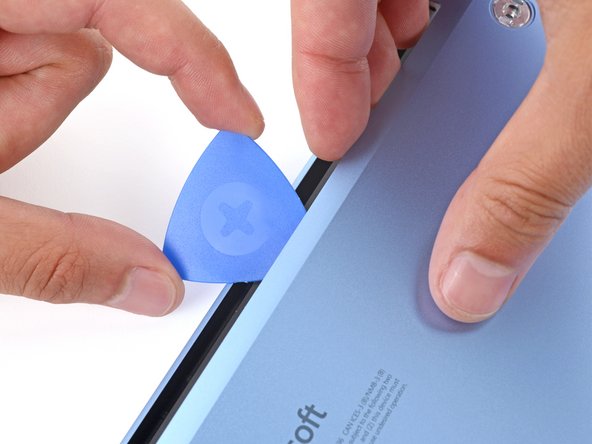
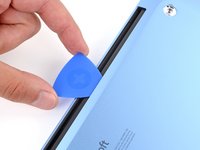
    • Insert the tip of an opening pick under the top edge of the lower case, about an inch (2.5 cm) to the left or right of the Microsoft logo.

    • Don't insert the pick near the outer edges or you'll damage the antenna bar.

  6. Battery Disconnection: шаг 6, изображение 1 из 3 Battery Disconnection: шаг 6, изображение 2 из 3 Battery Disconnection: шаг 6, изображение 3 из 3
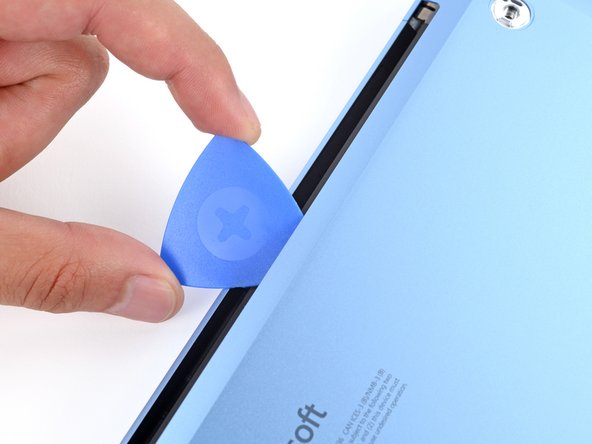
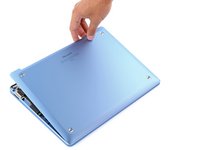
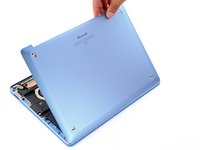
    • Twist the pick to lift the lower case enough that you can grip it with your hand.

  7. Battery Disconnection, Remove the lower case: шаг 7, изображение 1 из 3 Battery Disconnection, Remove the lower case: шаг 7, изображение 2 из 3 Battery Disconnection, Remove the lower case: шаг 7, изображение 3 из 3
    • Lift the lower case and remove it.

  8. Battery Disconnection, Disconnect the battery: шаг 8, изображение 1 из 3 Battery Disconnection, Disconnect the battery: шаг 8, изображение 2 из 3 Battery Disconnection, Disconnect the battery: шаг 8, изображение 3 из 3
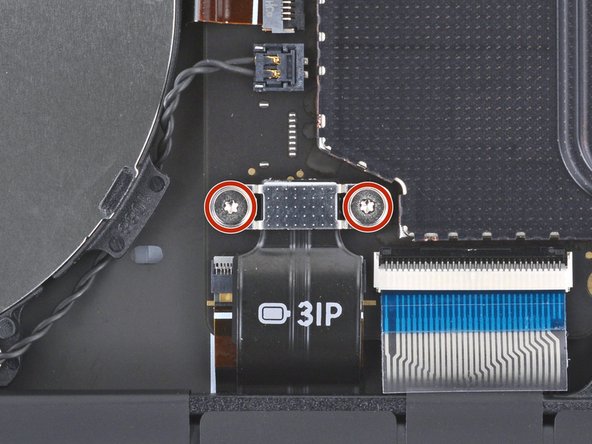
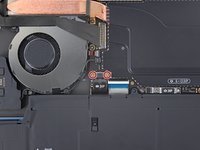
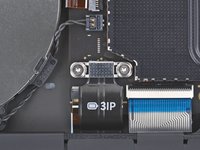
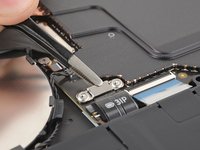
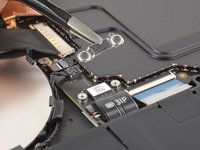
    • Use a Torx Plus 3IP screwdriver to remove the two 2.3 mm‑long screws securing the battery connector cover.

  9. Battery Disconnection: шаг 9, изображение 1 из 2 Battery Disconnection: шаг 9, изображение 2 из 2
    • Use tweezers or your fingers to remove the battery connector cover.

  10. Battery Disconnection: шаг 10, изображение 1 из 2 Battery Disconnection: шаг 10, изображение 2 из 2
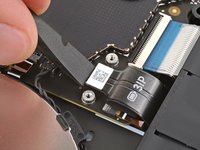
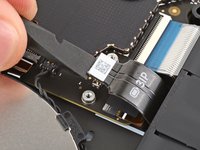
    • Insert the flat end of a spudger under the top edge of the battery press connector and pry up to disconnect it.

    • To reconnect a press connector, align it over the socket and gently press down on one side until it clicks into place, then press down on the other side. It may take a few tries to align the connector—don't try to force it into place.

Финишная черта

Spencer Day

Участник с: 09/14/22

95 987 Репутация

Автор 662 руководств

Команду

iFixit Участник iFixit

Staff

118 членов

Автор 19 649 руководств

0Комментарии к руководству

Добавить комментарий

Статистика просмотров:

За последние 24 час(ов): 0

За последние 7 дней: 0

За последние 30 дней: 7

За всё время: 13