Введение
The control PCB is attached to the inside of the back panel, and provides access to adjustment knobs and inputs and outputs for the B212D speaker.
Выберете то, что вам нужно
-
-
Remove the 8 Phillips screws from the back of the speaker.
-
-
-
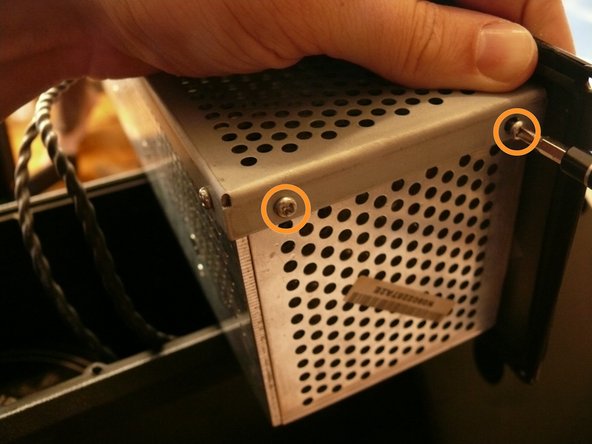
There are two silver, 6 mm-long machine screws with two 1/8" inner-diameter washers on the exterior of the metal electronics box; remove these first using a #2 philips screwdriver.
-
There are five of the same type of machine screw (silver, 6 mm-long) remaining around the metal electronics box's exterior; remove these as well.
-
-
-
Remove the portion of the metal housing that you freed with the 7 screws in the previous step.
-
-
-
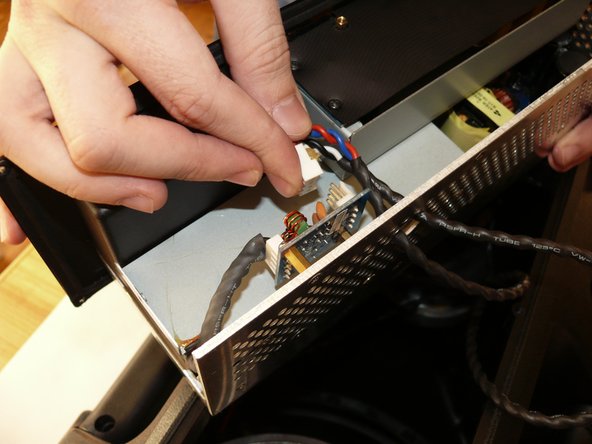
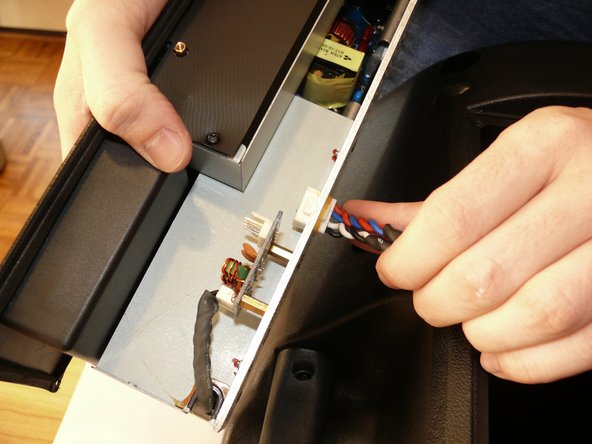
Inside the metal electronics box housing is a white clip attached to a small PCB; remove this.
-
Snake the clip head through the hole in the metal electronics box casing.
-
-
-
-
Remove the 4, 7/32" long machine screws with a #2 phillips head screwdriver.
-
-
-
Rotate the back panel so you can view the interior; note the three wires attached.
-
Remove the wires to you can fully remove the back panel.
-
-
-
Remove the 4 indicated 9/32" long screws with the #1 phillips head screwdriver
-
-
-
Remove the 2 indicated 3/16" long machine screws with a #1 phillips head screwdriver.
-
-
-
The control PCB is free now, ready to be removed from the speaker's back panel.
-


To reassemble your device, follow these instructions in reverse order.
To reassemble your device, follow these instructions in reverse order.
Отменить: Я не выполнил это руководство.
4 участников успешно повторили данное руководство.
5 Комментариев
In Step 3 there are 2 more screws, along the side of the 'electronics box’.
The washer and nut securing the 1/4” socket also need to be removed.
Hi,i like to conect the board to another amp pcb but i dont now wich cable is for what ,do you now where is the power and the inputs?i already look for schematics but i didnt find anything about..thanx
Where do I find a replacement control PCB for my B212A??
Hi
My Behringer Eurolive B215D speaker has got a serious hissing sound when I plug just the power with no audio player connected. Anyone with any idea what can course this? Thanks.