Перейти к основному содержанию

Bell and Howell DNV16HDZ Front Lens Replacement

Выберете то, что вам нужно

  1. Bell and Howell DNV16HDZ Front Lens Replacement, Lens Assembly: шаг 1, изображение 1 из 2 Bell and Howell DNV16HDZ Front Lens Replacement, Lens Assembly: шаг 1, изображение 2 из 2
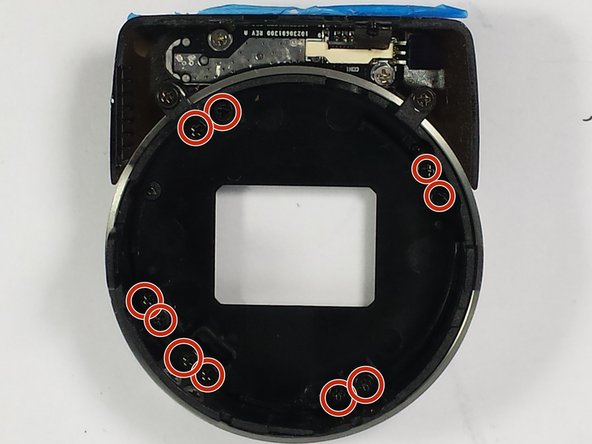
    • Remove the five 30mm Phillips #0 screws on the bottom of the camera.

  2. Bell and Howell DNV16HDZ Front Lens Replacement: шаг 2, изображение 1 из 1
    • Use a plastic opening tool to disconnect the internal hinges that snaps the camera into place.

    • Using a plastic opening tool is important since a metal one will scratch or damage the thin plastic hinges that hold the camera together.

  3. Bell and Howell DNV16HDZ Front Lens Replacement: шаг 3, изображение 1 из 1
    • It will still be connected by a plastic film. This can also be disconnected by pulling up the white part where it connects to the light circuit board.

  4. Bell and Howell DNV16HDZ Front Lens Replacement, Front Lens: шаг 4, изображение 1 из 1
    • Take out the two 20 mm screws that attach it to the shutter.

  5. Bell and Howell DNV16HDZ Front Lens Replacement: шаг 5, изображение 1 из 1
    • Remove the ten 30 mm Phillips #0 screws from the front lens.

  6. Bell and Howell DNV16HDZ Front Lens Replacement: шаг 6, изображение 1 из 1
    • Take the shutter screen parts out of the lens.

    • Now push out the front lens.

    • Slowly take out the shutter screen parts and lens, adding too much force will break them.

Заключение

To reassemble your device, follow these instructions in reverse order.

Jerry Hadjah

Участник с: 03/04/16

525 Репутация

Автор 5 руководств

Команда

UMass Dartmouth, Team 8-4, Botvin Spring 2016 Участник UMass Dartmouth, Team 8-4, Botvin Spring 2016

UMASSD-BOTVIN-S16S8G4

3 членов

Автор 12 руководств

0 Комментариев

Добавить комментарий

Просмотр статистики:

За последние 24часов: 1

За последние 7 дней: 6

За последние 30 дней: 7

За всё время: 578