Перейти к основному содержанию

Bell and Howell DNV16HDZ Internal Screen Replacement

Выберете то, что вам нужно

  1. Bell and Howell DNV16HDZ Internal Screen Replacement, Lens Assembly: шаг 1, изображение 1 из 2 Bell and Howell DNV16HDZ Internal Screen Replacement, Lens Assembly: шаг 1, изображение 2 из 2
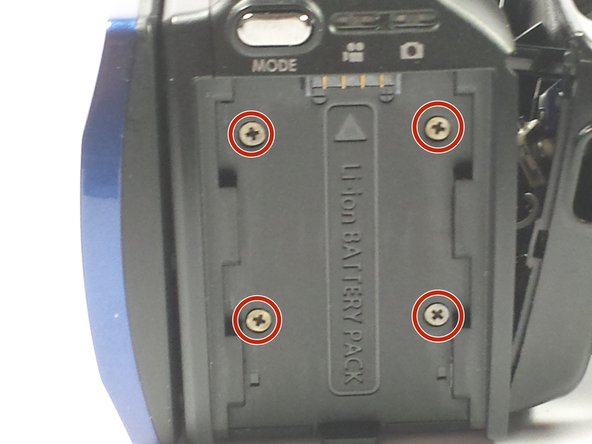
    • Remove the five 30mm Phillips #0 screws on the bottom of the camera.

  2. Bell and Howell DNV16HDZ Internal Screen Replacement: шаг 2, изображение 1 из 1
    • Use a plastic opening tool to disconnect the internal hinges that snaps the camera into place.

    • Using a plastic opening tool is important since a metal one will scratch or damage the thin plastic hinges that hold the camera together.

  3. Bell and Howell DNV16HDZ Internal Screen Replacement: шаг 3, изображение 1 из 1
    • It will still be connected by a plastic film. This can also be disconnected by pulling up the white part where it connects to the light circuit board.

  4. Bell and Howell DNV16HDZ Internal Screen Replacement, Internal Screen: шаг 4, изображение 1 из 1
    • Pull the side with the hand strap upwards to disconnect it from the camcorder.

  5. Bell and Howell DNV16HDZ Internal Screen Replacement: шаг 5, изображение 1 из 2 Bell and Howell DNV16HDZ Internal Screen Replacement: шаг 5, изображение 2 из 2
    • Remove the battery.

    • Remove the four 30 mm Phillips #0 screws on the back.

  6. Bell and Howell DNV16HDZ Internal Screen Replacement: шаг 6, изображение 1 из 3 Bell and Howell DNV16HDZ Internal Screen Replacement: шаг 6, изображение 2 из 3 Bell and Howell DNV16HDZ Internal Screen Replacement: шаг 6, изображение 3 из 3
    • On the hinge of the camcorder remove the two 30 mm Phillips #0 screws.

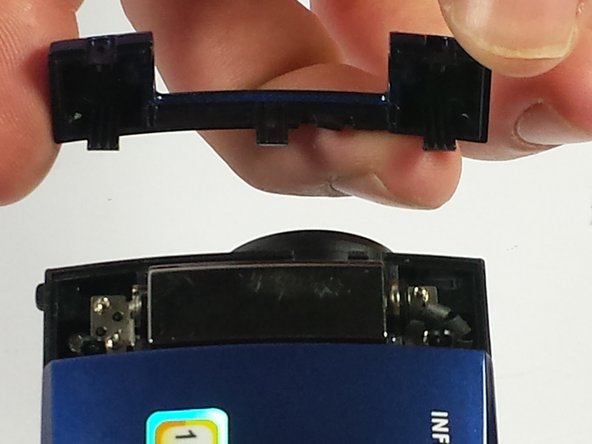
    • Remove blue piece holding it together.

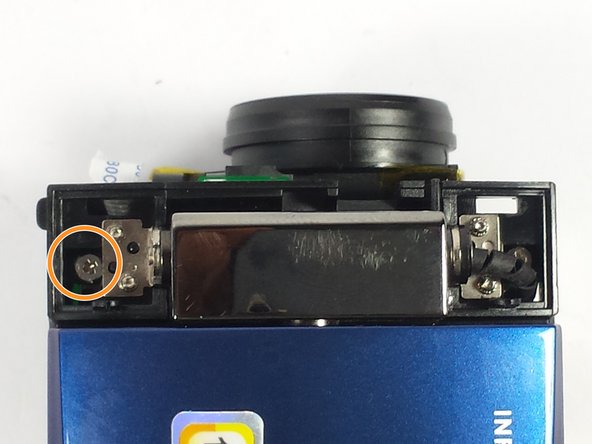
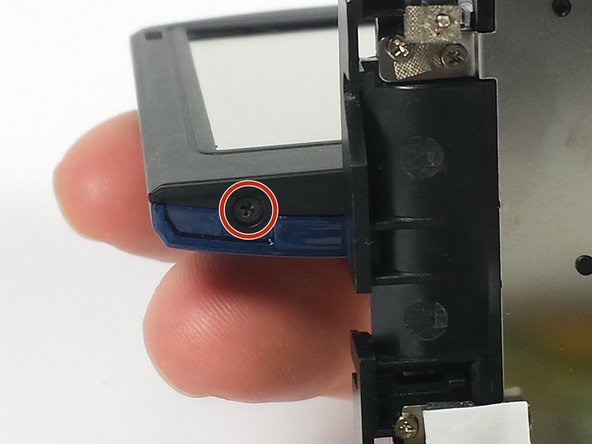
    • Remove the 50 mm Phillips #0 screw.

  7. Bell and Howell DNV16HDZ Internal Screen Replacement: шаг 7, изображение 1 из 2 Bell and Howell DNV16HDZ Internal Screen Replacement: шаг 7, изображение 2 из 2
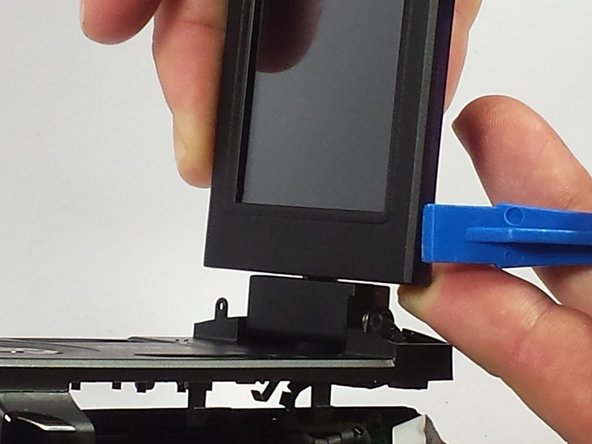
    • Use the plastic opening tool and slowly pry open the side.

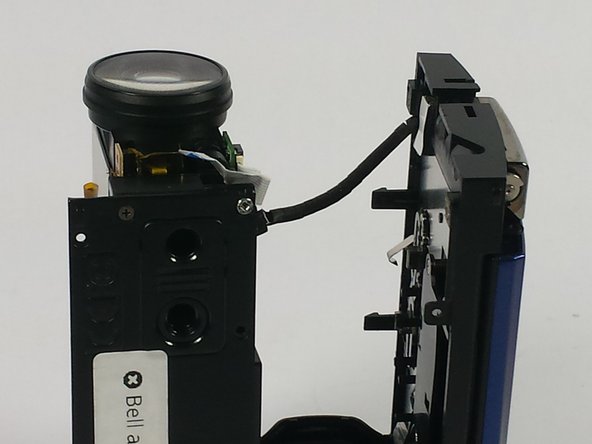
    • Now pull the part with camcorder out.

    • There is a wire connecting these two pieces using to much force will damage the camcorder.

  8. Bell and Howell DNV16HDZ Internal Screen Replacement: шаг 8, изображение 1 из 3 Bell and Howell DNV16HDZ Internal Screen Replacement: шаг 8, изображение 2 из 3 Bell and Howell DNV16HDZ Internal Screen Replacement: шаг 8, изображение 3 из 3
    • Have the screen open and twist it 90 degrees unscrew the 40 mm screw.

    • Repeat for the other side.

    • Use the plastic opening tool to pry the outer part of the screen, now attach the new one.

Заключение

To reassemble your device, follow these instructions in reverse order.

Jerry Hadjah

Участник с: 03/04/16

525 Репутация

Автор 5 руководств

Команда

UMass Dartmouth, Team 8-4, Botvin Spring 2016 Участник UMass Dartmouth, Team 8-4, Botvin Spring 2016

UMASSD-BOTVIN-S16S8G4

3 членов

Автор 12 руководств

0 Комментариев

Добавить комментарий

Просмотр статистики:

За последние 24часов: 0

За последние 7 дней: 4

За последние 30 дней: 5

За всё время: 324