Перейти к основному содержанию

Besta Super 5000 Motherboard Replacement

Выберете то, что вам нужно

  1. Besta Super 5000 Motherboard Replacement, Battery: шаг 1, изображение 1 из 1
    • Turn the device over so that the barcode is facing upwards.

  2. Besta Super 5000 Motherboard Replacement: шаг 2, изображение 1 из 2 Besta Super 5000 Motherboard Replacement: шаг 2, изображение 2 из 2
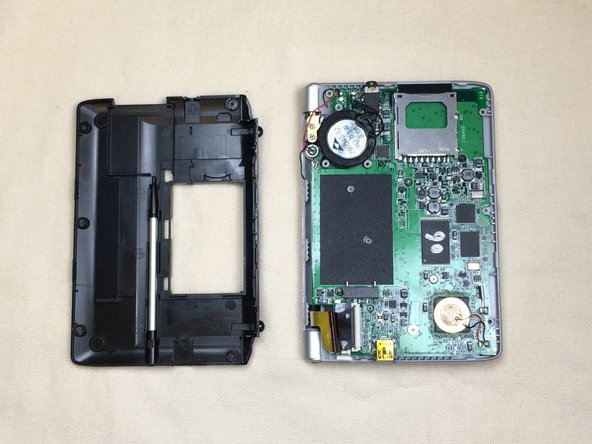
    • Place your fingers on the battery cover arrow and pull the cover down and off the device.

  3. Besta Super 5000 Motherboard Replacement: шаг 3, изображение 1 из 1
    • Pull upwards on the battery tab to remove the battery from the device.

  4. Besta Super 5000 Motherboard Replacement, Back Cover: шаг 4, изображение 1 из 1
    • Remove the five screws around the edge of the device using a Phillips #0 screwdriver.

  5. Besta Super 5000 Motherboard Replacement: шаг 5, изображение 1 из 1
    • Remove the two screws behind the battery using a Phillips #0 screwdriver.

  6. Besta Super 5000 Motherboard Replacement: шаг 6, изображение 1 из 2 Besta Super 5000 Motherboard Replacement: шаг 6, изображение 2 из 2
    • Potential for device damage: All screws must be removed before you begin this step. Do not forcefully pry apart the device with screws still in it because you may damage it.

    • Gently pry off the backing using an opening tool.

  7. Besta Super 5000 Motherboard Replacement, Motherboard: шаг 7, изображение 1 из 1
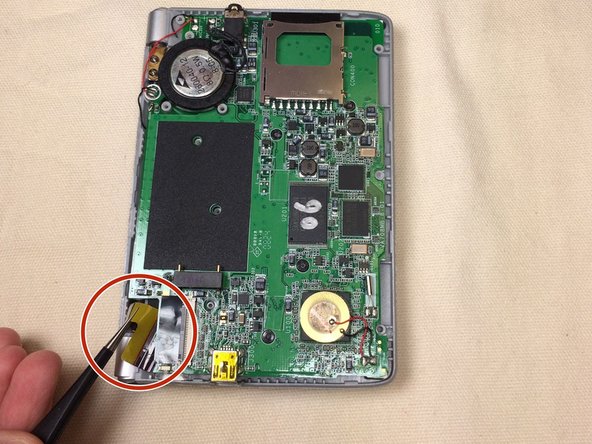
    • Remove the three silver screws from the black round battery using a Phillips #0 screwdriver.

  8. Besta Super 5000 Motherboard Replacement: шаг 8, изображение 1 из 1
    • Remove the five small screws from the motherboard using a Phillips #0 screwdriver.

  9. Besta Super 5000 Motherboard Replacement: шаг 9, изображение 1 из 3 Besta Super 5000 Motherboard Replacement: шаг 9, изображение 2 из 3 Besta Super 5000 Motherboard Replacement: шаг 9, изображение 3 из 3
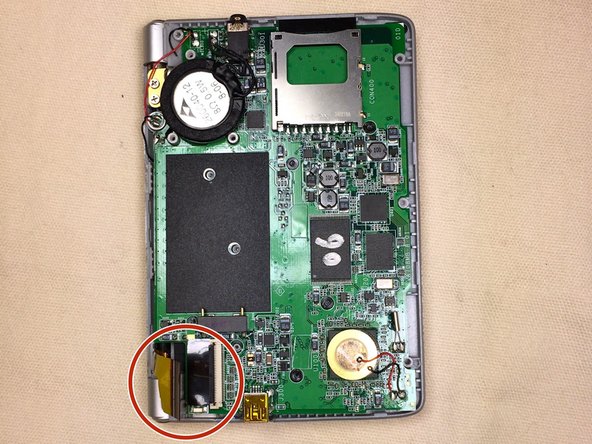
    • Using a pair of tweezers, pinch the center of the yellow ribbon located in the corner of the device.

    • Potential for device damage: Do not yank or remove the ribbon from the device.

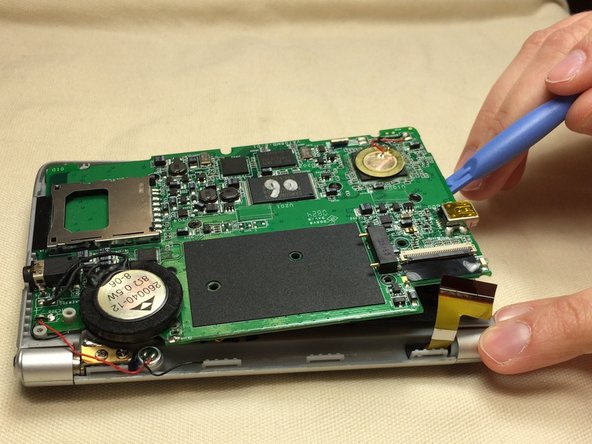
    • Carefully pull the hidden piece of yellow ribbon out from underneath the motherboard.

  10. Besta Super 5000 Motherboard Replacement: шаг 10, изображение 1 из 2 Besta Super 5000 Motherboard Replacement: шаг 10, изображение 2 из 2
    • Potential for device damage: All screws must be removed before you begin this step. Do not forcefully pry apart the motherboard with screws still in it because you may damage it.

    • Carefully pry off the motherboard with an opening tool.

  11. Besta Super 5000 Motherboard Replacement: шаг 11, изображение 1 из 1
    • Take the motherboard out of the body frame.

  12. Besta Super 5000 Motherboard Replacement: шаг 12, изображение 1 из 2 Besta Super 5000 Motherboard Replacement: шаг 12, изображение 2 из 2
    • Lift the black keyboard mat off of the motherboard.

    • Replace the motherboard.

Заключение

To reassemble your device, follow these instructions in reverse order.

Еще один человек закончил это руководство.

Jessie

Участник с: 09/30/14

370 Репутация

Автор 3 руководств

Команда

Ohio State, Team 1-5, Buehl Fall 2014 Участник Ohio State, Team 1-5, Buehl Fall 2014

OSU-BUEHL-F14S1G5

4 членов

Автор 4 руководств

0 Комментариев

Добавить комментарий

Просмотр статистики:

За последние 24часов: 0

За последние 7 дней: 1

За последние 30 дней: 1

За всё время: 358