Перейти к основному содержанию

Bissell Pet Hair Eraser Motherboard Replacement

Выберете то, что вам нужно

  1. Bissell Pet Hair Eraser Motherboard Replacement, Dirt Cup: шаг 1, изображение 1 из 2 Bissell Pet Hair Eraser Motherboard Replacement, Dirt Cup: шаг 1, изображение 2 из 2
    • Firmly grasp the handle and press the release button.

    • Gently pull the dirt cup down and away from the vacuum body.

  2. Bissell Pet Hair Eraser Motherboard Replacement, Power Button: шаг 2, изображение 1 из 2 Bissell Pet Hair Eraser Motherboard Replacement, Power Button: шаг 2, изображение 2 из 2
    • Remove the six 1.2 mm Philips #2 screws from the handle and base.

  3. Bissell Pet Hair Eraser Motherboard Replacement: шаг 3, изображение 1 из 2 Bissell Pet Hair Eraser Motherboard Replacement: шаг 3, изображение 2 из 2
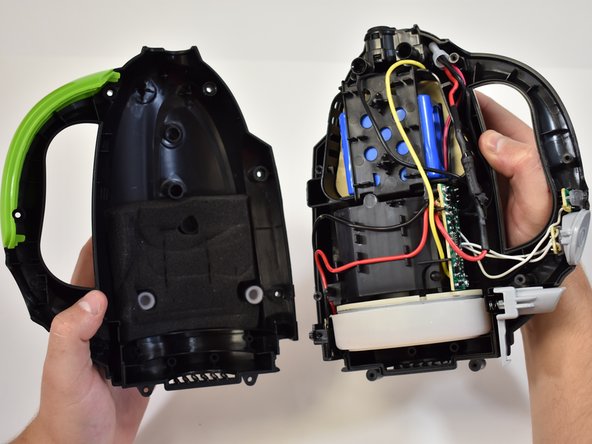
    • Grasp each half of the body and gently pull apart.

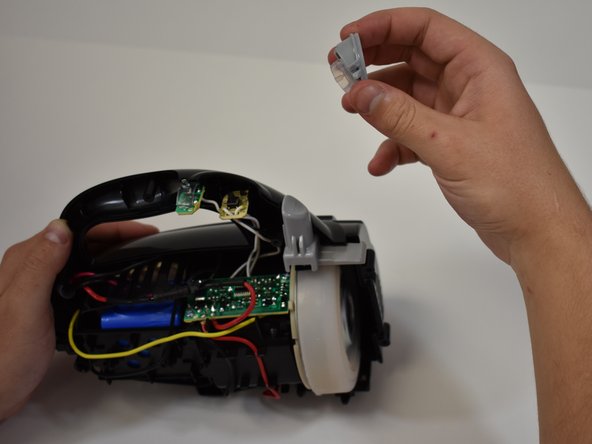
    • The green handle, power button, charge light lens, and dirt cup release are not fastened in place.

    • Once the case is split apart these items may come dislodged.

  4. Bissell Pet Hair Eraser Motherboard Replacement: шаг 4, изображение 1 из 3 Bissell Pet Hair Eraser Motherboard Replacement: шаг 4, изображение 2 из 3 Bissell Pet Hair Eraser Motherboard Replacement: шаг 4, изображение 3 из 3
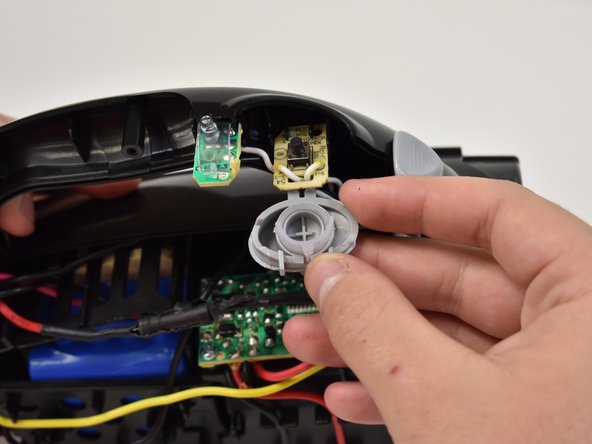
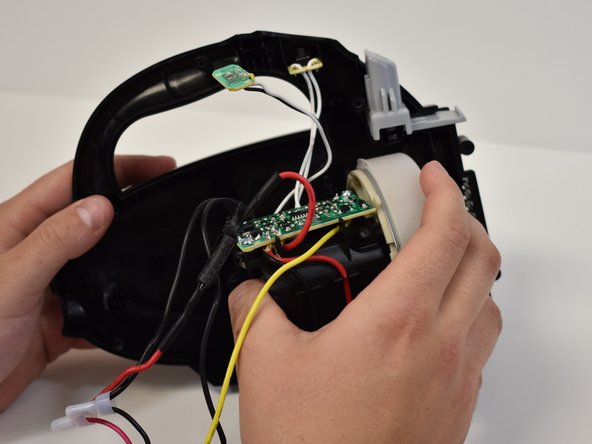
    • The power button can be removed by gently lifting it off the circuitry.

  5. Bissell Pet Hair Eraser Motherboard Replacement, Motherboard: шаг 5, изображение 1 из 2 Bissell Pet Hair Eraser Motherboard Replacement, Motherboard: шаг 5, изображение 2 из 2
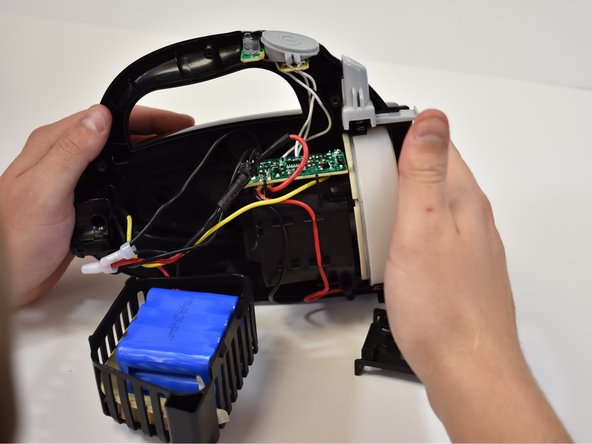
    • Remove the battery plastic hold down by lifting it off the tabs.

    • Remove the battery by lifting straight up.

    • Position the battery aside.

  6. Bissell Pet Hair Eraser Motherboard Replacement: шаг 6, изображение 1 из 3 Bissell Pet Hair Eraser Motherboard Replacement: шаг 6, изображение 2 из 3 Bissell Pet Hair Eraser Motherboard Replacement: шаг 6, изображение 3 из 3
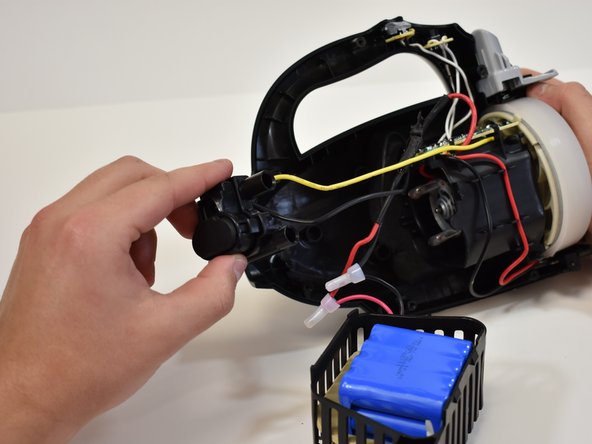
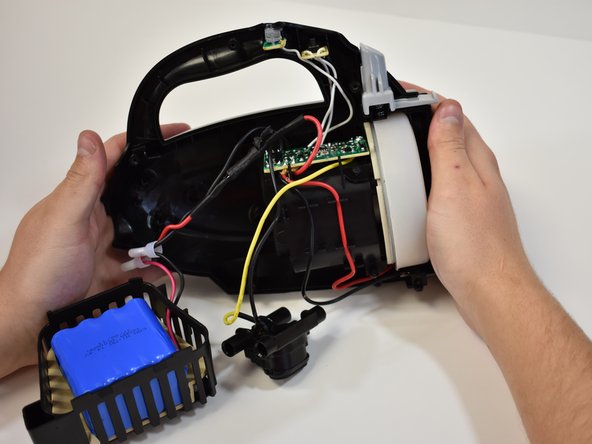
    • Grasp the charger port and remove it by lifting it straight out of the case.

    • Set the charger port next to the battery.

  7. Bissell Pet Hair Eraser Motherboard Replacement: шаг 7, изображение 1 из 2 Bissell Pet Hair Eraser Motherboard Replacement: шаг 7, изображение 2 из 2
    • Remove the power button and charge LED light by gently pulling straight out of the case.

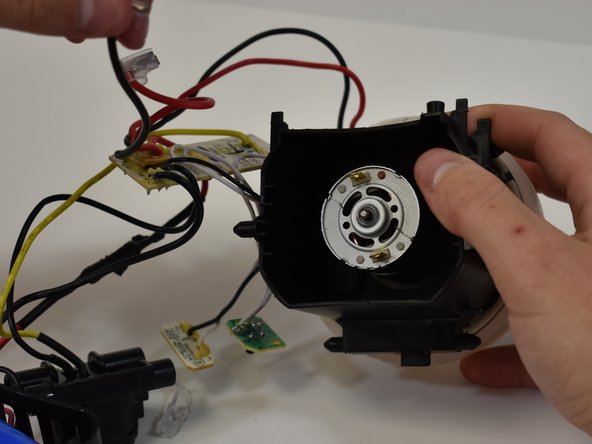
    • The vacuum motor can be removed by pulling straight out of the case.

    • All internals are now removed.

    • Set the case halves aside.

  8. Bissell Pet Hair Eraser Motherboard Replacement: шаг 8, изображение 1 из 1
    • Remove the two 1 mm Phillips #2 screws in the shown locations.

  9. Bissell Pet Hair Eraser Motherboard Replacement: шаг 9, изображение 1 из 2 Bissell Pet Hair Eraser Motherboard Replacement: шаг 9, изображение 2 из 2
    • Disconnect the power leads from the vacuum motor.

    • The red power lead goes on the terminal with the visible red dot.

Заключение

To reassemble your device, follow these instructions in reverse order.

Еще один человек закончил это руководство.

Jim Lopez

Участник с: 09/20/18

586 Репутация

Автор 5 руководств

Команда

Central Washington University, Team S1-G1, Pengilly Fall 2018 Участник Central Washington University, Team S1-G1, Pengilly Fall 2018

CWU-PENGILLY-F18S1G1

4 членов

Автор 5 руководств

0 Комментариев

Добавить комментарий

Просмотр статистики:

За последние 24часов: 1

За последние 7 дней: 3

За последние 30 дней: 7

За всё время: 355