Перейти к основному содержанию

Bissell Pet Hair Eraser Vacuum Motor Replacement

Выберете то, что вам нужно

  1. Bissell Pet Hair Eraser Vacuum Motor Replacement, Dirt Cup: шаг 1, изображение 1 из 2 Bissell Pet Hair Eraser Vacuum Motor Replacement, Dirt Cup: шаг 1, изображение 2 из 2
    • Firmly grasp the handle and press the release button.

    • Gently pull the dirt cup down and away from the vacuum body.

  2. Bissell Pet Hair Eraser Vacuum Motor Replacement, Power Button: шаг 2, изображение 1 из 2 Bissell Pet Hair Eraser Vacuum Motor Replacement, Power Button: шаг 2, изображение 2 из 2
    • Remove the six 1.2 mm Philips #2 screws from the handle and base.

  3. Bissell Pet Hair Eraser Vacuum Motor Replacement: шаг 3, изображение 1 из 2 Bissell Pet Hair Eraser Vacuum Motor Replacement: шаг 3, изображение 2 из 2
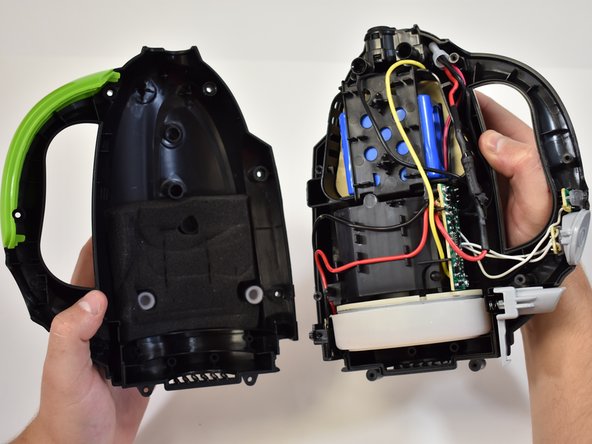
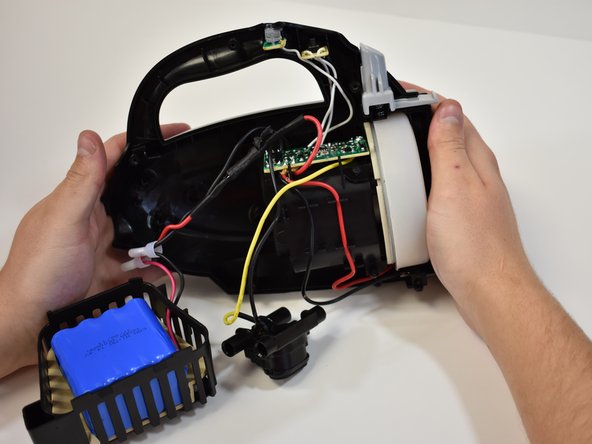
    • Grasp each half of the body and gently pull apart.

    • The green handle, power button, charge light lens, and dirt cup release are not fastened in place.

    • Once the case is split apart these items may come dislodged.

  4. Bissell Pet Hair Eraser Vacuum Motor Replacement: шаг 4, изображение 1 из 3 Bissell Pet Hair Eraser Vacuum Motor Replacement: шаг 4, изображение 2 из 3 Bissell Pet Hair Eraser Vacuum Motor Replacement: шаг 4, изображение 3 из 3
    • The power button can be removed by gently lifting it off the circuitry.

  5. Bissell Pet Hair Eraser Vacuum Motor Replacement, Motherboard: шаг 5, изображение 1 из 2 Bissell Pet Hair Eraser Vacuum Motor Replacement, Motherboard: шаг 5, изображение 2 из 2
    • Remove the battery plastic hold down by lifting it off the tabs.

    • Remove the battery by lifting straight up.

    • Position the battery aside.

  6. Bissell Pet Hair Eraser Vacuum Motor Replacement: шаг 6, изображение 1 из 3 Bissell Pet Hair Eraser Vacuum Motor Replacement: шаг 6, изображение 2 из 3 Bissell Pet Hair Eraser Vacuum Motor Replacement: шаг 6, изображение 3 из 3
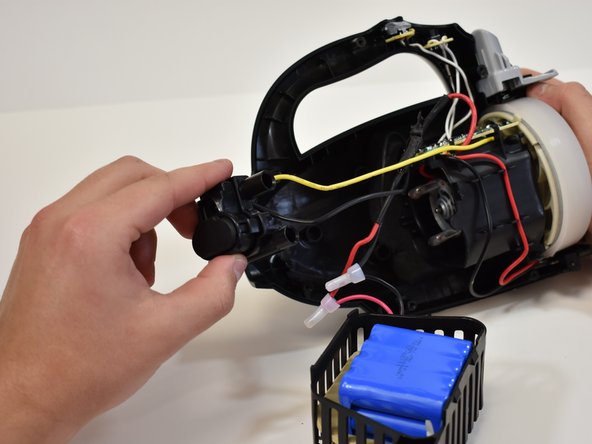
    • Grasp the charger port and remove it by lifting it straight out of the case.

    • Set the charger port next to the battery.

  7. Bissell Pet Hair Eraser Vacuum Motor Replacement: шаг 7, изображение 1 из 2 Bissell Pet Hair Eraser Vacuum Motor Replacement: шаг 7, изображение 2 из 2
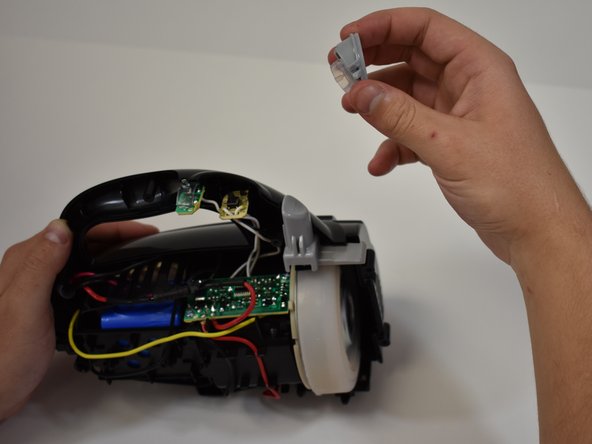
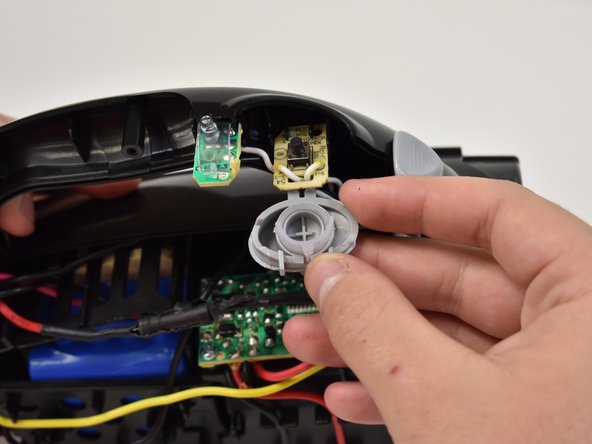
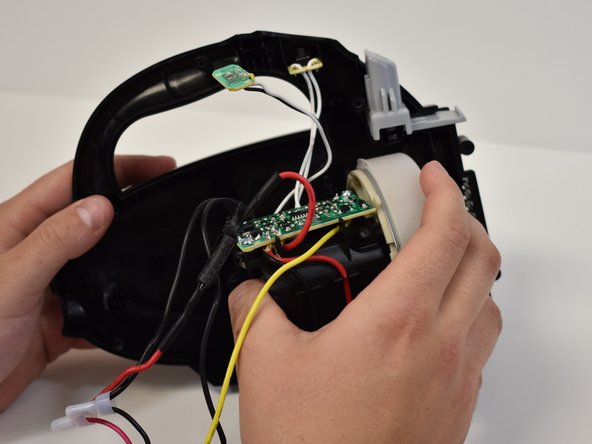
    • Remove the power button and charge LED light by gently pulling straight out of the case.

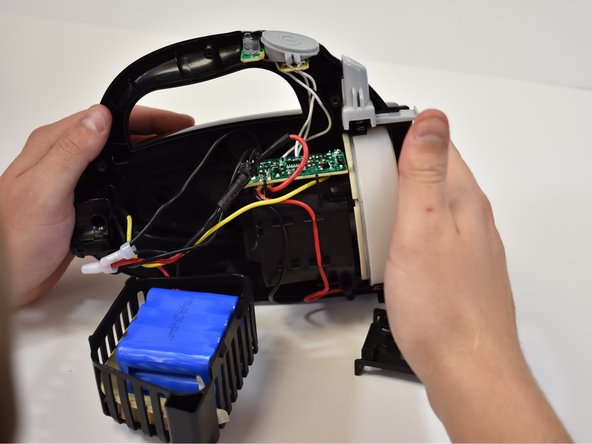
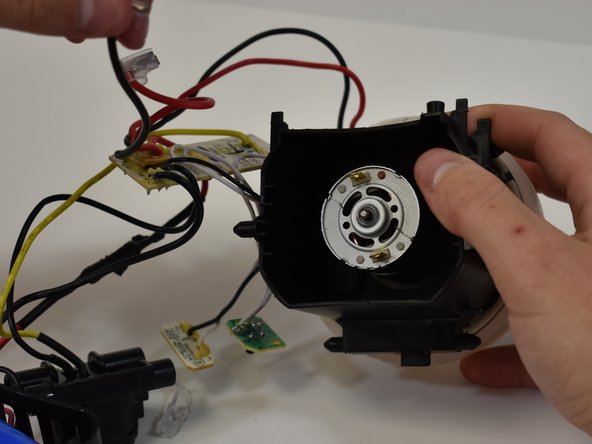
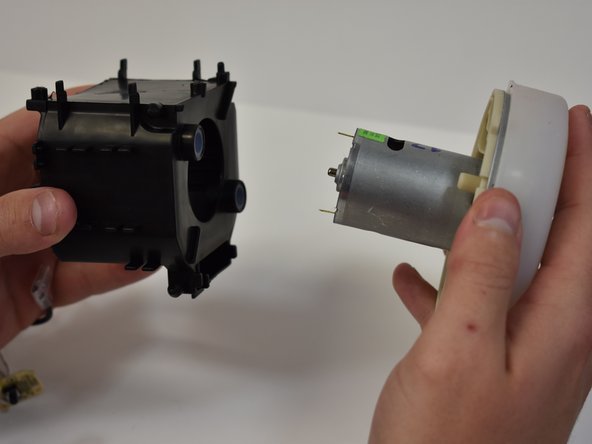
    • The vacuum motor can be removed by pulling straight out of the case.

    • All internals are now removed.

    • Set the case halves aside.

  8. Bissell Pet Hair Eraser Vacuum Motor Replacement: шаг 8, изображение 1 из 1
    • Remove the two 1 mm Phillips #2 screws in the shown locations.

  9. Bissell Pet Hair Eraser Vacuum Motor Replacement: шаг 9, изображение 1 из 2 Bissell Pet Hair Eraser Vacuum Motor Replacement: шаг 9, изображение 2 из 2
    • Disconnect the power leads from the vacuum motor.

    • The red power lead goes on the terminal with the visible red dot.

  10. Bissell Pet Hair Eraser Vacuum Motor Replacement, Vacuum Motor: шаг 10, изображение 1 из 2 Bissell Pet Hair Eraser Vacuum Motor Replacement, Vacuum Motor: шаг 10, изображение 2 из 2
    • Grasp the vacuum motor and housing and pull them apart.

Заключение

To reassemble your device, follow these instructions in reverse order.

Еще один человек закончил это руководство.

Jim Lopez

Участник с: 09/20/18

586 Репутация

Автор 5 руководств

Команда

Central Washington University, Team S1-G1, Pengilly Fall 2018 Участник Central Washington University, Team S1-G1, Pengilly Fall 2018

CWU-PENGILLY-F18S1G1

4 членов

Автор 5 руководств

0 Комментариев

Добавить комментарий

Просмотр статистики:

За последние 24часов: 1

За последние 7 дней: 9

За последние 30 дней: 39

За всё время: 1,126