Перейти к основному содержанию

Bissell SpotClean ProHeat 5207U Spraying Mechanism Replacement

Выберете то, что вам нужно

  1. Bissell SpotClean ProHeat 5207U Spraying Mechanism Replacement, Spraying Mechanism: шаг 1, изображение 1 из 3 Bissell SpotClean ProHeat 5207U Spraying Mechanism Replacement, Spraying Mechanism: шаг 1, изображение 2 из 3 Bissell SpotClean ProHeat 5207U Spraying Mechanism Replacement, Spraying Mechanism: шаг 1, изображение 3 из 3
    • Place the brush in front of you and make sure that the brushes are rotated towards the ceiling.

    • Separate the brush from the hose by pressing the lever.

  2. Bissell SpotClean ProHeat 5207U Spraying Mechanism Replacement: шаг 2, изображение 1 из 3 Bissell SpotClean ProHeat 5207U Spraying Mechanism Replacement: шаг 2, изображение 2 из 3 Bissell SpotClean ProHeat 5207U Spraying Mechanism Replacement: шаг 2, изображение 3 из 3
    • Using a Phillips screwdriver, unscrew the two 12.8 mm screws on the lever cap.

    • Remove the cap on top of the spring mechanism.

  3. Bissell SpotClean ProHeat 5207U Spraying Mechanism Replacement: шаг 3, изображение 1 из 3 Bissell SpotClean ProHeat 5207U Spraying Mechanism Replacement: шаг 3, изображение 2 из 3 Bissell SpotClean ProHeat 5207U Spraying Mechanism Replacement: шаг 3, изображение 3 из 3
    • Grab the spraying mechanism and separate it from the lever by pulling it back.

    • Rotate the spraying mechanism clockwise to fully separate it.

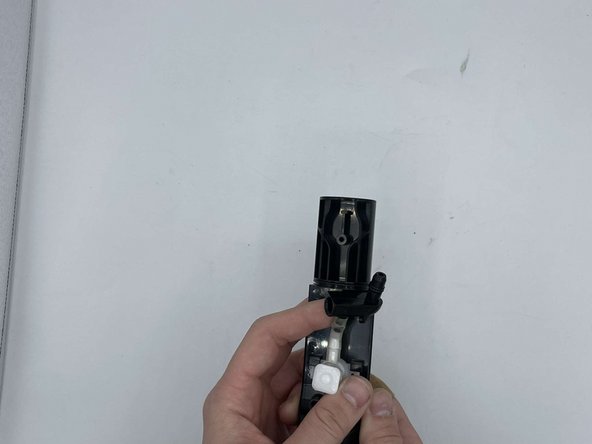
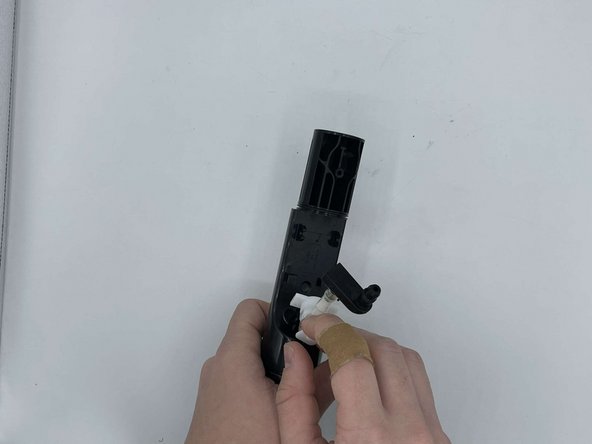
  4. Bissell SpotClean ProHeat 5207U Spraying Mechanism Replacement: шаг 4, изображение 1 из 3 Bissell SpotClean ProHeat 5207U Spraying Mechanism Replacement: шаг 4, изображение 2 из 3 Bissell SpotClean ProHeat 5207U Spraying Mechanism Replacement: шаг 4, изображение 3 из 3
    • Grab the spring mechanism and pull back to fully loosen it.

  5. Bissell SpotClean ProHeat 5207U Spraying Mechanism Replacement: шаг 5, изображение 1 из 3 Bissell SpotClean ProHeat 5207U Spraying Mechanism Replacement: шаг 5, изображение 2 из 3 Bissell SpotClean ProHeat 5207U Spraying Mechanism Replacement: шаг 5, изображение 3 из 3
    Инструмент, используемый на этом этапе:
    Tweezers
    $4.99
    Купить
    • Using tweezers, squeeze the hose clamp prongs together to loosen it.

    • As you are squeezing the hose clamp prongs, pull the spraying mechanism out to remove it.

    • Once the spraying mechanism is removed, and squeeze the clamp prongs again and install the new mechanism.

Заключение

To reassemble your device, follow these instructions in reverse order.

2 участников успешно повторили данное руководство.

Zachary Chandler

Участник с: 09/13/23

369 Репутация

Автор 2 руководств

Команда

University of North Texas, Team 6-4, Kilpatrick Fall 2023 Участник University of North Texas, Team 6-4, Kilpatrick Fall 2023

UNT-KILPATRICK-F23S6G4

4 членов

Автор 5 руководств

0 Комментариев

Добавить комментарий

Просмотр статистики:

За последние 24часов: 0

За последние 7 дней: 0

За последние 30 дней: 3

За всё время: 59