Перейти к основному содержанию

BlackBerry Bold 9700 LCD Display Replacement

Выберете то, что вам нужно

  1. BlackBerry Bold 9700 LCD Display Replacement, Motherboard Housing: шаг 1, изображение 1 из 3 BlackBerry Bold 9700 LCD Display Replacement, Motherboard Housing: шаг 1, изображение 2 из 3 BlackBerry Bold 9700 LCD Display Replacement, Motherboard Housing: шаг 1, изображение 3 из 3
    • Remove the battery by prying the bottom of the battery upward.

    • Once the battery is angled up, pull it away from the top of the device.

    • Be sure to remove all power sources before working on electronic devices to avoid harming yourself or the device.

  2. BlackBerry Bold 9700 LCD Display Replacement: шаг 2, изображение 1 из 3 BlackBerry Bold 9700 LCD Display Replacement: шаг 2, изображение 2 из 3 BlackBerry Bold 9700 LCD Display Replacement: шаг 2, изображение 3 из 3
    • Slide the SIM card from underneath the holding bracket upward toward the battery connector pins.

    • You must remove the SIM card before you can fully disassemble the device. Failure to do so may cause damage to components later on in this process.

  3. BlackBerry Bold 9700 LCD Display Replacement: шаг 3, изображение 1 из 3 BlackBerry Bold 9700 LCD Display Replacement: шаг 3, изображение 2 из 3 BlackBerry Bold 9700 LCD Display Replacement: шаг 3, изображение 3 из 3
    • Pry off the AT&T logo panel with the plastic opening tool.

    • You will hear a snapping sound as the plastic tabs pop out.

  4. BlackBerry Bold 9700 LCD Display Replacement: шаг 4, изображение 1 из 3 BlackBerry Bold 9700 LCD Display Replacement: шаг 4, изображение 2 из 3 BlackBerry Bold 9700 LCD Display Replacement: шаг 4, изображение 3 из 3
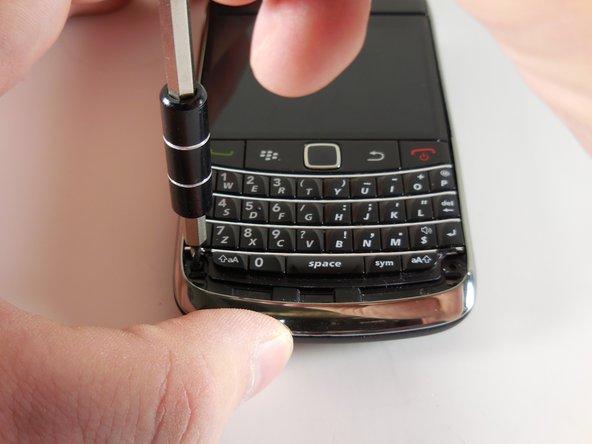
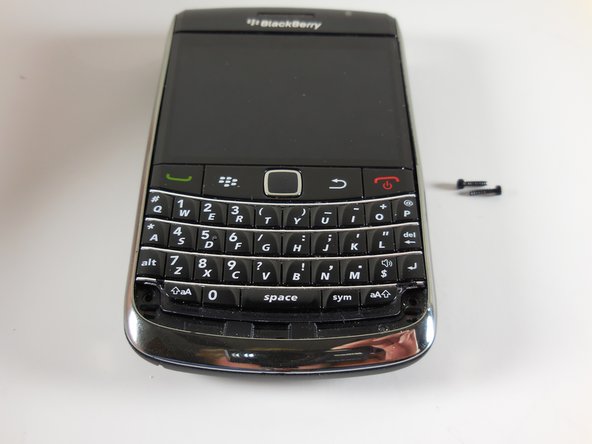
    • Use your T5 Torx screwdriver to remove the two black 5.57mm Torx head screws underneath the keyboard.

  5. BlackBerry Bold 9700 LCD Display Replacement: шаг 5, изображение 1 из 3 BlackBerry Bold 9700 LCD Display Replacement: шаг 5, изображение 2 из 3 BlackBerry Bold 9700 LCD Display Replacement: шаг 5, изображение 3 из 3
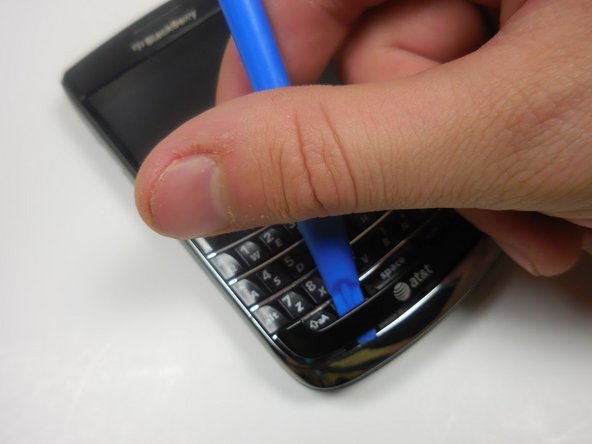
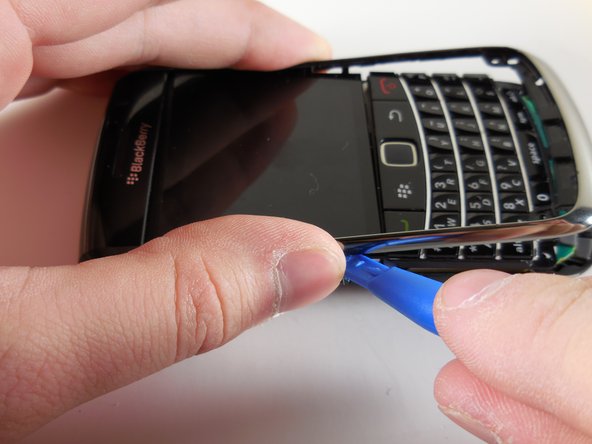
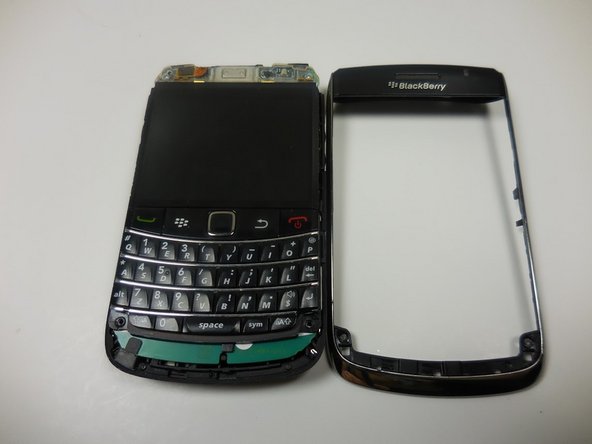
    • Use the plastic opening tool to remove the frame of your device.

    • You will hear a snapping sound as the tabs pop out.

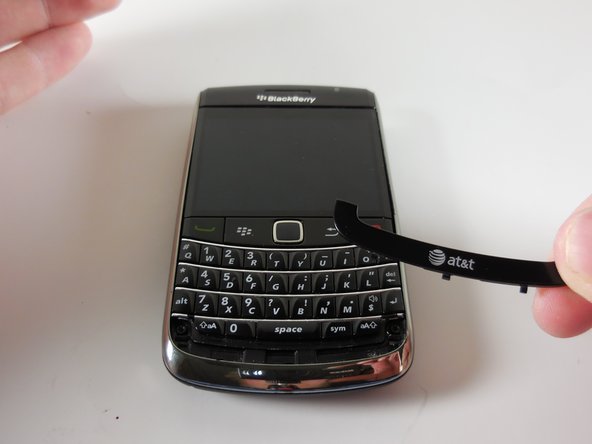
    • Once the case is loosened from the device, slide the case away from the top of the phone.

  6. BlackBerry Bold 9700 LCD Display Replacement: шаг 6, изображение 1 из 3 BlackBerry Bold 9700 LCD Display Replacement: шаг 6, изображение 2 из 3 BlackBerry Bold 9700 LCD Display Replacement: шаг 6, изображение 3 из 3
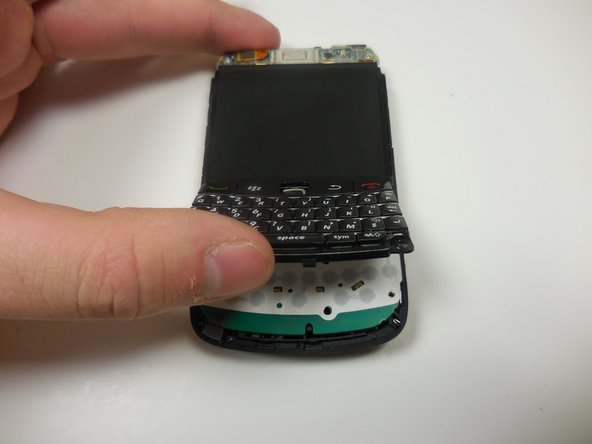
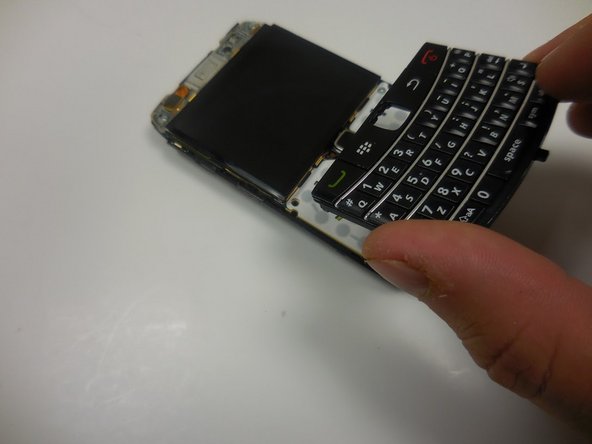
    • Gently lift the bottom of the keyboard upward.

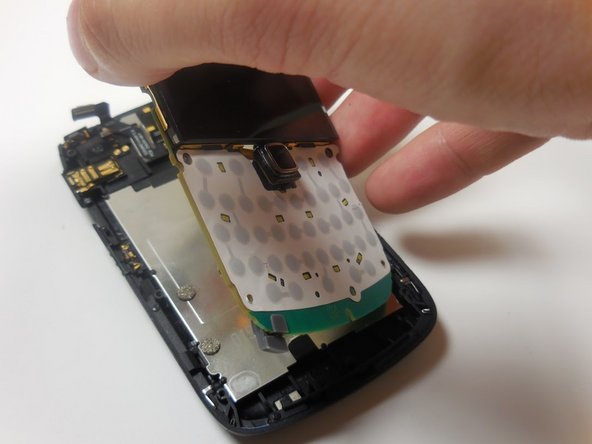
    • Pull the keyboard away from the bottom of the LCD display and lift upward.

  7. BlackBerry Bold 9700 LCD Display Replacement: шаг 7, изображение 1 из 2 BlackBerry Bold 9700 LCD Display Replacement: шаг 7, изображение 2 из 2
    • Remove the two Torx head 4.13mm steel screws with your T5 Torx screwdriver.

  8. BlackBerry Bold 9700 LCD Display Replacement: шаг 8, изображение 1 из 3 BlackBerry Bold 9700 LCD Display Replacement: шаг 8, изображение 2 из 3 BlackBerry Bold 9700 LCD Display Replacement: шаг 8, изображение 3 из 3
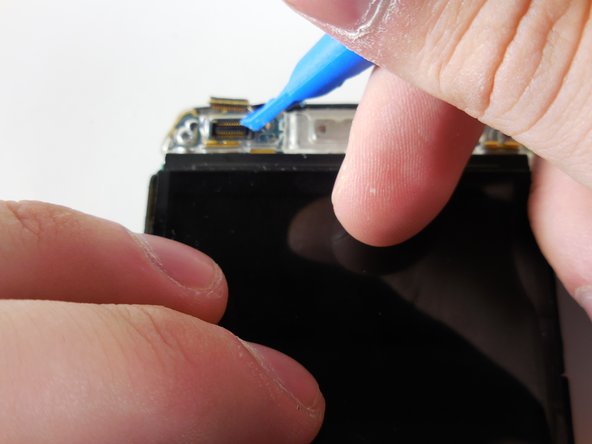
    • Gently pry up the ribbon connector at the top of the phone with a plastic opening tool.

    • Ribbon connectors are fragile. Too much force in the wrong place will damage the ribbon and may force you to replace an entire assembly.

  9. BlackBerry Bold 9700 LCD Display Replacement: шаг 9, изображение 1 из 3 BlackBerry Bold 9700 LCD Display Replacement: шаг 9, изображение 2 из 3 BlackBerry Bold 9700 LCD Display Replacement: шаг 9, изображение 3 из 3
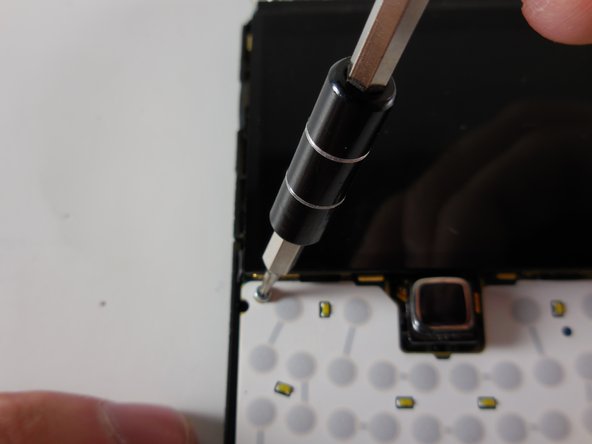
    • Remove the top two Torx head 4.13mm steel screws with your T5 Torx screwdriver.

    • You should now have two 5.57mm black torx head screws and four 4.13mm steel Torx head screws off to the side. Do not lose them.

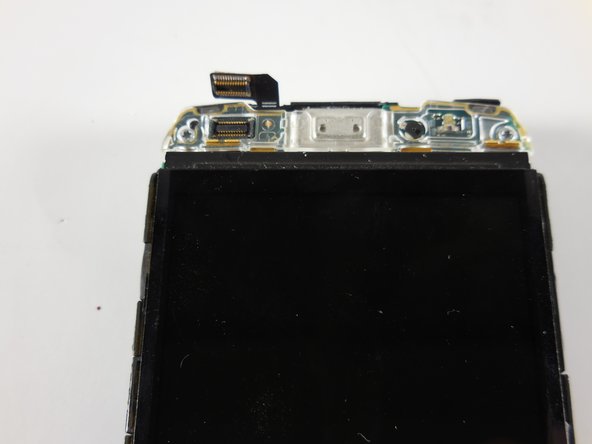
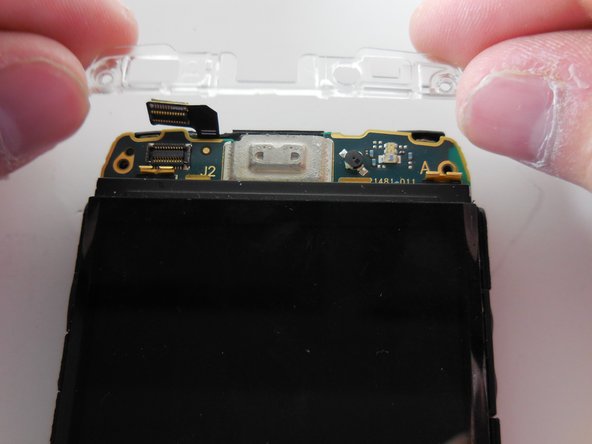
    • Lift the clear plastic cover directly upward.

  10. BlackBerry Bold 9700 LCD Display Replacement: шаг 10, изображение 1 из 3 BlackBerry Bold 9700 LCD Display Replacement: шаг 10, изображение 2 из 3 BlackBerry Bold 9700 LCD Display Replacement: шаг 10, изображение 3 из 3
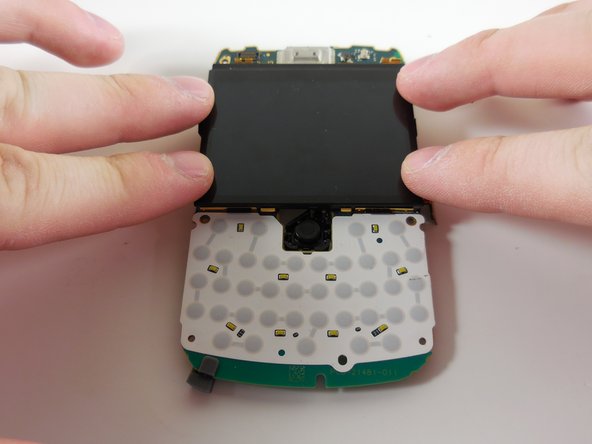
    • Grip the motherboard by the screen

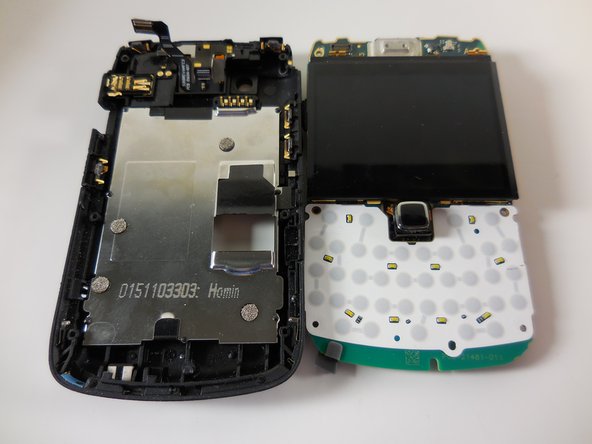
    • Lift the board away from the base of the housing and vertically up.

  11. BlackBerry Bold 9700 LCD Display Replacement, LCD Display: шаг 11, изображение 1 из 2 BlackBerry Bold 9700 LCD Display Replacement, LCD Display: шаг 11, изображение 2 из 2
    • Flip the motherboard over so that the LCD display is flush with the surface of your work space.

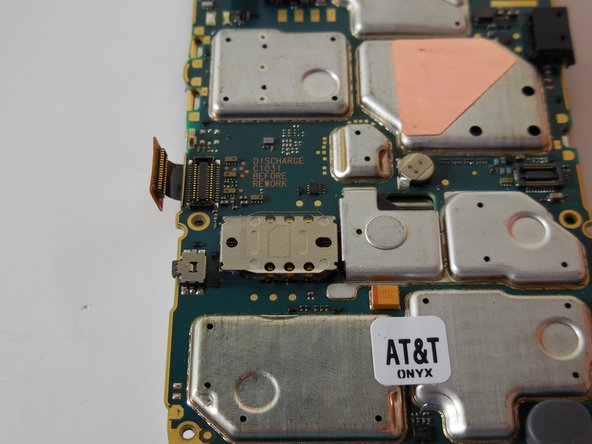
    • Use a plastic opening tool to gently pry up the ribbon connector located on the left hand side of the motherboard.

    • Be gentle. Ribbon connectors are very fragile.

  12. BlackBerry Bold 9700 LCD Display Replacement: шаг 12, изображение 1 из 2 BlackBerry Bold 9700 LCD Display Replacement: шаг 12, изображение 2 из 2
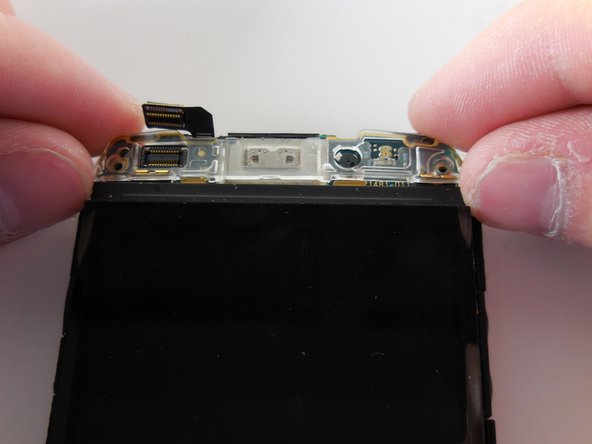
    • Use a plastic opening tool to gently pry back the two golden metal brackets at the top of the display.

  13. BlackBerry Bold 9700 LCD Display Replacement: шаг 13, изображение 1 из 3 BlackBerry Bold 9700 LCD Display Replacement: шаг 13, изображение 2 из 3 BlackBerry Bold 9700 LCD Display Replacement: шаг 13, изображение 3 из 3
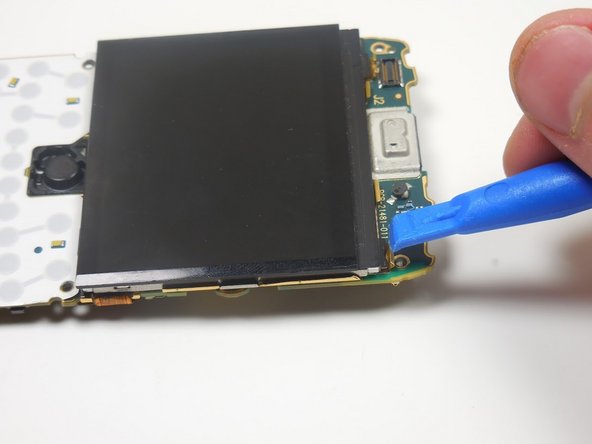
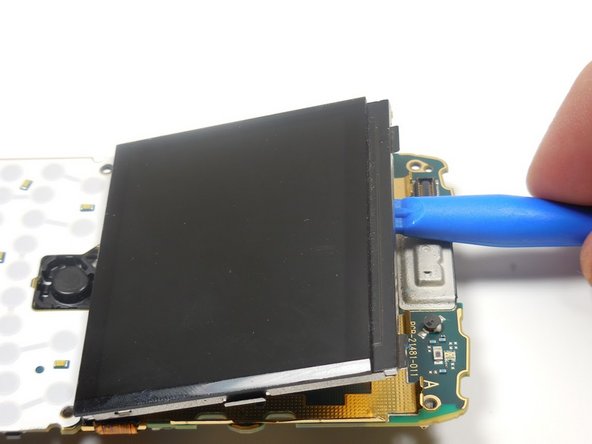
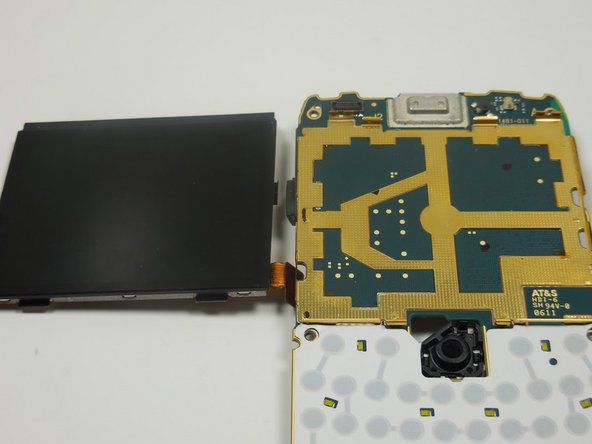
    • Use a plastic opening tool to pry the LCD display off the board.

    • The screen is held onto the board by two strong adhesive pads. You will need to pry vigorously. Do not be afraid of breaking the board. The screen will come off well before the board snaps.

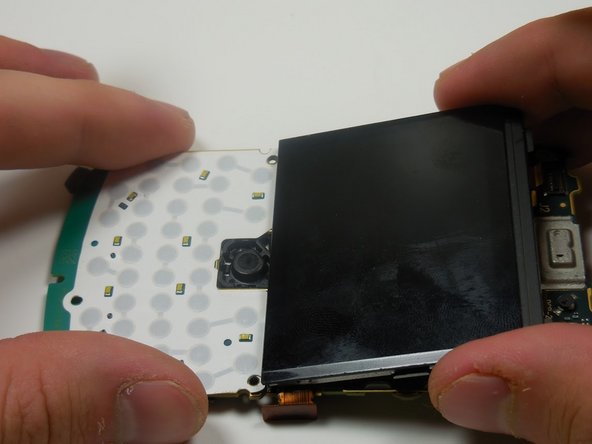
    • Removing the trackpad prior to this repair is optional. If you wish to do so, follow this guide for removal instructions.

  14. BlackBerry Bold 9700 LCD Display Replacement: шаг 14, изображение 1 из 3 BlackBerry Bold 9700 LCD Display Replacement: шаг 14, изображение 2 из 3 BlackBerry Bold 9700 LCD Display Replacement: шаг 14, изображение 3 из 3
    • Insert the bottom prongs of the new LCD display into the golden slots above the trackpad resting panel.

    • Firmly press the new display into place.

  15. BlackBerry Bold 9700 LCD Display Replacement: шаг 15, изображение 1 из 2 BlackBerry Bold 9700 LCD Display Replacement: шаг 15, изображение 2 из 2
    • Use a plastic opening tool to bend the golden brackets back into place

    • Press the ribbon connector into place.

Заключение

To reassemble your device, follow these instructions in reverse order.

6 участников успешно повторили данное руководство.

Patrick

Участник с: 03/11/15

622 Репутация

Автор 3 руководств

Команда

Colorado Springs, Team 9-3, Panko Spring 2015 Участник Colorado Springs, Team 9-3, Panko Spring 2015

UCCS-PANKO-S15S9G3

2 членов

Автор 7 руководств

0 Комментариев

Добавить комментарий

Просмотр статистики:

За последние 24часов: 3

За последние 7 дней: 4

За последние 30 дней: 15

За всё время: 5,814