Введение
This is a tutorial with tips to replace your Blackberry Classic Q20 battery.
Выберете то, что вам нужно
-
-
Use a SIM tool to remove the SIM and micro SD card trays.
-
-
-
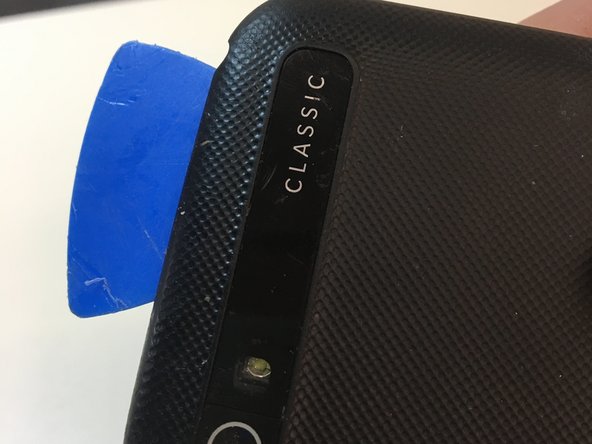
Use a Jimmy to pry between the midframe and back cover. Wiggle back and forward until the first clip releases.
-
Switch to a plastic spudger and continue gently prying along the edge of the back cover to release the clips.
-
Once all the clips are released around the edge of the cover, you will need to use a guitar pick to cut through adhesive on the top and bottom of the cover. Take care not to cut through the battery ribbon cable. The top adhesive is behind the glass feature on the back cover. You may need to apply some heat.
-
-
-
-
One T5 (lower) and one PH00 (upper) screwdriver heads are needed to remove the battery's connector shield.
-
Then use a spudger to pry the battery's connector from the motherboard. Be sure to pry with even pressure.
-
-
-
Use extreme caution when removing the battery. It is directly against the motherboard, and piercing the battery could corrode other components. It could also catch flame.
-
Take off the battery shield, and use a scalpel or other flat tool to remove the foam on the connector. Place these onto new battery.
-
Carefully apply some low heat to the stickers covering the battery and gently peel them off. The white sticker is connected to adhesive under the battery.
-
Gently pry up on the edges of the battery so that the adhesive will come out more easily. Take great care not to pierce the black "skin" on the battery.
-
Slowly start pulling the adhesive tab out, regripping close to the battery as it starts to come out.
-
-
-
Be sure to add adhesive to the new battery, and replace the foam on the connector.
-


To reassemble your device, follow these instructions in reverse order. Remember to replace the foam pad on the connector.
To reassemble your device, follow these instructions in reverse order. Remember to replace the foam pad on the connector.
Отменить: Я не выполнил это руководство.
17 участников успешно повторили данное руководство.
Команда

8 Комментариев
Glad it helped!
Success! Nerve racking for an amateur and I could not have done it without your guidance.
Thank you.
So happy to be of help!
My BB is going to have a 2nd life. Unbelievably irresponsible to glue everything together.
Thx Jessica for this great guide. It worked perfectly and in a spell.
Worked like a charm with a new battery from Ebay for $10. You can get a roll of double sided crafter”s tape at Dollar Tree for a buck and it works perfect. Do use some heat (hair dryer) and take your time prying the battery out. Follow the instructions and look at pictures carefully.
Wow, that was awful. As I was trying to remove the battery, the pull tab immediately tore to shreds. Had to very carefully pry the battery out, bending it in the process. So I put on some safety goggles and gloves before proceeding (in the bathroom so I would have someplace safe to drop the %#*@ thing if it spontaneously burst into flame). Had to carefully work a scalpel under the battery to sever the ungodly amount of adhesive. It all worked out well eventually but I was sweating bullets the whole time. I’ve done stuff like that for years but this was easily one of the hardest battery replacements ever.
Thanks for the guide - couldn’t have done it without.
Thanks for this tutorial. It saved my Classic bought on the second-hand market in new condition out of the box but whose battery was almost dead. Rather than buying a new replacement battery, too expansive for me, I got one from another very badly damaged Classic that I had in my collection. So I carried out a transplant from one device to another by following your tutorial.