Перейти к основному содержанию

Blu Grand M Plastic Plate Replacement

Абсолютно необходимое руководство
Это руководство предназначено только для использования в качестве обязательного условия для других руководств. Оно не полностью само по себе.

Выберете то, что вам нужно

  1. Blu Grand M Plastic Plate Replacement, Battery: шаг 1, изображение 1 из 2 Blu Grand M Plastic Plate Replacement, Battery: шаг 1, изображение 2 из 2
    • Remove the two plastic plates with a plastic opening tool.

  2. Blu Grand M Plastic Plate Replacement: шаг 2, изображение 1 из 1
    • Using a Phillips #000 screwdriver, remove the 3mm screws. Be sure to do this for the top and bottom of the phone.

  3. Blu Grand M Plastic Plate Replacement: шаг 3, изображение 1 из 3 Blu Grand M Plastic Plate Replacement: шаг 3, изображение 2 из 3 Blu Grand M Plastic Plate Replacement: шаг 3, изображение 3 из 3
    • Remove SIM card tray with paperclip or SIM card tray removal tool.

    • Push down on the phone beside the camera and up on the backplate with your thumbs to remove the back plate. Remove adhesive if necessary.

  4. Blu Grand M Plastic Plate Replacement: шаг 4, изображение 1 из 2 Blu Grand M Plastic Plate Replacement: шаг 4, изображение 2 из 2
    • There is a patch of adhesive underneath the battery, which can make it difficult to remove.

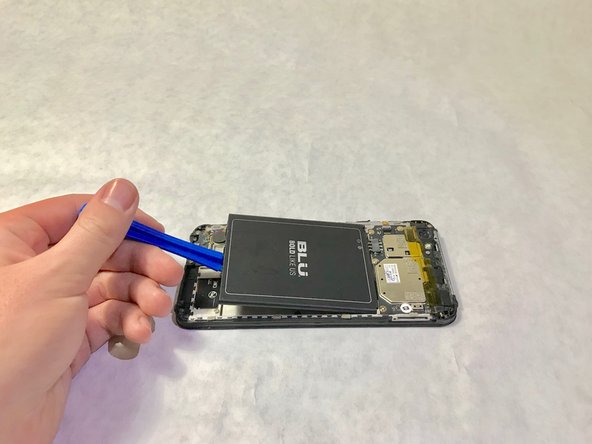
    • Place the plastic opening tool in the highlighted indent, and push up on the battery to remove it.

  5. Blu Grand M Plastic Plate Replacement, Plastic Plate: шаг 5, изображение 1 из 2 Blu Grand M Plastic Plate Replacement, Plastic Plate: шаг 5, изображение 2 из 2
    • Remove the yellow plastic tape using a pair of tweezers.

  6. Blu Grand M Plastic Plate Replacement: шаг 6, изображение 1 из 3 Blu Grand M Plastic Plate Replacement: шаг 6, изображение 2 из 3 Blu Grand M Plastic Plate Replacement: шаг 6, изображение 3 из 3
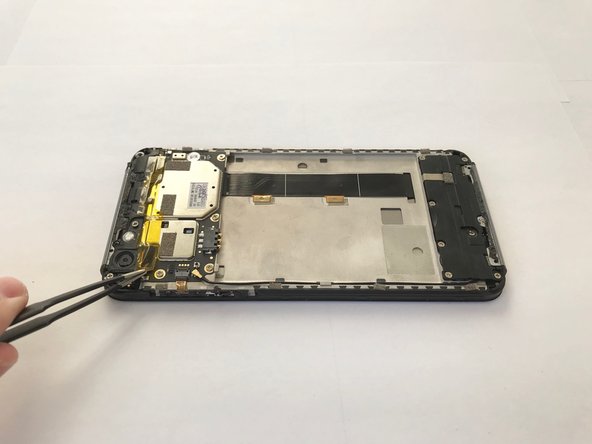
    • Use a Phillips #000 screwdriver to remove two black 4.0mm screws.

    • Use a Phillips #000 screwdriver to remove 2 silver 4.0mm screws

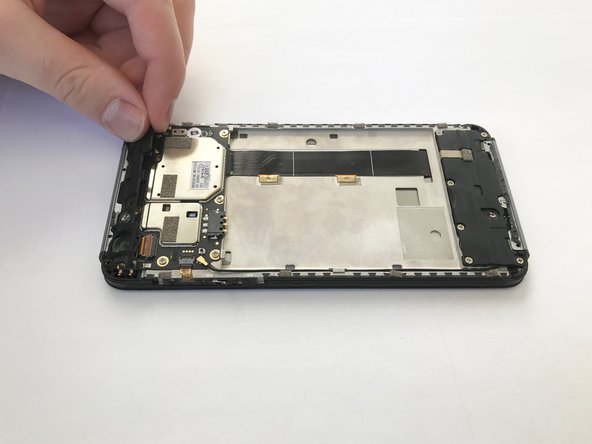
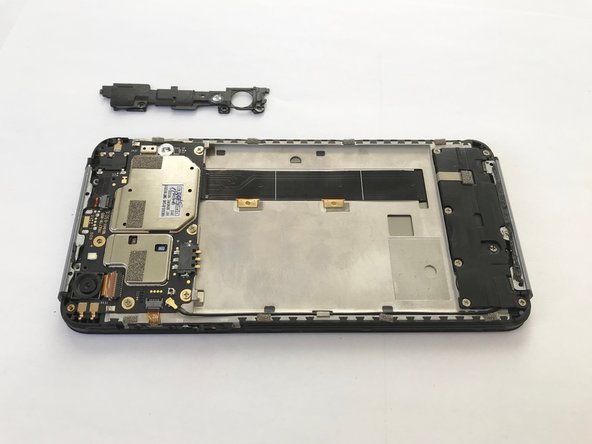
    • Remove the plastic cover along the top by tugging on it on the corner as shown.

Заключение

To reassemble your device, follow these instructions in reverse order.

Еще один человек закончил это руководство.

Cameron Retzlaff

Участник с: 09/17/18

608 Репутация

Автор 5 руководств

Команда

Washington State, Team S9-G2, Hope Fall 2018 Участник Washington State, Team S9-G2, Hope Fall 2018

WSU-HOPE-F18S9G2

3 членов

Автор 5 руководств

0 Комментариев

Добавить комментарий

Просмотр статистики:

За последние 24часов: 0

За последние 7 дней: 0

За последние 30 дней: 0

За всё время: 95