Введение
This guide will be helpful if your camera has become cloudy and in need of cleaning, or even if it needs to be replaced outright.
Выберете то, что вам нужно
-
Шаг 1 Battery
Careful: steps 1-2 are sourced from a guide that's marked as in-progress.
-
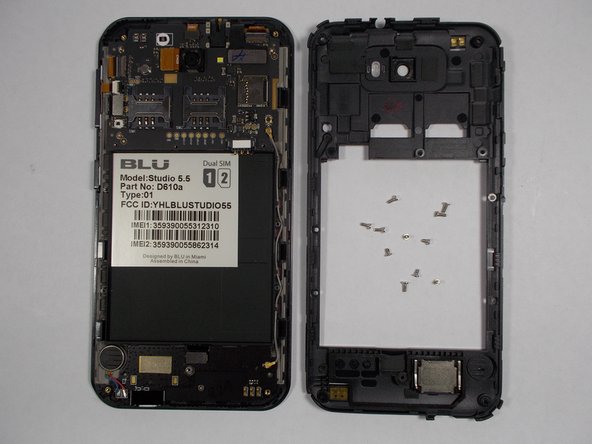
Flip over your Studio 5.5 so the back is facing you.
-
Use either the spudger or your fingernail to pull up on the slot in the lower left corner and remove the back cover.
-
-
-
Place your finger in the small groove beneath the battery.
-
Push the battery toward the top of the phone and lift it out.
-
-
-
Begin by removing the 12 3.5mm screws along the back of the device.
-
1 of these screws will be underneath a white sticker. Just press the screwdriver through it and remove it normally.
-
-
-
-
Using your plastic opening tool, begin carefully prying the plastic shell from the phone.
-
Make your way around the edge slowly and lift the shell off when you have made a full circuit.
-
-
-
Locate and unplug seven connectors on the motherboard.
-
Those marked in red are pulled straight up, away from the phone.
-
The connector marked in orange is pulled out horizontally.
-
-
-
Using the plastic opening tool, you can now lift the motherboard straight up and out.
-
-
-
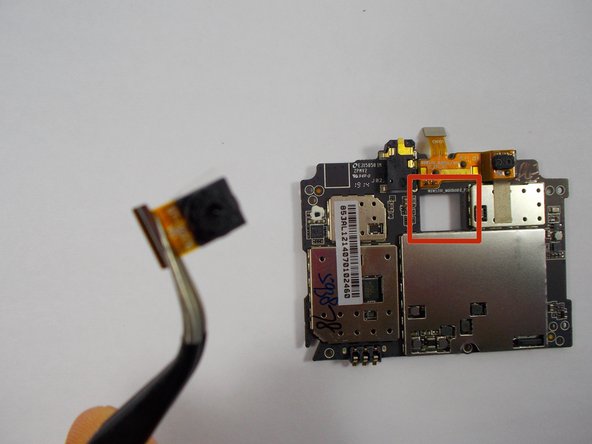
Carefully wedge the plastic remover tool underneath the corner of the camera module and slowly pry until it comes free.
-
-
-
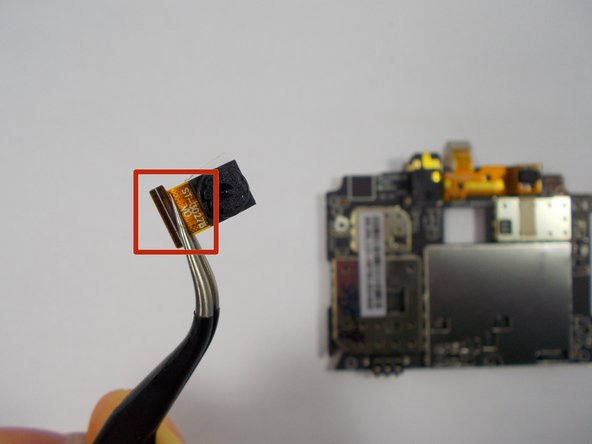
Use tweezers to lift the camera module out, taking care not to get any fingerprints on it.
-


To reassemble your device, follow these instructions in reverse order.
To reassemble your device, follow these instructions in reverse order.
Отменить: Я не выполнил это руководство.
3 участников успешно повторили данное руководство.

Команда

UMass Dartmouth, Team 1-2, Shastany Fall 2014 Участник UMass Dartmouth, Team 1-2, Shastany Fall 2014
UMASSD-SHASTANY-F14S1G2
3 членов
Автор 3 руководств