Введение
In this guide, we will be removing the micro usb port and the circuit board it is attached to, so that a new one may be installed.
Выберете то, что вам нужно
-
Шаг 1 Battery
Careful: steps 1-2 are sourced from a guide that's marked as in-progress.
-
Flip over your Studio 5.5 so the back is facing you.
-
Use either the spudger or your fingernail to pull up on the slot in the lower left corner and remove the back cover.
-
-
-
Place your finger in the small groove beneath the battery.
-
Push the battery toward the top of the phone and lift it out.
-
-
-
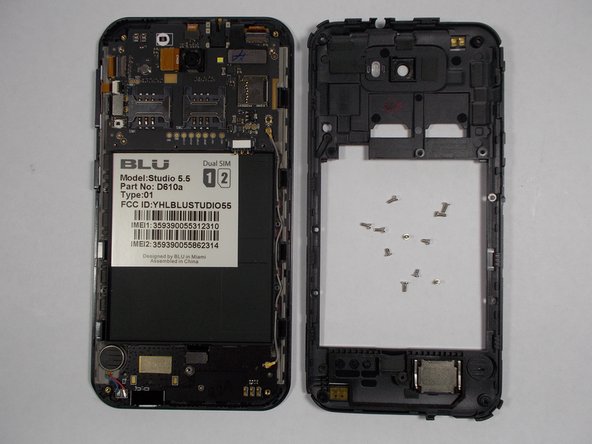
Begin by removing the 12 screws along the back of the device.
-
1 of these screws will be underneath a white sticker. Just press the screwdriver through it and remove it normally.
-
-
-
-
Using your plastic opening tool, begin carefully prying the plastic shell from the phone.
-
Make your way around the edge slowly and lift the shell off when you have made a full circuit.
-
-
-
Using your tweezers, locate the small gold-colored plug in the bottom left corner and pull it straight out.
-
-
-
Grip the entire circuit board firmly with your tweezers and pull it towards the bottom of the phone and out.
-


To reassemble your device, follow these instructions in reverse order.
To reassemble your device, follow these instructions in reverse order.
Отменить: Я не выполнил это руководство.
6 участников успешно повторили данное руководство.

Команда

UMass Dartmouth, Team 1-2, Shastany Fall 2014 Участник UMass Dartmouth, Team 1-2, Shastany Fall 2014
UMASSD-SHASTANY-F14S1G2
3 членов
Автор 3 руководств
3 Комментариев
i want buy chargin port sir my blue cahrging port was dead plz help me i want buy
Where do i buy the %#*@ micro usb port