Перейти к основному содержанию

Boucher un trou dans une cloison sèche

Выберете то, что вам нужно

  1. Boucher un trou dans une cloison sèche, Boucher un trou dans une cloison sèche: шаг 1, изображение 1 из 1
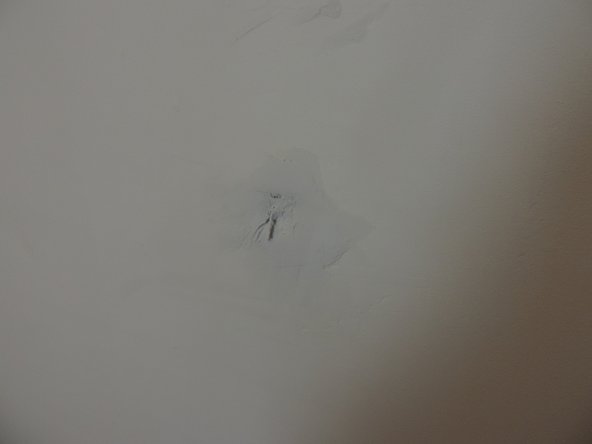
    • Voici un trou typique. Il traverse la cloison sèche et doit être réparé.

    • Ce trou mesure environ 5 cm sur 5 cm.

  2. Boucher un trou dans une cloison sèche: шаг 2, изображение 1 из 1
    • Pour cette réparation, vous aurez besoin (de gauche à droite): d'un patch de réparation de mur adhésif, d'enduit, d'une ficelle, d'un couteau à mastic et de papier de verre.

    • En plus : peinture de la couleur du mur que vous réparez et morceaux de carton pour boucher le le trou.

  3. Boucher un trou dans une cloison sèche: шаг 3, изображение 1 из 1
    • Prenez un morceau de carton et attachez-y un bout de ficelle d'environ 23 cm de long.

    • Vous aurez besoin du morceau de carton le plus épais disponible pour assurer une réparation plus stable.

  4. Boucher un trou dans une cloison sèche: шаг 4, изображение 1 из 1
    • Mettez le carton dans le trou.

    • Tirez sur la ficelle de sorte que le carton affleure le mur.

    • Cette étape facilite le plâtrage.

  5. Boucher un trou dans une cloison sèche: шаг 5, изображение 1 из 1
    • Enduisez soigneusement le trou et veillez à bien tendre la corde pendant ce processus.

  6. Boucher un trou dans une cloison sèche: шаг 6, изображение 1 из 1
    • Une fois le plâtre posé, laissez-le sécher (cela prendra plusieurs heures).

    • Trouvez un moyen de laisser la ficelle tendue, comme on le voit ici avec une poignée de porte.

  7. Boucher un trou dans une cloison sèche: шаг 7, изображение 1 из 1
    • Une fois sec, continuez à enduire complètement le trou.

  8. Boucher un trou dans une cloison sèche: шаг 8, изображение 1 из 2 Boucher un trou dans une cloison sèche: шаг 8, изображение 2 из 2
    • Préparez le papier de verre et commencez à poncer toutes les bosses et aspérités.

    • Coupez la ficelle qui dépasse.

  9. Boucher un trou dans une cloison sèche: шаг 9, изображение 1 из 2 Boucher un trou dans une cloison sèche: шаг 9, изображение 2 из 2
    • Décollez le patch mural adhésif de son papier ciré.

    • Centrez le patch sur le trou et posez-le.

  10. Boucher un trou dans une cloison sèche: шаг 10, изображение 1 из 2 Boucher un trou dans une cloison sèche: шаг 10, изображение 2 из 2
    • Pour cette prochaine étape, vous appliquerez du plâtre sur le trou bouché.

    • Appliquez jusqu'à ce que le patch soit invisible.

  11. Boucher un trou dans une cloison sèche: шаг 11, изображение 1 из 1
    • Pour terminer cette réparation, repeignez le mur. Cela rendra le résultat plus attrayant, comme on le voit ici.

    • Afin de montrer le trou réparé, nous n'avons appliqué qu'une seule couche de peinture. Faites au moins 2 couches pour couvrir entièrement la réparation.

Заключение

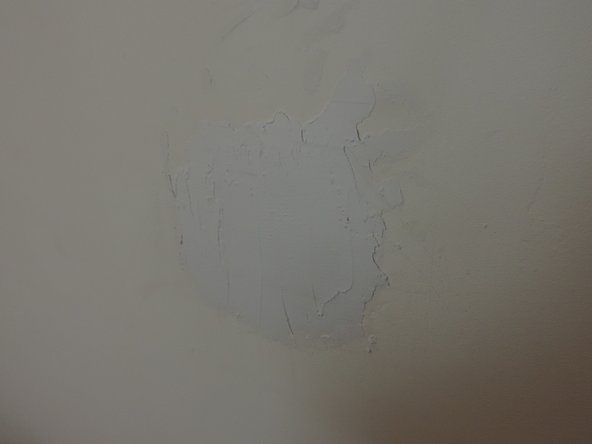
Maintenant, invitez vos amis et faites la fête !

14 участников успешно повторили данное руководство.

Особая благодарность этим переводчикам:

en fr

100%

Эти переводчики помогают нам починить мир! Хотите внести свой вклад?
Начните переводить ›

Michael Toscano

Участник с: 03/16/15

393 Репутация

1 руководство автора

6 Комментариев

I suggest using a sanding sponge or block in step 8

Dennis - Ответить

Perfect mix of comedy and helpfulness!!

Nathanael - Ответить

Not strong enough. Get another piece of drywall and cut it 2" larger than the hole all around . Turn drywall upside down and with a knife score the paper slightly smaller than the hole and bend back the drywall and peel off piece but leave the top layer of paper attached. Do that on all four sides and you will have a two inch flap all around edge of repair with drywall in the middle. Put patching compound on edge of the piece of drywall and flap and some on wall at hole. Place piece of drywall in hole and with a 6" putty knife scrape out excess putty by dragging putty knife from center of repair to outside of damaged area. Continue doing this until paper flap is smooth against wall with no excess in a lump underneath. When dry, add more putty in a circular motion around the paper flap until smooth. When dry you can sand it or use a wet sponge that is wrung out really well and smooth it out with no dust. Now paint it.

rswiebe - Ответить

I wholeheartedly agree. I have over 30 years experience as a commercial drywall finisher and I would do it the same way rswiebe says

timothy mccreery -

that size hole needs something more then just plaster to fill it, I would have placed a strip of wood 1x1/2 in the wall and using drywall screws secure on either side of the hole then glue or screw a new piece of wall board that is just smaller then the hole to the wood strip and use the plaster to finish sealing the hole. it makes for a stronger repair.

of course if it is a rental then your repair is good enough

Seanpatrick2000 - Ответить

Добавить комментарий

Просмотр статистики:

За последние 24часов: 3

За последние 7 дней: 26

За последние 30 дней: 94

За всё время: 11,240