Перейти к основному содержанию

Braun Aromaster KF440 Heating Element Replacemen

Выберете то, что вам нужно

  1. Braun Aromaster KF440 Heating Element Replacemen, Access the base: шаг 1, изображение 1 из 1
    • Remove the carafe (coffee pot) from the coffee maker.

    • Turn the Braun Aromaster KF 440 upside down so the base is exposed.

  2. Braun Aromaster KF440 Heating Element Replacemen, Remove the nut: шаг 2, изображение 1 из 1
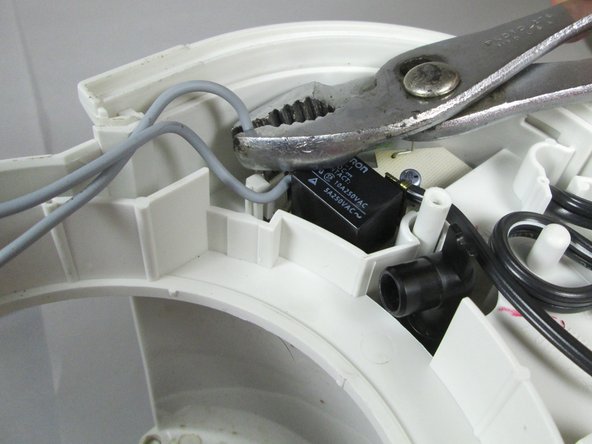
    • Locate the nut at the center of the base and unscrew it with a pair of basic pliers.

  3. Braun Aromaster KF440 Heating Element Replacemen, Remove the cover: шаг 3, изображение 1 из 1
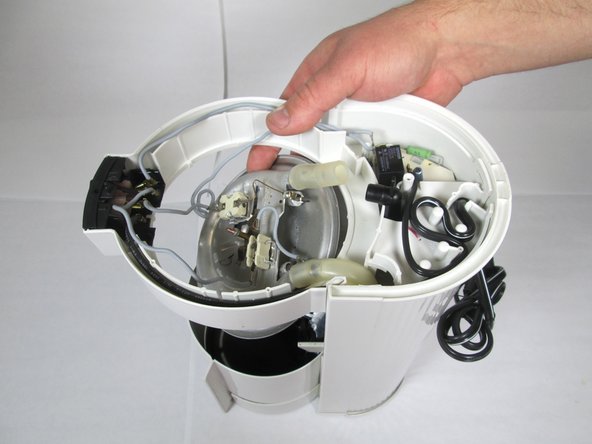
    • Gently lift the cover away from the bottom of the coffee maker and remove it.

  4. Braun Aromaster KF440 Heating Element Replacemen, Remove the first center tube from the one-way valve: шаг 4, изображение 1 из 2 Braun Aromaster KF440 Heating Element Replacemen, Remove the first center tube from the one-way valve: шаг 4, изображение 2 из 2
    • Using the larger plastic opening tool, gently push the tubing off of the one-way valve. (If the tubing is being stubborn and won't come off, run the metal spudger around the inside of the tubing to free it up.)

  5. Braun Aromaster KF440 Heating Element Replacemen, Remove second tubing from hose: шаг 5, изображение 1 из 2 Braun Aromaster KF440 Heating Element Replacemen, Remove second tubing from hose: шаг 5, изображение 2 из 2
    • Using the larger plastic opening tool, gently push the tubing off of the second one-way valve. (If the tubing is being stubborn and won't come off, run the metal spudger around the inside of the tubing to free it up.)

  6. Braun Aromaster KF440 Heating Element Replacemen, Locate two wires: шаг 6, изображение 1 из 1
    • Looking at bottom of the coffee maker, locate the two gray wires attached to the circuit board.

  7. Braun Aromaster KF440 Heating Element Replacemen, Remove wires.: шаг 7, изображение 1 из 3 Braun Aromaster KF440 Heating Element Replacemen, Remove wires.: шаг 7, изображение 2 из 3 Braun Aromaster KF440 Heating Element Replacemen, Remove wires.: шаг 7, изображение 3 из 3
    • Remove each wire by gripping with pliers and then gently pulling straight up.

    • If you're having a hard time getting the wires off, gently wiggle the wire end back and forth with the pliers while keeping sufficient downward force on the circuit board with your finger. The wire should pop off easily.

  8. Braun Aromaster KF440 Heating Element Replacemen, Locate switch wires: шаг 8, изображение 1 из 1
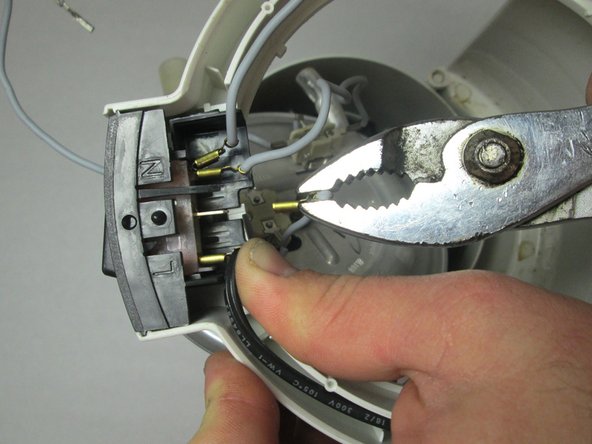
    • Locate the second set of attached wires, which are connected to the on/off switch.

  9. Braun Aromaster KF440 Heating Element Replacemen, Remove switch wires: шаг 9, изображение 1 из 3 Braun Aromaster KF440 Heating Element Replacemen, Remove switch wires: шаг 9, изображение 2 из 3 Braun Aromaster KF440 Heating Element Replacemen, Remove switch wires: шаг 9, изображение 3 из 3
    • Notice that there are 4 wires to remove.

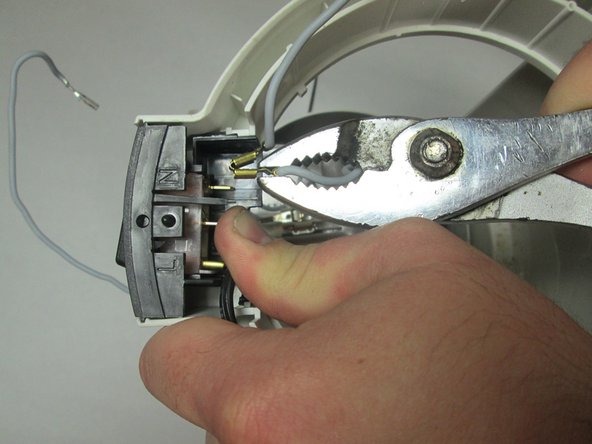
    • Remove each wire by gently gripping with pliers and then pulling straight back.

    • Again, if your having a hard time removing the wires, revert back to the tip given in step 4.

  10. Braun Aromaster KF440 Heating Element Replacemen, Pull away heating element: шаг 10, изображение 1 из 1
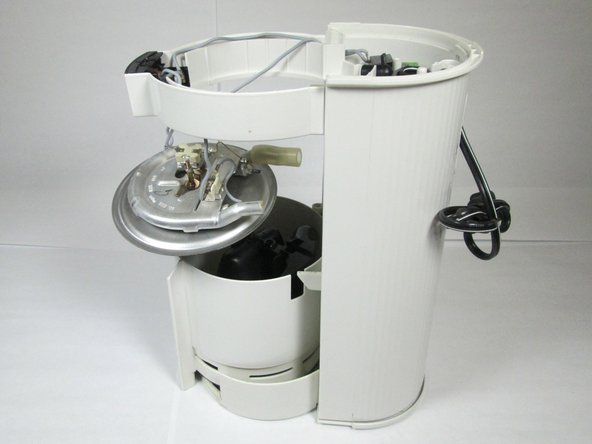
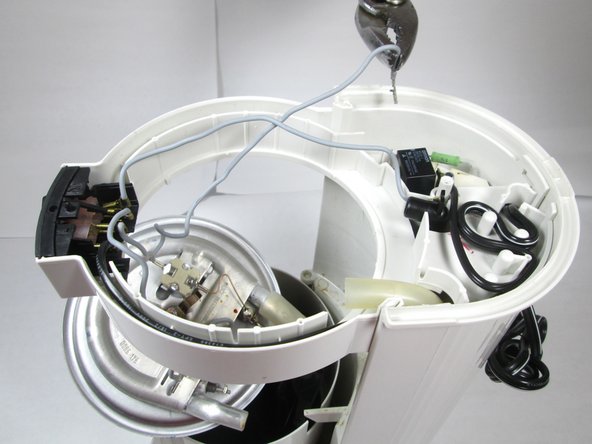
    • Once everything is detached, the heating element should come right out.

  11. Braun Aromaster KF440 Heating Element Replacemen, Remove bolts and nuts: шаг 11, изображение 1 из 2 Braun Aromaster KF440 Heating Element Replacemen, Remove bolts and nuts: шаг 11, изображение 2 из 2
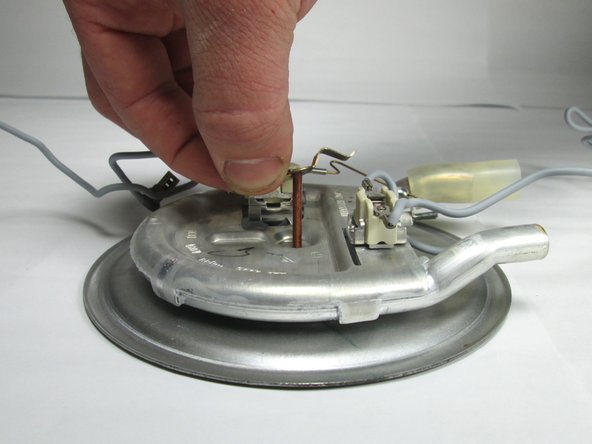
    • Remove the bolt by simply screwing it off by hand, or by using the pliers again if you need to.

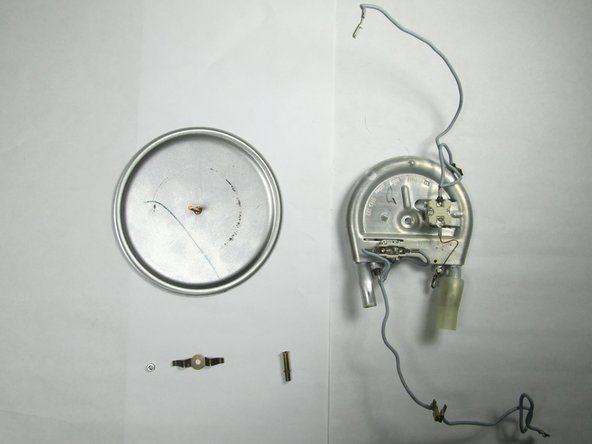
    • Remove the metal spacer. ( Note: Make sure you are aware which way it came off because it does matter when you go to reassemble)

    • Remove the wing nut.

  12. Braun Aromaster KF440 Heating Element Replacemen, Separate heating element from heating plate: шаг 12, изображение 1 из 2 Braun Aromaster KF440 Heating Element Replacemen, Separate heating element from heating plate: шаг 12, изображение 2 из 2
    • Pull the heating element off of the heating plate.

Заключение

To reassemble your device, follow these instructions in reverse order.

Еще один человек закончил это руководство.

Dennis

Участник с: 10/20/14

315 Репутация

Автор 2 руководств

Команда

Baylor, Team 8-12, Williams Fall 2014 Участник Baylor, Team 8-12, Williams Fall 2014

BU-WILLIAMS-F14S8G12

3 членов

Автор 10 руководств

0 Комментариев

Добавить комментарий

Просмотр статистики:

За последние 24часов: 2

За последние 7 дней: 14

За последние 30 дней: 44

За всё время: 4,139