Перейти к основному содержанию

Cambridge SoundWorks OontZ Angle Plus Speakers Replacement

Выберете то, что вам нужно

  1. Cambridge SoundWorks OontZ Angle Plus Speakers Replacement, Rubber Casing: шаг 1, изображение 1 из 1
    • Remove the six screw covers from the bottom of the device.

  2. Cambridge SoundWorks OontZ Angle Plus Speakers Replacement: шаг 2, изображение 1 из 1
    • Starting from the screw covers, remove the front and back casing of the device.

  3. Cambridge SoundWorks OontZ Angle Plus Speakers Replacement: шаг 3, изображение 1 из 1
    • Carefully pull off the casing covering the ends.

  4. Cambridge SoundWorks OontZ Angle Plus Speakers Replacement: шаг 4, изображение 1 из 1
    • Slowly remove the casing from the top of the device.

  5. Cambridge SoundWorks OontZ Angle Plus Speakers Replacement, Speaker Grill: шаг 5, изображение 1 из 1
    • Unscrew the five 11.5mm Phillips screws from the bottom plate.

  6. Cambridge SoundWorks OontZ Angle Plus Speakers Replacement: шаг 6, изображение 1 из 1
    • Carefully pull apart the bottom and top plates, using the blue plastic opening tool.

  7. Cambridge SoundWorks OontZ Angle Plus Speakers Replacement: шаг 7, изображение 1 из 1
    • Once the plates are separated, slowly pull the bottom plate away from the top plate.

    • There are wires connected to both plates, so be cautious while doing this step.

  8. Cambridge SoundWorks OontZ Angle Plus Speakers Replacement: шаг 8, изображение 1 из 1
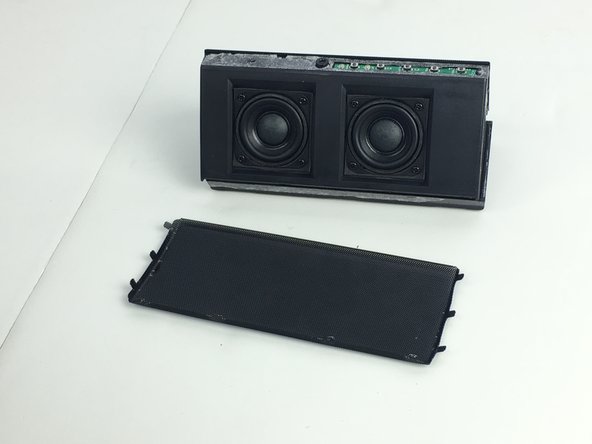
    • Use the metal spudger to bend the three bendable clamps on the ends of the speaker cover.

    • Beware, the bending process requires patience and extra time.

  9. Cambridge SoundWorks OontZ Angle Plus Speakers Replacement: шаг 9, изображение 1 из 1
    • Next, use the metal spudger to bend the four bendable clamps on the bottom of the speaker cover.

    • This step also requires some time and patience.

  10. Cambridge SoundWorks OontZ Angle Plus Speakers Replacement: шаг 10, изображение 1 из 2 Cambridge SoundWorks OontZ Angle Plus Speakers Replacement: шаг 10, изображение 2 из 2
    • Finally, bend the speaker cover upward and it will slide out.

  11. Cambridge SoundWorks OontZ Angle Plus Speakers Replacement, Speakers: шаг 11, изображение 1 из 1
    • With some force, push the motherboard straight in toward the center of the device.

  12. Cambridge SoundWorks OontZ Angle Plus Speakers Replacement: шаг 12, изображение 1 из 1
    • Pull the motherboard straight out of the device.

    • There is some adhesive on the motherboard that holds it in place. This makes the motherboard fit in the groove rather tight.

  13. Cambridge SoundWorks OontZ Angle Plus Speakers Replacement: шаг 13, изображение 1 из 1
    • Unplug the speaker's connector from the motherboard.

  14. Cambridge SoundWorks OontZ Angle Plus Speakers Replacement: шаг 14, изображение 1 из 1
    • Unscrew the eight screws holding the speakers in place.

  15. Cambridge SoundWorks OontZ Angle Plus Speakers Replacement: шаг 15, изображение 1 из 1
    • Desolder the the wires connected to the back side of both speakers.

  16. Cambridge SoundWorks OontZ Angle Plus Speakers Replacement: шаг 16, изображение 1 из 1
    • Carefully push the speakers out one at a time.

Заключение

To reassemble your device, follow these instructions in reverse order.

David Rice

Участник с: 02/10/16

161 Репутация

1 руководство автора

Команда

USF Tampa, Team 1-1, Nance Spring 2016 Участник USF Tampa, Team 1-1, Nance Spring 2016

USFT-NANCE-S16S1G1

4 членов

Автор 6 руководств

0 Комментариев

Добавить комментарий

Просмотр статистики:

За последние 24часов: 0

За последние 7 дней: 4

За последние 30 дней: 7

За всё время: 1,894