Введение
This is a step by step walkthrough showing you how to remove the current focusing screen and replace it with another, in order to restore auto focus or implement a different focusing screen for manual focusing.
Выберете то, что вам нужно
-
-
Turn the camera off using the power switch on the top of the camera.
-
Open the battery compartment on the bottom of the camera and remove the battery. Then close the battery compartment.
-
-
-
While holding both the camera's body and lens securely, press and hold the lens release button located below the marking plate.
-
Rotate the lens counter-clockwise until it stops turning, and gently pull the lens away from the body.
-
Place the lens some place safe. It will not be used in this guide.
-
-
-
-
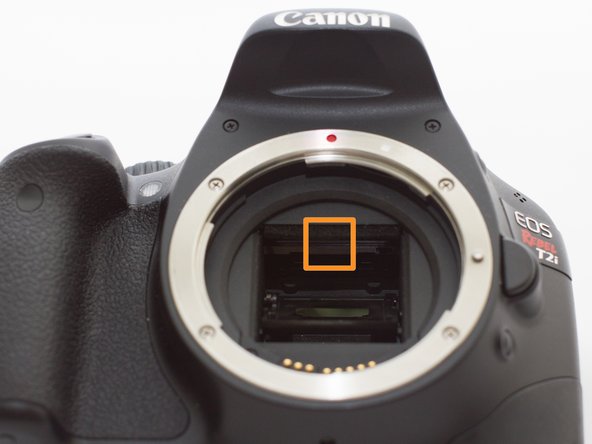
The focusing screen is located inside of the body, at the top of the opening, directly above the mirror, inside of a metal housing.
-
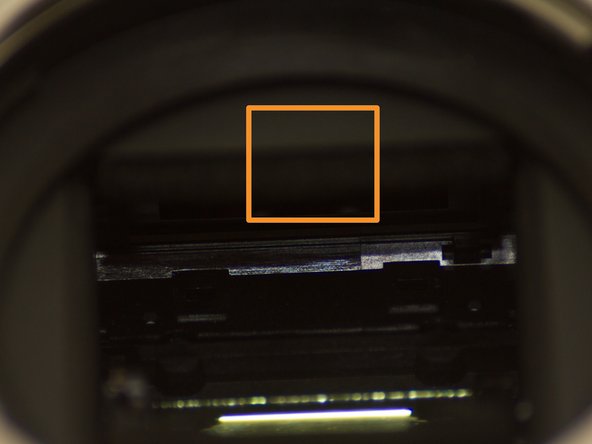
To remove the focusing screen, first use tweezers and grab onto the latch that secures the housing above the mirror.
-
Then gently pull down on the latch, towards the mirror, to release the housing which contains the focusing screen.
-
Using tweezers, gently but firmly grab the focusing screen by the outer tab, and lift it out of its housing and the camera's body.
-
-
-
To install the new focusing screen hold it by the outer tab with tweezers, and lower it into the housing, opposing-end of the focusing screen first. Then gently set the tab-end into the housing.
-
Now grab the latch of the housing with your tweezers and raise the housing up into its original position, above the mirror, applying gentle pressure until it clips into place.
-
Finally, re-attach the lens, insert the battery, turn the camera on and test the focusing ability of the camera.
-


You have now successfully replaced the focusing screen.
You have now successfully replaced the focusing screen.
Отменить: Я не выполнил это руководство.
2 участников успешно повторили данное руководство.
Команда

UMass Dartmouth, Team 1-4, Duarte Fall 2014 Участник UMass Dartmouth, Team 1-4, Duarte Fall 2014
UMASSD-DUARTE-F14S1G4
3 членов
Автор 4 руководств