Перейти к основному содержанию
Присоединяйся к сообществу ремонтников - Создай аккаунт

Canon Pixma MP480 Motherboard Replacement

Выберете то, что вам нужно

    1. Canon Pixma MP480 Motherboard Replacement, Rear and Side Panel: шаг 1, изображение 1 из 2 Canon Pixma MP480 Motherboard Replacement, Rear and Side Panel: шаг 1, изображение 2 из 2
      • Remove the two 7.9 mm screws using a Phillips #1 screwdriver.

      Спросите у FixBot

      Добавить комментарий

    2. Canon Pixma MP480 Motherboard Replacement: шаг 2, изображение 1 из 1
      • Lift up the back cover to remove it.

      • You may need to lift firmly as it requires quite a bit of force.

      Спросите у FixBot

      Добавить комментарий

    3. Canon Pixma MP480 Motherboard Replacement: шаг 3, изображение 1 из 1
      • Open the front tray.

      Спросите у FixBot

      Добавить комментарий

    4. Canon Pixma MP480 Motherboard Replacement: шаг 4, изображение 1 из 2 Canon Pixma MP480 Motherboard Replacement: шаг 4, изображение 2 из 2
      • Open the scanner compartment.

      • Make sure the blue lever locks into place to keep the compartment open.

      Спросите у FixBot

      Добавить комментарий

    5. Canon Pixma MP480 Motherboard Replacement: шаг 5, изображение 1 из 2 Canon Pixma MP480 Motherboard Replacement: шаг 5, изображение 2 из 2
      • Remove the blue lever from its slot by pushing it back and twisting clockwise.

      • Close the scanner compartment and cover.

      Спросите у FixBot

      Добавить комментарий

    6. Canon Pixma MP480 Motherboard Replacement: шаг 6, изображение 1 из 2 Canon Pixma MP480 Motherboard Replacement: шаг 6, изображение 2 из 2
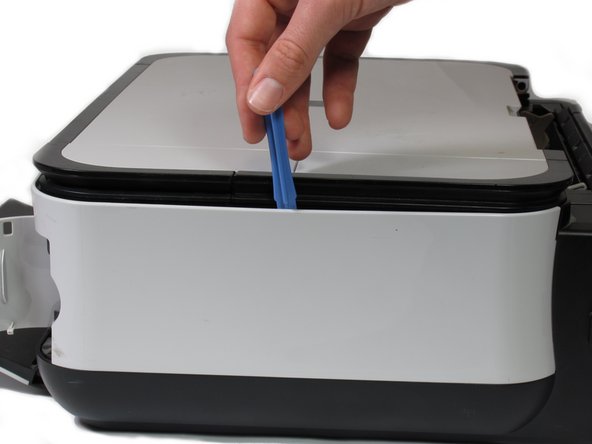
      • Pry open the side cover with the plastic opening tool.

      Спросите у FixBot

      Добавить комментарий

    7. Canon Pixma MP480 Motherboard Replacement: шаг 7, изображение 1 из 2 Canon Pixma MP480 Motherboard Replacement: шаг 7, изображение 2 из 2
      • Flip the printer over so that the bottom of the printer is facing you.

      • Use the plastic opening tool to remove the corner of the side panel from the plastic pin.

      Спросите у FixBot

      Добавить комментарий

    8. Canon Pixma MP480 Motherboard Replacement: шаг 8, изображение 1 из 2 Canon Pixma MP480 Motherboard Replacement: шаг 8, изображение 2 из 2
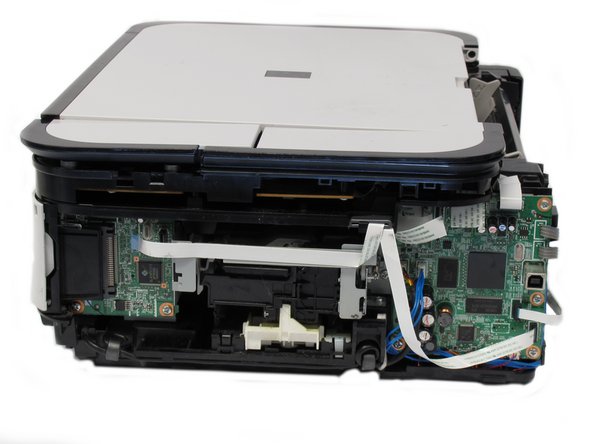
      • Use the plastic opening tool to loosen the side panel from the bottom of the printer.

      Спросите у FixBot

      Добавить комментарий

    1. Canon Pixma MP480 Motherboard Replacement, Motherboard: шаг 9, изображение 1 из 1
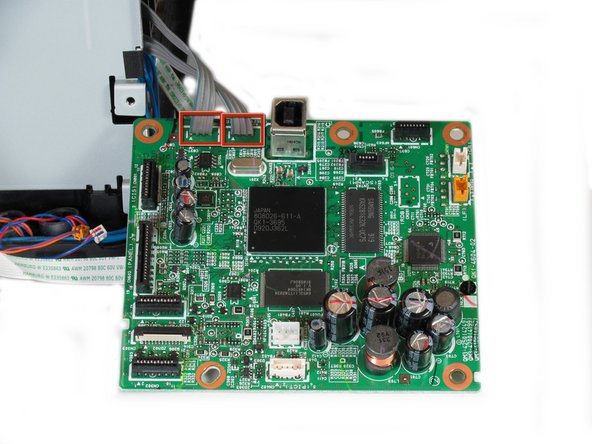
      • Gently pull the 6 ribbon wires out.

      • Gently pull the 4 molded cable assemblies out.

      Спросите у FixBot

      Добавить комментарий

    2. Canon Pixma MP480 Motherboard Replacement: шаг 10, изображение 1 из 2 Canon Pixma MP480 Motherboard Replacement: шаг 10, изображение 2 из 2
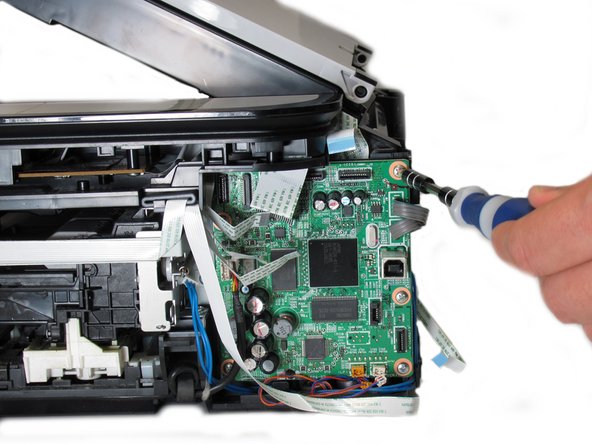
      • Unscrew the five silver Phillips screws that secure the motherboard:

      • Five 3.65mm Phillips #1 screws.

      Спросите у FixBot

      Добавить комментарий

    3. Canon Pixma MP480 Motherboard Replacement: шаг 11, изображение 1 из 2 Canon Pixma MP480 Motherboard Replacement: шаг 11, изображение 2 из 2
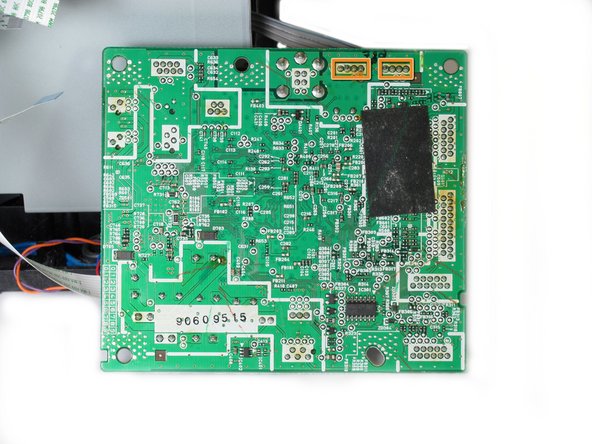
      • Once all wires and screws have been removed, gently take the motherboard out of the printer.

      • These wires are soldered onto the bottom of the PCB and must be de-soldered in order to completely detach the motherboard from the printer.

      • If you do not know how to operate a soldering iron, do not attempt to finish this guide.

      • De-solder these eight solder joints on the bottom of the motherboard.

      • When reinstalling the motherboard back into the printer, solder the highlighted joints (in orange markers in the second photo) back onto the board.

      Спросите у FixBot

      Добавить комментарий

Заключение

Congratulations on successfully removing the motherboard from the printer! To reassemble the motherboard, follow these instructions in reverse order.

Отменить: Я не выполнил это руководство.

3 человек успешно провели ремонт по этому руководству.

nathan zorndorf

Участник с: 01/15/13

73 Репутация

1 руководство автора

Команда

Cal Poly, Team 19-41, Regan Winter 2013 Участник Cal Poly, Team 19-41, Regan Winter 2013

CPSU-REGAN-W13S19G41

4 членов

Автор 12 руководств

0 Комментарии к руководству

Добавить комментарий

Статистика просмотров:

За последние 24 часов: 0

За последние 7 дней: 6

За последние 30 дней: 35

За всё время: 5,817