Перейти к основному содержанию

Canon PowerShot A540 Front Cover Replacement

Выберете то, что вам нужно

  1. Canon PowerShot A540 Front Cover Replacement, Back Cover: шаг 1, изображение 1 из 2 Canon PowerShot A540 Front Cover Replacement, Back Cover: шаг 1, изображение 2 из 2
    • Turn off the camera.

    • Turn the camera upside-down and press the tab to release the battery cover. Remove the batteries.

  2. Canon PowerShot A540 Front Cover Replacement: шаг 2, изображение 1 из 1
    • Turn the camera upside down to view the "Card/Batt. Open" Cover.

    • Use a Phillips head #000 screwdriver to remove the three (3) 4.0 mm screws.

  3. Canon PowerShot A540 Front Cover Replacement: шаг 3, изображение 1 из 1
    • Open "Card/Batt. Open" Cover.

    • Remove the one (1) 5.0 mm screw with the Phillips head #000 screwdriver.

  4. Canon PowerShot A540 Front Cover Replacement: шаг 4, изображение 1 из 1
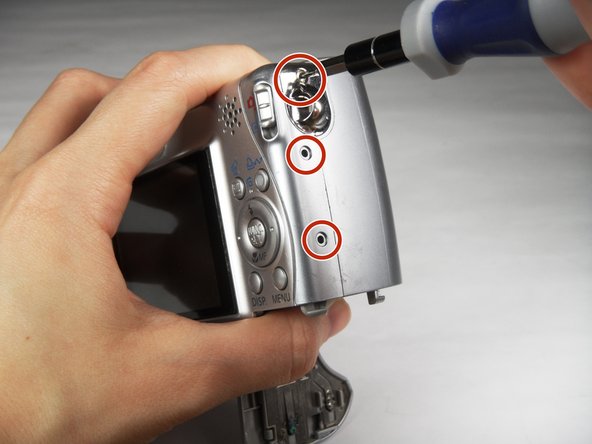
    • Turn the camera to the right side of the LCD screen.

    • Remove the three (3) 4.0 mm screws with the Phillips head #000 screwdriver.

  5. Canon PowerShot A540 Front Cover Replacement: шаг 5, изображение 1 из 3 Canon PowerShot A540 Front Cover Replacement: шаг 5, изображение 2 из 3 Canon PowerShot A540 Front Cover Replacement: шаг 5, изображение 3 из 3
    • Gently remove the back cover.

    • Start at the bottom at the corner of the "Card/Batt. Open" Cover.

    • Then move onto the other edges and the top.

    • It may be tight at the top!

  6. Canon PowerShot A540 Front Cover Replacement, Front Cover: шаг 6, изображение 1 из 2 Canon PowerShot A540 Front Cover Replacement, Front Cover: шаг 6, изображение 2 из 2
    • Turn the camera to view the front.

    • Remove the lens guard.

    • Press the lens guard's button as you turn the guard counterclockwise.

  7. Canon PowerShot A540 Front Cover Replacement: шаг 7, изображение 1 из 1
    • Turn the camera to the side left of the LCD screen.

    • Remove the one (1) 4.0 mm screw with the Phillips head #000 screwdriver.

  8. Canon PowerShot A540 Front Cover Replacement: шаг 8, изображение 1 из 1
    • Remove the front cover gently.

    • When removing the front cover, a thin, black rubber washer may fall off the lens. If it does, make sure to put it back on the lens before reassembly.

Заключение

To reassemble your device, follow these instructions in reverse order.

2 участников успешно повторили данное руководство.

Carley Fuller

Участник с: 03/23/15

434 Репутация

Автор 3 руководств

Команда

Baylor, Team 7-12, Williams Spring 2015 Участник Baylor, Team 7-12, Williams Spring 2015

BU-WILLIAMS-S15S7G12

3 членов

Автор 20 руководств

0 Комментариев

Добавить комментарий

Просмотр статистики:

За последние 24часов: 1

За последние 7 дней: 3

За последние 30 дней: 22

За всё время: 1,456