Эта версия возможно содержит некорректные исправления. Переключить на последнюю проверенную версию.
Выберете то, что вам нужно
-
Этот шаг не переведен. Помогите перевести
-
Turn off the camera by pressing the power button above the LCD screen.
-
-
Этот шаг не переведен. Помогите перевести
-
Remove the two, small screws on the bottom of the camera using a Phillip's #00 screwdriver.
-
-
Этот шаг не переведен. Помогите перевести
-
Use a Phillips #00 screwdriver to remove the two, small screws on the right side of the camera.
-
-
Этот шаг не переведен. Помогите перевести
-
Use a Phillips #00 screwdriver to remove the screw on the left of the camera under the A/V out Digital label.
-
-
Этот шаг не переведен. Помогите перевести
-
Use a Phillips #00 screwdriver, remove the screw on the bottom of the camera near the battery and memory card slots.
-
-
Этот шаг не переведен. Помогите перевести
-
Remove the front, back, and side casings from the camera and set to the side.
-
-
-
Этот шаг не переведен. Помогите перевести
-
Once the LCD and Backlight are detached, remove the larger screw marked in red in the picture as well as the four smaller sized screws marked in blue.
-
-
Этот шаг не переведен. Помогите перевести
-
Remove the two screws near the the tri-pod mount with a Philips head screw driver.
-
-
Этот шаг не переведен. Помогите перевести
-
Remove the screw next to the shutter with a Philip's head screw driver.
-
-
Этот шаг не переведен. Помогите перевести
-
Remove the orange ribbon cable by lifting the ZIF connector attached to the ribbon with a flat head screw driver or spudger.
-
-
Этот шаг не переведен. Помогите перевести
-
Carefully lift the shutter along with the ribbon connected to it. This will remove the casing around the motherboard.
-
-
Этот шаг не переведен. Помогите перевести
-
With the motherboard casing detached, remove the short orange ribbon by lifting the ZIF connector with a spudger or other plastic opening tools and slide the ribbon out. Detaching this ribbon will disconnect the side of the camera containing the motherboard from the rest of the camera.
-
-
Этот шаг не переведен. Помогите перевести
-
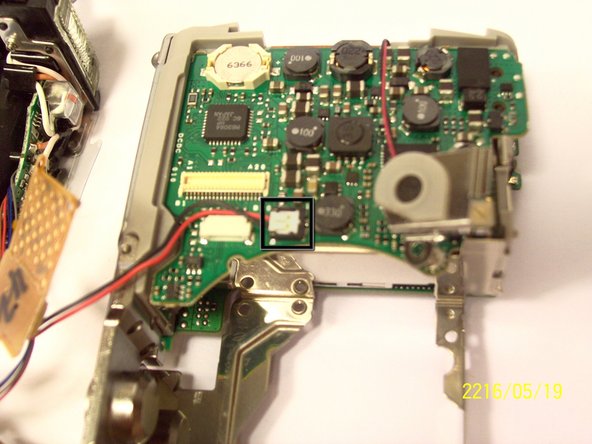
First remove the wires that are attached to the motherboard, as shown by the black box. You can detach them by simply pulling them out.
-
Next you can remove the film by lifting it gently from the motherboard.
-
-
Этот шаг не переведен. Помогите перевести
-
Remove the last wires connected to the motherboard. You can remove it by gently lifting it upwards.
-
-
Этот шаг не переведен. Помогите перевести
-
Place a flathead screwdriver and gently lift the circuit attached, as shown on the picture.
-
-
Этот шаг не переведен. Помогите перевести
-
Remove the screw using a philip 00 screwdriver.
-
Once the screw is removed, gently lift the motherboard away from the case.
-
-
Этот шаг не переведен. Помогите перевести
-
Remove the screw as shown by the red circle.
-
Once the screw is removed, you can remove the board.
-


Команда

Cal Poly, Team 9-71, Walters Spring 2011 Участник Cal Poly, Team 9-71, Walters Spring 2011
CPSU-WALTERS-S11S9G71
4 членов
Автор 9 руководств