Введение
This guide will show how to remove the metal plate that leads to the inside of the camera. This will allow access to the lens and motherboard.
Выберете то, что вам нужно
-
-
Remove 2-3.4 mm screws that secure the back panel using a Phillips #000 screwdriver.
-
Remove 4-4 mm screws on the left and right sides of the camera using a Phillips #000 screwdriver.
-
-
-
Remove 2-4 mm screws that secure the bottom of the camera using a Phillips #000 screwdriver.
-
-
-
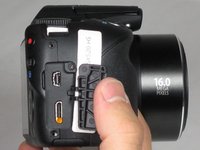
Pull back the rubber facing to access the A/V and HDMI output compartment.
-
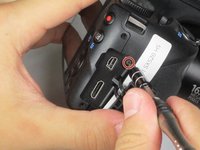
Remove 1-3.4mm screw inside the compartment using a Phillips #000 screwdriver.
-
-
-
-
Remove 3-4.4 mm screws that secure the small metal plate using a Phillips #000 screwdriver.
-
-
-
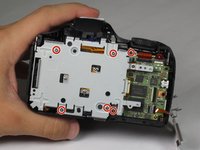
Remove 6-4.4 mm screws that secure the metal cover using a Phillips #000 screwdriver.
-
Remove 2-2.5 mm screws that secure the back panel using a Phillips #000 screwdriver.
-
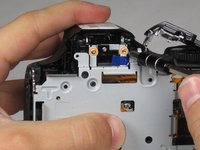
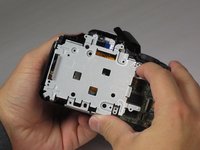
After all 8 screws are removed, pull the metal plate out with your fingers.
-


To reassemble your device, follow these instructions in reverse order.
To reassemble your device, follow these instructions in reverse order.
Команду

Baylor, Team 4-4, Williams Fall 2015 Участник Baylor, Team 4-4, Williams Fall 2015
BU-WILLIAMS-F15S4G4
4 членов
Автор 6 руководств