Введение
Use this guide to remove and replace a broken LCD screen for a Canon PowerShot SD790 IS camera.
The LCD screen is a monitor that allows you to view pictures you have taken. If your screen has black spots or blurred areas, visible scratches or crack lines, or there is a lack of touch sensitivity, this could mean your screen is defective or broken.
No special skills required to perform this repair. Make sure to power off the camera and remove it from the charger before beginning.
Выберете то, что вам нужно
-
-
Remove the two screws from the left side of the camera using a Phillips #00 screwdriver.
-
Remove the two screws from the right side of the camera using a Phillips #00 screwdriver.
-
Remove the two screws from the bottom of the camera using a Phillips #00 screwdriver.
-
-
-
Using your fingers, manually open the USB cover, labeled as “A/V OUT DIGITAL.”
-
Gently pull the tab of the side cover, completely detaching the cover from the camera.
-
-
-
Gently grab the sides of the camera and pry off the screen cover using your fingers.
-
Once the screen cover is removed, the front cover and side plate will slide off.
-
-
-
-
Remove the two screws from the bottom of the camera using a Phillips #00 screwdriver.
-
Remove the screw located below the button release panel.
-
-
-
Using tweezers, gently slide the LCD cable, horizontally from its white plug towards the camera screen.
-
-
-
Using your fingers, open the USB port cover (labeled as “A/V OUT DIGITAL” on the camera).
-
Using your fingers, remove the button release panel located on the top of the camera and allow room for it to hang out of the way.
-
-
-
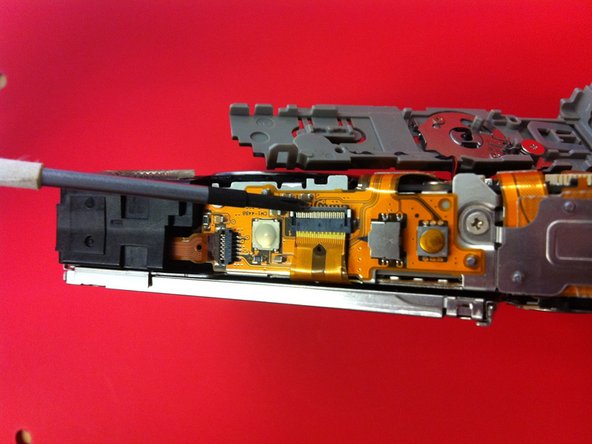
Using the spudger, flip the clip in an upward motion. The clip should remain attached to camera, not removed completely.
-
-
-
Using tweezers, gently slide the orange, translucent LCD ribbon from its dark gray plug horizontally towards the screen.
-
Remove the screen from the camera, and attach the new screen.
-


To reassemble your device, follow these instructions in reverse order.
To reassemble your device, follow these instructions in reverse order.
Отменить: Я не выполнил это руководство.
2 участников успешно повторили данное руководство.
Команда

Cal Poly, Team 4-33, Regan Winter 2011 Участник Cal Poly, Team 4-33, Regan Winter 2011
CPSU-REGAN-W11S4G33
4 членов
Автор 5 руководств