Введение
In order to replace the LCD screen you will need a PH00 screwdriver and a spudger. Be careful with the connections to the board it is easy to break.
Выберете то, что вам нужно
-
-
Push the small orange tab forward to release the battery (Battery is ready for removal).
-
-
-
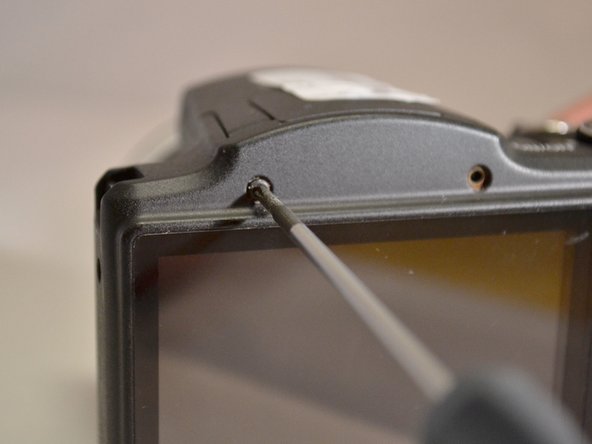
Using the Phillips 00 screwdriver, remove the two 4mm top screws above the LCD screen.
-
-
-
Using the Phillips 00 screwdriver, remove the two 4mm side screws to the left of the LCD screen.
-
-
-
-
Using the Phillips 00 screwdriver, remove the two 4mm side screws to the left of the LCD screen.
-
-
-
Using the Phillips 00 screwdriver, remove the three 4mm screws from the underside of the camera.
-
-
-
Using the Phillips 00 screwdriver, remove the two 3mm screws closest to the right of the LCD screen.
-
-
-
Using the Phiillips 00 screwdriver, remove the 4mm screw to the right of the control dial.
-
-
-
Using the spudger, lift the connection tab and remove the control dial's orange ribbon from motherboard.
-
-
-
Using spudger, lift the tab on the connector and remove the orange ribbon from motherboard (LCD screen is separated from camera).
-


To reassemble your device, follow these instructions in reverse order.
To reassemble your device, follow these instructions in reverse order.
Отменить: Я не выполнил это руководство.
2 участников успешно повторили данное руководство.
Команда

Eastern Washington University, Team 1-4, Plummer Spring 2015 Участник Eastern Washington University, Team 1-4, Plummer Spring 2015
EWU-PLUMMER-S15S1G4
4 членов
Автор 6 руководств
2 Комментариев
Hello, my LCD screen is not working. One day it was fine, the next day I powered my camera and the LCD screen is only half visible. I appreciate the directions on how to take out/repair LCD screen, though where am I able to purchase a new LCD screen for my PowerShot SX500IS? Many thanks.
Disassembly of SX510HS is exactly the same. No special pry tool is required - it is very easy to remove the cover with your fingernail. Replacement LCD on Aliexpress is 8-12 USD.