Эта версия возможно содержит некорректные исправления. Переключить на последнюю проверенную версию.
Выберете то, что вам нужно
-
Этот шаг не переведен. Помогите перевести
-
Remove eight 1.8 mm screws from the left and right sides of the camera using a Phillips #00 screwdriver
-
-
Этот шаг не переведен. Помогите перевести
-
Remove the four 3.7 mm screws from the bottom of the camera using a Phillips #00 screwdriver.
-
-
Этот шаг не переведен. Помогите перевести
-
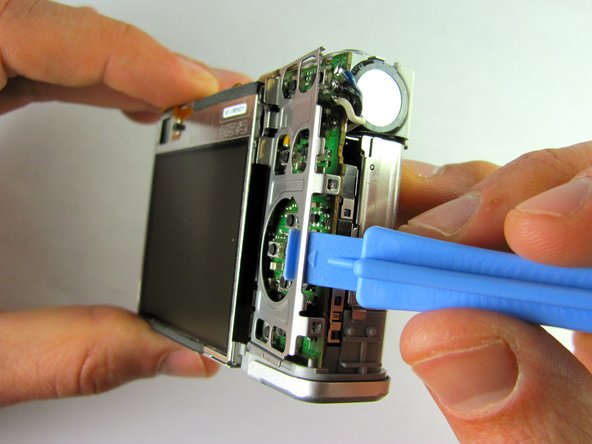
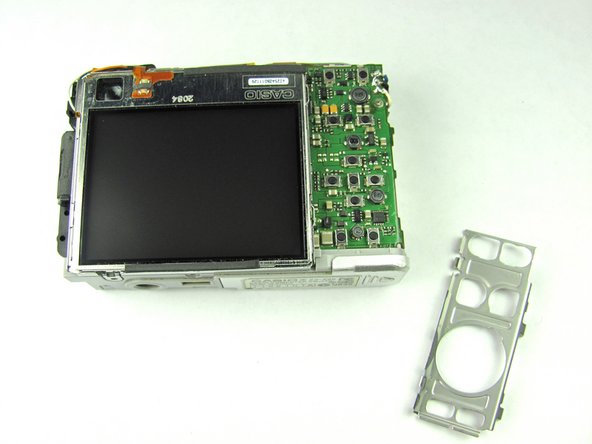
Remove the metal grating located to the right of the LCD screen by inserting the plastic opening tool under the grating and pulling up.
-
-
-
Этот шаг не переведен. Помогите перевести
-
Before removing the side metal bracket, first remove the attached strap knob by twisting it off.
-
Then, remove the side metal bracket by inserting the plastic opening tool under the bracket and pulling up.
-
-
Этот шаг не переведен. Помогите перевести
-
Using the plastic opening tool, pry up the LCD screen starting at one of the corners. Insert the tool under one of the corners and lift up.
-
-
Этот шаг не переведен. Помогите перевести
-
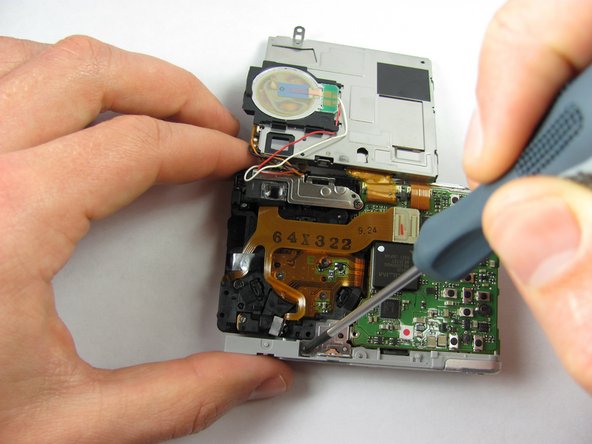
Remove the orange ribbon cable by grabbing the white tab and pulling back.
-
-
Этот шаг не переведен. Помогите перевести
-
Remove the two 1.66mm screws on both the bottom and top metal plates, using a #00 Phillips screwdriver.
-
-
Этот шаг не переведен. Помогите перевести
-
Using the plastic opening tool, pry the battery case clamps (located on front of the camera) so that the bottom portion of the camera will come loose.
-
-
Этот шаг не переведен. Помогите перевести
-
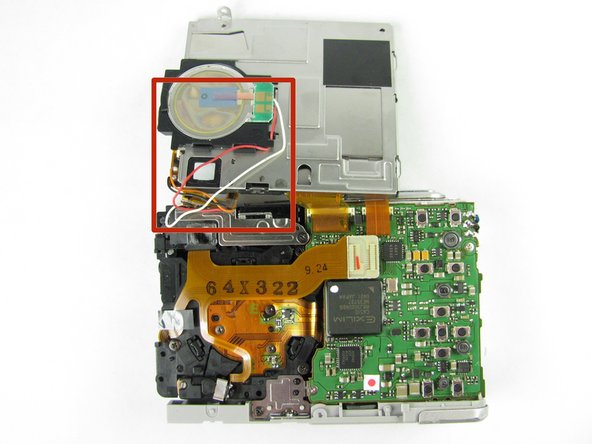
Once the bottom portion of the camera is removed, stand the camera upright, bottom portion facing up, then detach the inner orange strip from the motherboard to the lens by inserting the plastic opening tool under the tab and lifting up.
-
-
Этот шаг не переведен. Помогите перевести
-
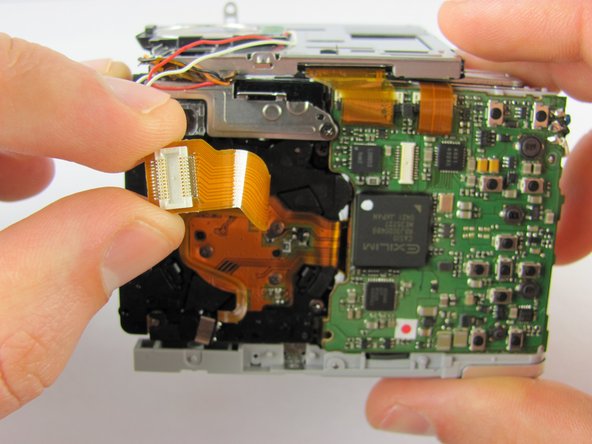
Fully remove the lens from the motherboard.
-
You can now proceed to repair the existing lens or replace it with a new lens.
-


Отменить: Я не выполнил это руководство.
Еще один человек закончил это руководство.
Команда

Cal Poly, Team 9-45, Regan Spring 2012 Участник Cal Poly, Team 9-45, Regan Spring 2012
CPSU-REGAN-S12S9G45
7 членов
Автор 12 руководств