Введение
Welcome to this Fast Fix guide on how to replace the CR2016 Lithium battery in a Casio F91-W watch. The Casio F91-W is a popular digital watch known for its affordability, durability, and simplicity. However, like all electronic devices, the battery will eventually run out of power and require replacement. Fortunately, replacing the battery in the Casio F91-W is a straightforward process that can be done with just a few basic tools and a new CR2016 battery. In the following guide, we will walk you through the step-by-step process of replacing the battery in your Casio F91-W, so you can continue to enjoy your trusty timepiece for years to come.
Выберете то, что вам нужно
-
-
Place the watch with the digital display facing downward, revealing the back cover.
-
-
-
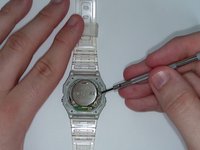
Using a small Phillips head screwdriver, remove the four screws connecting the case back to the watch case.
-
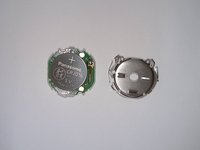
Gently remove the case back and set aside.
-
-
Инструмент, используемый на этом этапе:Tweezers$4.99
-
Use a pair of tweezers to gently remove the gasket from the bevel surrounding the watch movement.
-
-
-
-
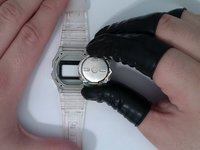
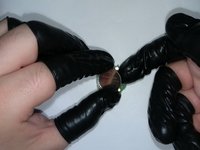
Gently pry the watch movement out of the case from the upper right corner. Use as little force as possible.
-
Once you have pried the watch movement up slightly from the case, you can gently remove it with your fingers.
-
-
-
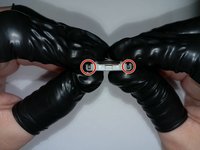
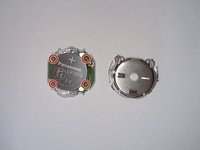
Gently disengage the hinges holding the battery cover onto the rest of the watch movement.
-
There are four hinges to disengage—two on each side of the movement. Make sure you disengage all four before attempting to remove the battery cover to avoid damaging the movement.
-
-
-
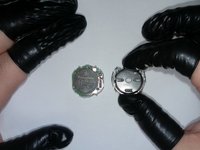
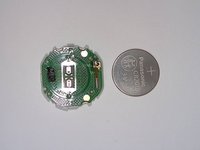
Gently remove the old battery and replace it with the new battery.
-
Make sure the replacement battery rests securely between the four white plastic posts circled in the third picture.
-


To reassemble your device, follow these instructions in reverse order.
Отменить: Я не выполнил это руководство.
4 человек успешно провели ремонт по этому руководству.

Команда

University of North Texas, Team 2-1, Raign Spring 2023 Участник University of North Texas, Team 2-1, Raign Spring 2023
UNT-RAIGN-S23S2G1
2 членов
Автор 5 руководств
1 Комментарий к руководству
Fantastic guide, thank you! On reassembling I did find I had trouble getting the watch movement back in the case. This was because the buttons were catching on the button arms. To solve it I used a flat head to push the buttons out, from the inside, as far as they would go and with a bit of persuassion it all went back in. Thanks again :-)