Введение
Welcome to our guide on replacing the battery for a Casio FX-115ES PLUS calculator! Over time, the battery in your calculator may start to wear down and lose its ability to hold a charge, which can result in your calculator not functioning properly. Fortunately, replacing the battery is a quick and simple process that can be done at home with just a few tools and some basic knowledge. In this guide, we will walk you through each step of the process, providing detailed instructions and helpful tips to ensure a successful battery replacement. Whether you are an experienced DIY-er or a first time battery replacer, this guide is designed to help you get your Casio FX115ES PLUS calculator back up and running in no time. So lets get started!
Выберете то, что вам нужно
-
-
Turn off the calculator by pressing the [shift] button.
-
Press the [AC] [OFF] button to turn off the calculator by pressing the [shift] button.
-
-
-
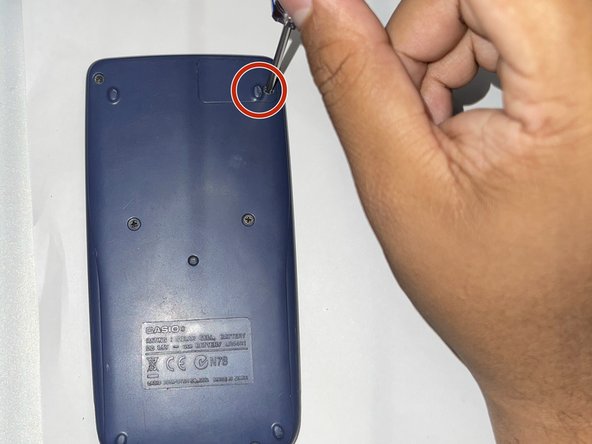
Turn the calculator the other way around so that the small panel in the top right corner of the back of the calculator faces forward.
-
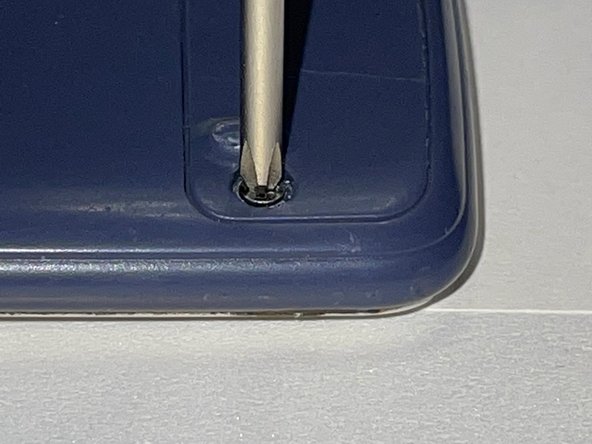
Use a Phillips #0 screwdriver to remove the screw in the upper right corner.
-
-
-
-
Insert the spudger in the available slot in the middle of the right side.
-
Use the spudger to take the battery out carefully.
-
-
-
Reattach the battery cover.
-
Insert the screw back in place along with the cover using a Phillips #0 screwdriver.
-
-
-
Reset the calculator by pressing [ON].
-
Press the [Shift] button.
-
Press the [9] [CLR] button to clear the data.
-
Press the [3] [ALL] button option.
-
Press the [=] [yes] button to accept.
-
Press the [AC] key to reset completely.
-


You have successfully replaced a Casio FX-115ES PLUS battery
You have successfully replaced a Casio FX-115ES PLUS battery
Команду

CSU Los Angeles, Team 2-1, Briggs Spring 2023 Участник CSU Los Angeles, Team 2-1, Briggs Spring 2023
CSULA-BRIGGS-S23S2G1
2 членов
Автор 2 руководств