Перейти к основному содержанию

Эта версия возможно содержит некорректные исправления. Переключить на последнюю проверенную версию.

Выберете то, что вам нужно

  1. Этот шаг не переведен. Помогите перевести

    : шаг 1, изображение 1 из 1
    • Lay the device on its back, and rotate so the base is facing away from you.

  2. Этот шаг не переведен. Помогите перевести

    : шаг 2, изображение 1 из 1
    • Grip the frame with your fingers under the edge of the frame, and thumbs pushing down on the front of the device.

  3. Этот шаг не переведен. Помогите перевести

    : шаг 3, изображение 1 из 1
    • Lift up the frame with your fingers and push down the rest of the device with your thumbs.

  4. Этот шаг не переведен. Помогите перевести

    : шаг 4, изображение 1 из 1
    • Remove the frame and matte from the device.

  5. Этот шаг не переведен. Помогите перевести

    : шаг 5, изображение 1 из 1
    • Remove the four 7mm Torx T6 screws.

  6. Этот шаг не переведен. Помогите перевести

    : шаг 6, изображение 1 из 2 : шаг 6, изображение 2 из 2
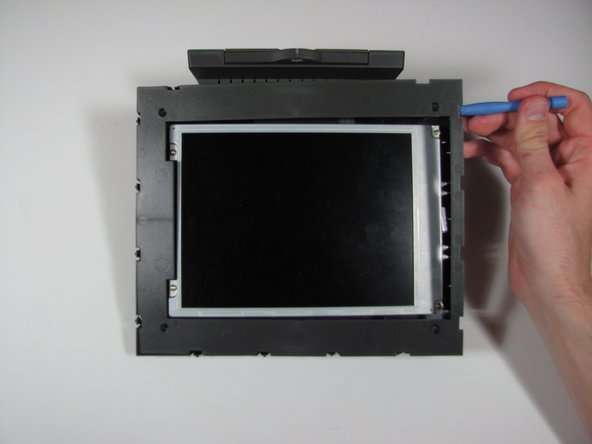
    • Using the plastic opening tool or your fingers, lift up the frame from any edge.

    • Remove the frame from the device.

  7. Этот шаг не переведен. Помогите перевести

    : шаг 7, изображение 1 из 3 : шаг 7, изображение 2 из 3 : шаг 7, изображение 3 из 3
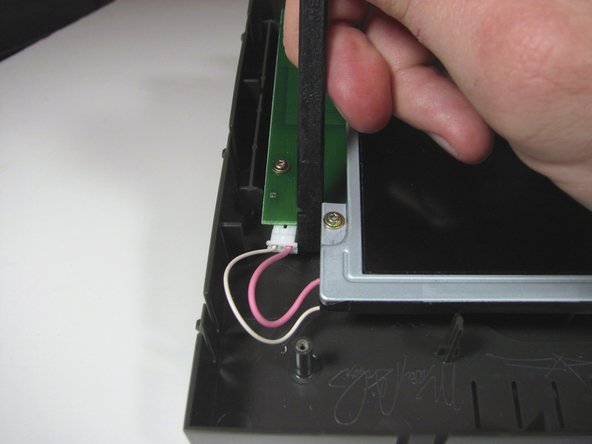
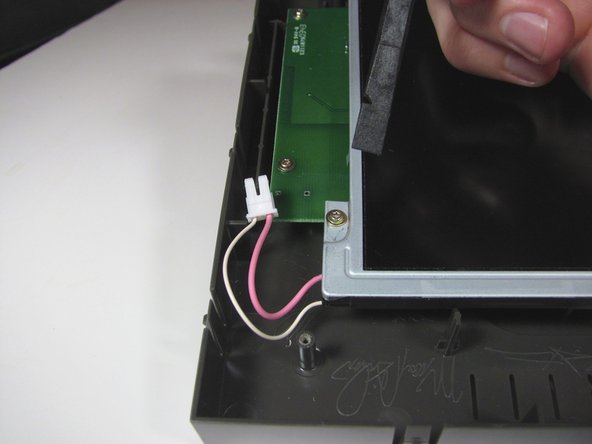
    • Unplug the cable connecting the display to the power supply using the flat end of the spudger to pry the connector away from the circuit board.

    • Alternate applying pressure to the left and right side of the connector to ensure that it does not break.

  8. Этот шаг не переведен. Помогите перевести

    : шаг 8, изображение 1 из 1
    • Remove the four 7mm Torx T6 screws.

  9. Этот шаг не переведен. Помогите перевести

    : шаг 9, изображение 1 из 2 : шаг 9, изображение 2 из 2
    • Lift up the display from the left edge and flip display over.

    • Do not lift the display too quickly, as the display is still connected to the main circuit board on the right.

  10. Этот шаг не переведен. Помогите перевести

    : шаг 10, изображение 1 из 3 : шаг 10, изображение 2 из 3 : шаг 10, изображение 3 из 3
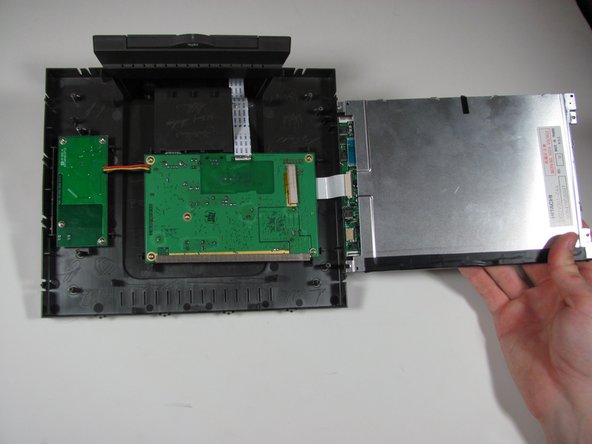
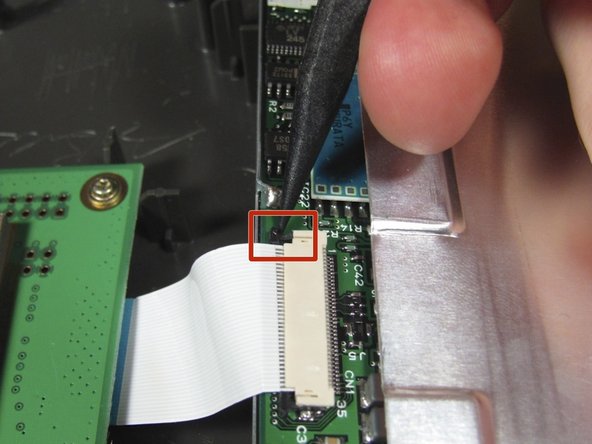
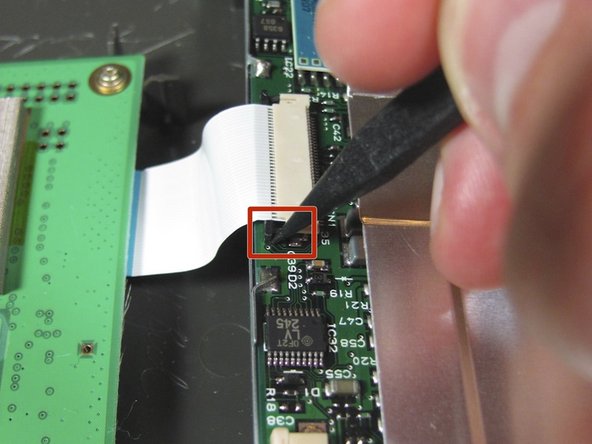
    • Use the spudger to disconnect the ribbon cable from the display by the black pins away from the connector. There is a pin on either side of the connector.

    • Once both pins are released, the ribbon cable should slide easily out.

    • It may be easier if someone else holds the display so the cable does not get ripped out.

  11. Этот шаг не переведен. Помогите перевести

    : шаг 11, изображение 1 из 1
    • Remove the display assembly from the device.

Финишная черта

Еще один человек закончил это руководство.

Casey Glasgow

Участник с: 01/26/14

510 Репутация

Автор 5 руководств

Команда

Cal Poly, Team 9-25, Maness Winter 2014 Участник Cal Poly, Team 9-25, Maness Winter 2014

CPSU-MANESS-W14S9G25

4 членов

Автор 5 руководств

0 Комментариев

Добавить комментарий

Просмотр статистики:

За последние 24часов: 3

За последние 7 дней: 8

За последние 30 дней: 9

За всё время: 143