Введение
These devices were sold to power Celestron GOTO mount portable telescopes, and may be available under other brands. They incorporate a very powerful spotlight, two 12v accessory sockets, a smaller lamp with red filter and two screw terminals for directly taking power from the internal battery. This is a 12 volt 7Ah lead acid battery of 151x65x95mm size, readily available online for much less than a new unit.
Выберете то, что вам нужно
-
-
To dismantle, use a long crosshead screwdriver that will fit the screw heads properly. Remove the long screw that holds the lamp hinge together, remove the plastic hinge pin and pull off the lamp - this will require a fair amount of finger strength. Keeps the parts safe. Note the rubber washers between the pin flange and the brackets.
-
The third photo shows the friction inserts that prevent the lamp housing from moving when positioned. Note the placement of these for reassembly.
-
-
-
To remove the battery, remove the spade connectors. Avoid shorting out or touching the terminals. Dispose of the expired battery according to local regulations. It will still contain charge so handle with care - tape over the terminals if neccessary. This photo shows the new battery.
-
To attach the new battery reconnect the leads, noting red lead goes to red terminal. I made a mistake here and reinserted the battery back to front but it still works. It's a rather heavy and clumsy component.
-
-
-
-
This is the main bulb for reference. It's held into the reflector by a spring clip as shown. Disconnect the black lead to make it easier to get at.
-
-
-
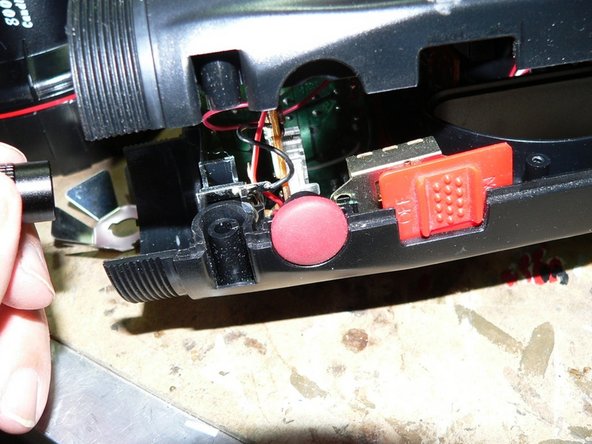
When the case is opened some parts may come adrift - note the red sliding switch fits over the switch component underneath. Also the pink button for the top lamp flashing function can drop out easily.
-
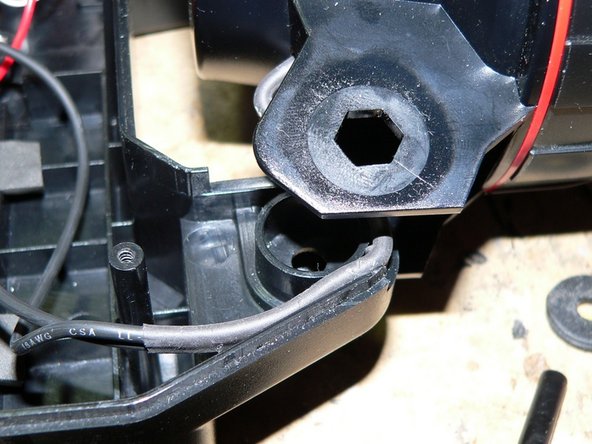
The cable for the main lamp fits between the hinge tube and the outside of the casing as shown in the third photo.
-
In the second photo just above the strap recess to left of the pink button switch, you can see a small horizontal metal contact - make sure this stays in this position, as it is the retainer for the top lamp bulb.
-
-
-
Reassembly is tricky - make sure everything lines up including the switches and small circuit boards, which fit in lugs inside one half of the casing. Use a small torch to look inside if neccessary. Make sure cables are not "pinched". If everything is okay the casing halves should fit evenly and easily.
-
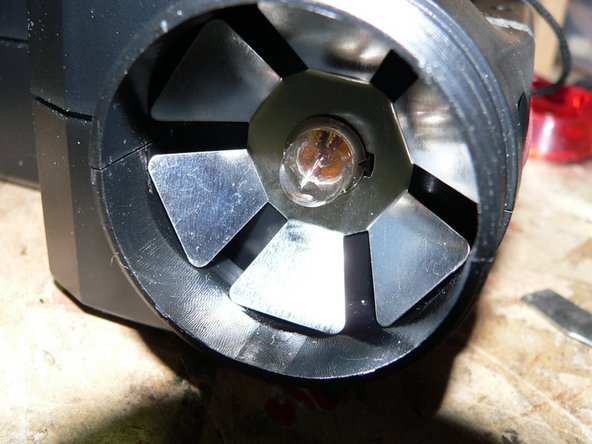
The second photo shows the reflector and bulb assembly for the top lamp. If you look closely on the right edge behind the bulb you will see a small metal "V" or claw - this holds the bulb in place. To remove the bulb, rotate it carefully so the claw clears the cutout in the flange and pull out.
-
-
-
The Power Tank can now rejoin your telescope and provide you with centuries of enjoyment exchanging coded light signals with extraterrestrial civilizations. And power your heated travel mug. It may be able to start your car again after immobilisation by a nearby UFO, but I haven't tried that yet.
-


Inexpensive replacement for a very useful and well made device.
Inexpensive replacement for a very useful and well made device.
Отменить: Я не выполнил это руководство.
2 участников успешно повторили данное руководство.

2 Комментариев
Very Grateful for the tutorial and photos! It was of terrific help. I have 2 of these Power Tanks and I’ve learned the included charger over charges the battery. I now use a battery minder that has computer smarts to know when the battery is charged and de-sulfonates ****** as well.