Введение
How to disassemble the device to access the sensor, clean it, then reassemble.
Выберете то, что вам нужно
-
-
Remove the 4 Hex screws surrounding the protective case.
-
Note: The two hex screws closest to the front lens are decorative, and cannot be removed.
-
Remove the two screws from the opposite side of the battery compartment.
-
-
-
On top, next to the GPS unit, remove the top screw
-
On the bottom remove the two screws next to the tripod mount
-
All the screws surrounding the protective aluminum housing should now be removed. Using a spudger or other flat tool, carefully work your way around this housing, separating it from the body.
-
-
-
WIth the protective housing removed, now remove the 6 screws from the back of the body.
-
Turn the unit over, removing the extra long screw near where the lanyard connection is.
-
On the side opposite the battery compartment, remove the small screw that has a washer around it.
-
-
-
-
Carefully remove the back lcd from the body, making sure not to damage the 3 connecting ribbons.
-
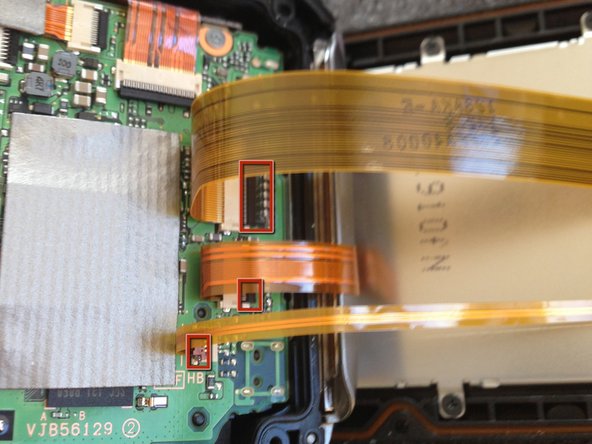
Using a spudger tool, unlatch the two larger ribbon connections by pressing up on the black connector.
-
The smaller one, has a brown connector, works in the opposite fashion.
-
-
-
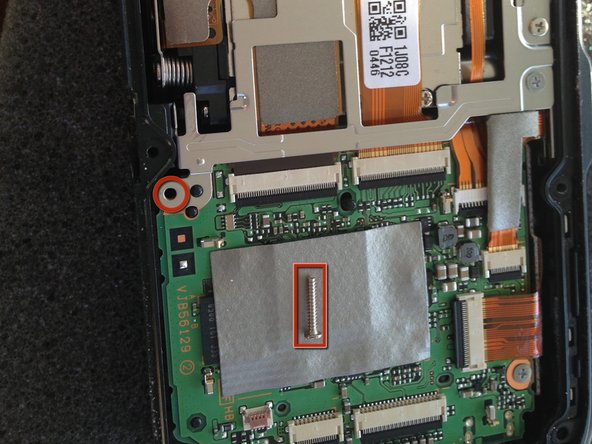
With the camera body face down, begin removing the screws securing the sensor assembly.
-
Remove the long screw in the lower center of the camera.
-
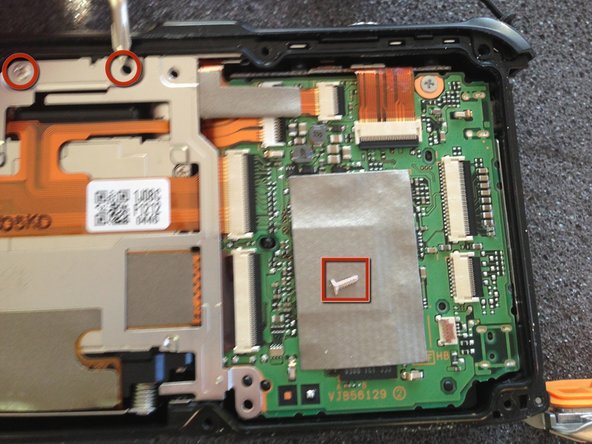
Remove the remaining 3 screws shown in the photos.
-
-
-
Gently lift out the metal securing bracket
-
Lift up the black ribbon connectors using a spudger tool.
-
Gently remove the 2 ribbons from the connector.
-
Carefully lift out the image sensor.
-
-
-
This is where you need to be the most careful.
-
Unscrew the three screws securing the image sensor
-
Carefully remove the image sensor
-
A rubber gasket and protective lens separate between the sensor assembly and sensor itself.
-
Turn the assembly over to remove the glass and gasket.
-
Spray the gasket, glass, and sensor with canned air.
-
Reassemble the sensor, placing the glass in the assembly. It should fit snugly. On top of the, place the gasket, square side towards the glass, with the oval piece facing where the sensor was.
-
When reattaching the sensor, it may help to have the screws already in the hole then hovering slowly back in to place. Be very careful not to let the sensor touch anything. Screw down the sensor, then follow these steps in reverse order to reassemble.
-


If your pictures were blurry this may help, it certainly did for me.
If your pictures were blurry this may help, it certainly did for me.
Отменить: Я не выполнил это руководство.
Еще один человек закончил это руководство.