Перейти к основному содержанию

Cobra 29 LTD Classic Knobs Replacement

Выберете то, что вам нужно

  1. Cobra 29 LTD Classic Knobs Replacement, Power Cable: шаг 1, изображение 1 из 2 Cobra 29 LTD Classic Knobs Replacement, Power Cable: шаг 1, изображение 2 из 2
    • Turn the power switch, the leftmost knob, counterclockwise to off.

  2. Cobra 29 LTD Classic Knobs Replacement: шаг 2, изображение 1 из 2 Cobra 29 LTD Classic Knobs Replacement: шаг 2, изображение 2 из 2
    • Turn the device around and firmly pull the power cable plug to remove it from the radio.

  3. Cobra 29 LTD Classic Knobs Replacement, Microphone: шаг 3, изображение 1 из 2 Cobra 29 LTD Classic Knobs Replacement, Microphone: шаг 3, изображение 2 из 2
    • Unscrew the cap counterclockwise on the microphone plug to disconnect the cable.

  4. Cobra 29 LTD Classic Knobs Replacement: шаг 4, изображение 1 из 1
    • Gently unplug the microphone plug.

  5. Cobra 29 LTD Classic Knobs Replacement, Knobs: шаг 5, изображение 1 из 1
    • Gently turn the middle four knobs counter-clockwise until they no longer move.

    • The middle four knobs are held in place by friction and do not have a way to keep them in the correct position. When reassembling the middle four knobs, make sure to line up the mark on the knob with the left-most mark on the front panel.

  6. Cobra 29 LTD Classic Knobs Replacement: шаг 6, изображение 1 из 2 Cobra 29 LTD Classic Knobs Replacement: шаг 6, изображение 2 из 2
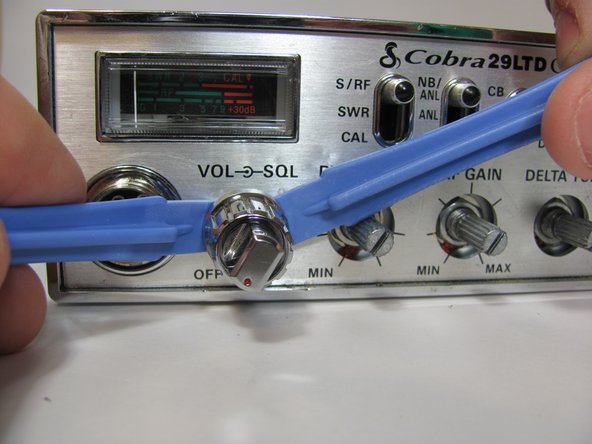
    • Insert two plastic opening tools behind the tuning knob.

    • With some force, pry the knob off of the radio.

    • Two opening tools are needed so that you don't break the knob or connector by applying uneven force.

  7. Cobra 29 LTD Classic Knobs Replacement: шаг 7, изображение 1 из 3 Cobra 29 LTD Classic Knobs Replacement: шаг 7, изображение 2 из 3 Cobra 29 LTD Classic Knobs Replacement: шаг 7, изображение 3 из 3
    • Repeat the above procedure with the remaining knobs.

    • The final knob will have a power knob on the end of it. When reassembling, put the power knob on last.

Заключение

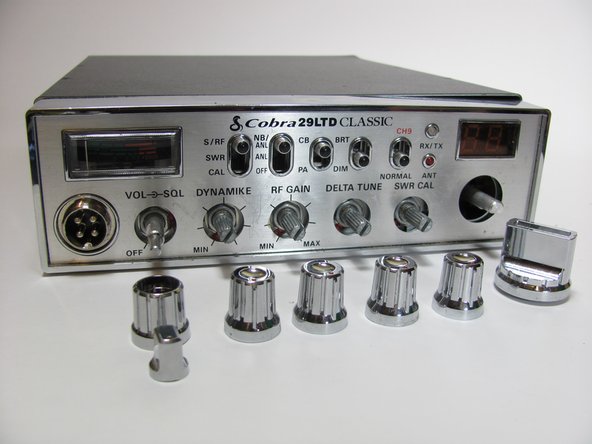
To reassemble your device, align the buttons and push them on.

Еще один человек закончил это руководство.

Matt Williams

Участник с: 10/20/13

133 Репутация

1 руководство автора

Команда

Cal Poly, Team 11-37, Amido Fall 2013 Участник Cal Poly, Team 11-37, Amido Fall 2013

CPSU-AMIDO-F13S11G37

4 членов

Автор 9 руководств

0 Комментариев

Добавить комментарий

Просмотр статистики:

За последние 24часов: 2

За последние 7 дней: 3

За последние 30 дней: 14

За всё время: 5,152