Перейти к основному содержанию

Coby DVD209 Circuit Board for Buttons Replacement

Выберете то, что вам нужно

  1. Coby DVD209 Circuit Board for Buttons Replacement, The bottom portion of the DVD player: шаг 1, изображение 1 из 3 Coby DVD209 Circuit Board for Buttons Replacement, The bottom portion of the DVD player: шаг 1, изображение 2 из 3 Coby DVD209 Circuit Board for Buttons Replacement, The bottom portion of the DVD player: шаг 1, изображение 3 из 3
    • Press the eject button to view the laser inside.

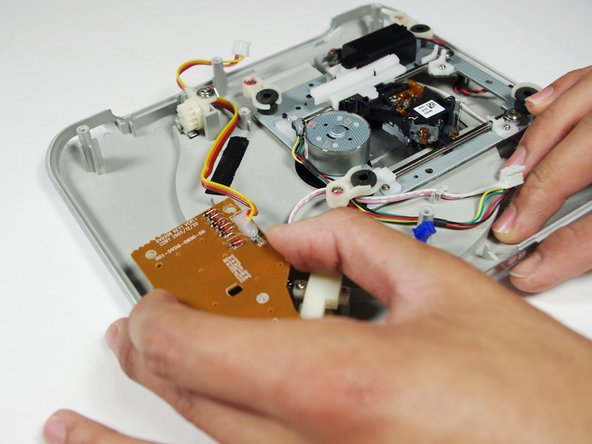
    • Using the blue plastic tool and the tweezers, remove the ribbon cable.

  2. Coby DVD209 Circuit Board for Buttons Replacement: шаг 2, изображение 1 из 3 Coby DVD209 Circuit Board for Buttons Replacement: шаг 2, изображение 2 из 3 Coby DVD209 Circuit Board for Buttons Replacement: шаг 2, изображение 3 из 3
    • Remove the six 1cm screws on the bottom of the device with the Phillips #1 screwdriver.

    • Do not lift the top of the DVD player too quickly because there are wires attached on the inside.

    • Pry the top of the device open from the right side where the buttons are located.

  3. Coby DVD209 Circuit Board for Buttons Replacement: шаг 3, изображение 1 из 3 Coby DVD209 Circuit Board for Buttons Replacement: шаг 3, изображение 2 из 3 Coby DVD209 Circuit Board for Buttons Replacement: шаг 3, изображение 3 из 3
    • When pulling the ribbon cables out, make sure not to pull by the wires, as this can cause damage to them.

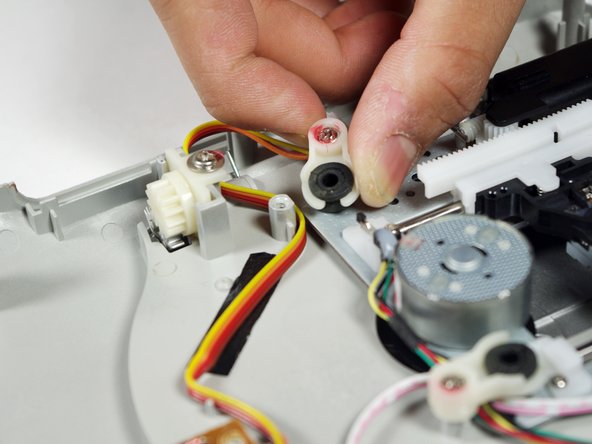
    • Pinch the plastic adapter with two fingers to remove the wires circled in red from the circuit board.

  4. Coby DVD209 Circuit Board for Buttons Replacement, Circuit Board for Buttons: шаг 4, изображение 1 из 2 Coby DVD209 Circuit Board for Buttons Replacement, Circuit Board for Buttons: шаг 4, изображение 2 из 2
    • Take the top portion of the DVD player and orient the device as shown in the first picture.

    • Remove the four 0.2" screws circled in red.

  5. Coby DVD209 Circuit Board for Buttons Replacement: шаг 5, изображение 1 из 3 Coby DVD209 Circuit Board for Buttons Replacement: шаг 5, изображение 2 из 3 Coby DVD209 Circuit Board for Buttons Replacement: шаг 5, изображение 3 из 3
    • Losen the screw circled in red.

    • The screw will not come out of the plastic knob.

    • Turn the plastic knob 90 degrees to the right so that the cable comes out freely.

Заключение

To reassemble your device, follow these instructions in reverse order.

Yufay Chow

Участник с: 01/23/12

92 Репутация

Автор 4 руководств

Команда

Cal Poly, Team 10-36, Amido Winter 2012 Участник Cal Poly, Team 10-36, Amido Winter 2012

CPSU-AMIDO-W12S10G36

4 членов

Автор 7 руководств

0 Комментариев

Добавить комментарий

Просмотр статистики:

За последние 24часов: 0

За последние 7 дней: 0

За последние 30 дней: 0

За всё время: 424