Перейти к основному содержанию

Compaq Presario v2000 Display Panel Replacement

Выберете то, что вам нужно

  1. Compaq Presario v2000 Display Panel Replacement, Display Panel: шаг 1, изображение 1 из 1
    • Remove the battery before starting working on the laptop

  2. Compaq Presario v2000 Display Panel Replacement: шаг 2, изображение 1 из 3 Compaq Presario v2000 Display Panel Replacement: шаг 2, изображение 2 из 3 Compaq Presario v2000 Display Panel Replacement: шаг 2, изображение 3 из 3
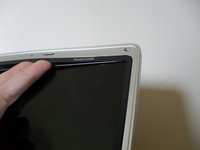
    • There are 6 screws holding on the display bezel, hidden behind screw covers

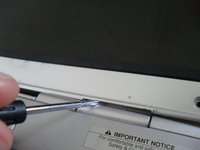
    • Remove the screw covers with a spudger or small flat blade screwdriver

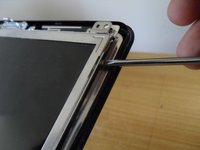
    • Remove the screws with a phillips #1 screwdriver

  3. Compaq Presario v2000 Display Panel Replacement: шаг 3, изображение 1 из 3 Compaq Presario v2000 Display Panel Replacement: шаг 3, изображение 2 из 3 Compaq Presario v2000 Display Panel Replacement: шаг 3, изображение 3 из 3
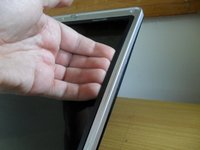
    • Use your fingers to pry off the bezel at the top and sides first

    • Don't use anything hard and sharp as you may damage the panel

    • You may need to use a spudger or flat blade screwdriver at the bottom edge around the hinges

  4. Compaq Presario v2000 Display Panel Replacement: шаг 4, изображение 1 из 1
    • Remove the backlight inverter cable using a spudger or flat blade screwdriver

  5. Compaq Presario v2000 Display Panel Replacement: шаг 5, изображение 1 из 2 Compaq Presario v2000 Display Panel Replacement: шаг 5, изображение 2 из 2
    • Remove the two side screws at the top of the panel first

    • Then remove the two side screws at the bottom. It may be necessary to angle the display away from the back cover to reach these well

    • Hold on to the display when removing the last screw, there is still a cable on the back to remove

  6. Compaq Presario v2000 Display Panel Replacement: шаг 6, изображение 1 из 3 Compaq Presario v2000 Display Panel Replacement: шаг 6, изображение 2 из 3 Compaq Presario v2000 Display Panel Replacement: шаг 6, изображение 3 из 3
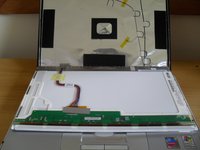
    • Lay the panel down on the keyboard

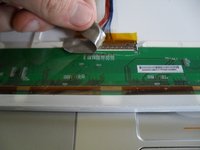
    • Remove the tape covering the display cable connecter

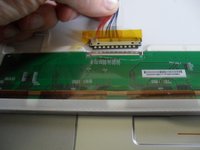
    • Remove the display cable from the panel

Заключение

To reassemble your device, follow these instructions in reverse order.

5 участников успешно повторили данное руководство.

Andrew

Участник с: 05/08/10

1 341 Репутация

Автор 5 руководств

2 Комментариев

Do you know where I can buy the replacement screen being replaced?

Amanda Turner - Ответить

Laptop panels are fairly generic, you don't need an HP screen for an HP laptop for example. There are numerous places selling them including laptop screen.com, or on eBay. Be sure to get the same size, resolution, backlight type, and connector as the screen you are replacing. Often there is a sticker on the back of the screen with a model code you can search for (e.g.. LP140WH3)

Andrew - Ответить

Добавить комментарий

Просмотр статистики:

За последние 24часов: 0

За последние 7 дней: 6

За последние 30 дней: 17

За всё время: 3,778