Эта версия возможно содержит некорректные исправления. Переключить на последнюю проверенную версию.
Выберете то, что вам нужно
-
Этот шаг не переведен. Помогите перевести
-
Unscrew the two 18 mm long Phillips #2 screws on the side of the hair dryer.
-
-
-
Этот шаг не переведен. Помогите перевести
-
Once you have taken the screws out, take the top half of the handle off by lifting it off of the dryer.
-
-
Этот шаг не переведен. Помогите перевести
-
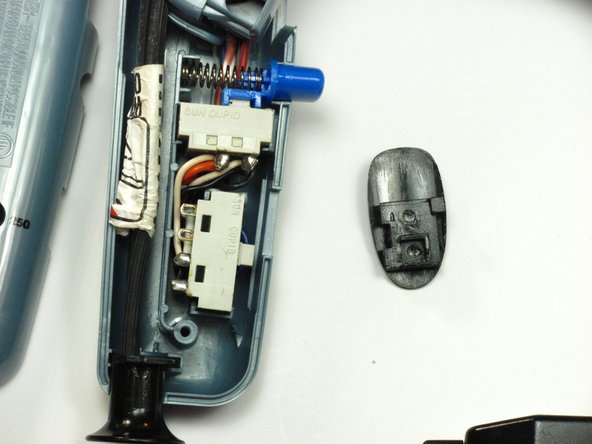
Now take out the On/Off switch by gently pulling it out towards you and lightly pushing it to the right with your finger until it comes out of the groove it is resting in.
-
Once the new switch is in place you can put the dryer back together.
-


Отменить: Я не выполнил это руководство.
3 участников успешно повторили данное руководство.
Команда

Cal Poly, Team 10-33, Maness Winter 2014 Участник Cal Poly, Team 10-33, Maness Winter 2014
CPSU-MANESS-W14S10G33
3 членов
Автор 7 руководств
3 Комментариев
Looks to me that a replacement switch would be required. How can obtain one?
“No parts required” is what’s displayed by default when there’s no link to an actual part for sale—it’’s a bit silly and clearly incorrect in this case. For hard-to-find parts, check eBay or Amazon. Also, a lot of folks with multiple broken units use these guides to cobble together one working unit from the parts. Good luck!
That was my question, where can I get a replacement switch?