Перейти к основному содержанию

Corsair Katar USB Cable Replacement

Выберете то, что вам нужно

  1. Corsair Katar USB Cable Replacement, Corsair Katar Disassembly: шаг 1, изображение 1 из 2 Corsair Katar USB Cable Replacement, Corsair Katar Disassembly: шаг 1, изображение 2 из 2
    • Unplug your mouse before starting.

    • Flip the mouse over so the bottom is facing up.

  2. Corsair Katar USB Cable Replacement: шаг 2, изображение 1 из 1
    • Remove the three skates on the bottom of the mouse using the plastic opening tools.

    • Skates will be very sticky.

  3. Corsair Katar USB Cable Replacement: шаг 3, изображение 1 из 2 Corsair Katar USB Cable Replacement: шаг 3, изображение 2 из 2
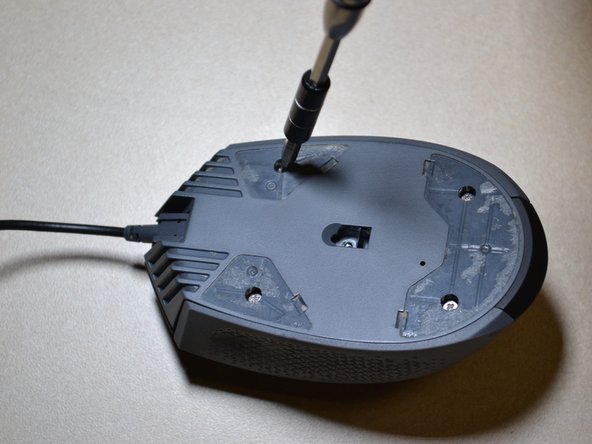
    • Use the JIS 0 screwdriver to remove the four 5 mm screws on the bottom of the mouse.

  4. Corsair Katar USB Cable Replacement: шаг 4, изображение 1 из 1
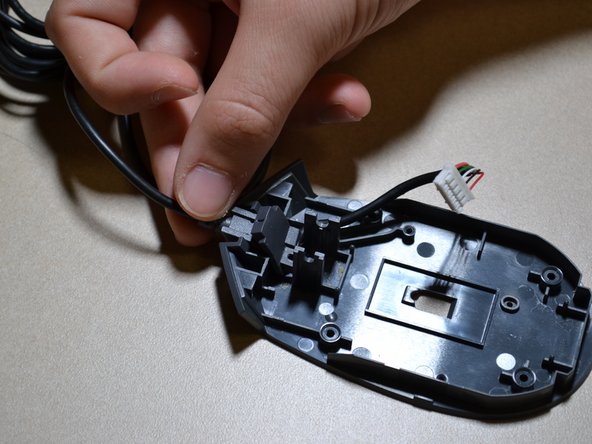
    • Detach the bottom of the mouse from the upper shell.

    • Remove the shell slowly so as not to damage the white DPI cable inside the mouse.

    • Use the plastic opening tool to detach the white DPI sensor cable from its port.

    • Alternatively, you can use your hand to remove the DPI sensor cable by wiggling it out of the port.

  5. Corsair Katar USB Cable Replacement, USB Cable: шаг 5, изображение 1 из 2 Corsair Katar USB Cable Replacement, USB Cable: шаг 5, изображение 2 из 2
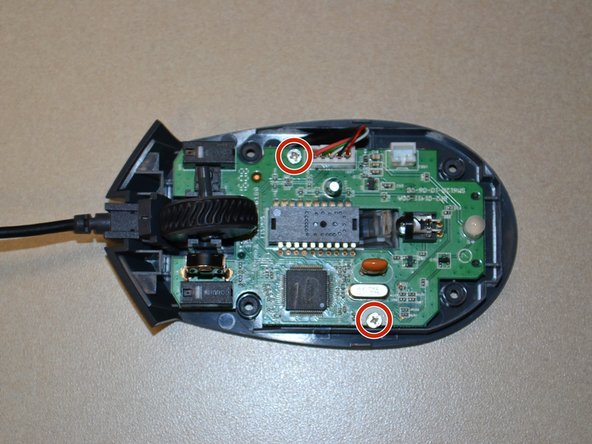
    • Use the JIS 0 screwdriver to remove the two 5mm screws on the motherboard.

  6. Corsair Katar USB Cable Replacement: шаг 6, изображение 1 из 1
    • Use the plastic opening tool to pry the white cable jack away from the motherboard.

    • Lift the motherboard away from the bottom of the mouse.

  7. Corsair Katar USB Cable Replacement: шаг 7, изображение 1 из 2 Corsair Katar USB Cable Replacement: шаг 7, изображение 2 из 2
    • Use the JIS 0 screwdriver to remove the 5mm screw attached to the USB wire housing.

    • Lift the USB wire away from the shell of the mouse.

    • When reassembling the device, run the USB wire through the channel on the bottom of the shell to keep it in place.

Заключение

To reassemble your device, follow these instructions in reverse order.

Еще один человек закончил это руководство.

Margaret Loughren

Участник с: 07/12/18

594 Репутация

Автор 5 руководств

Команда

UW Tacoma, Team S1-G3, Cardinal Summer 2018 Участник UW Tacoma, Team S1-G3, Cardinal Summer 2018

UWT-CARDINAL-SU18S1G3

3 членов

Автор 12 руководств

0 Комментариев

Добавить комментарий

Просмотр статистики:

За последние 24часов: 0

За последние 7 дней: 0

За последние 30 дней: 10

За всё время: 1,277